
Here at Green Mountain Timber Frames, we have spent the last couple of days working on repairing, sorting, and preparing the roof boards for a little corn crib for sale that dates to the 1800s. 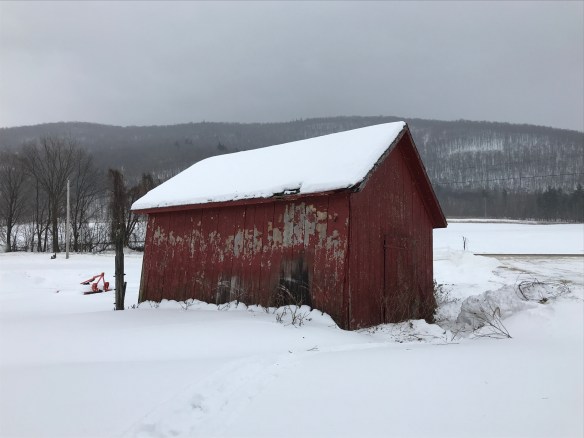
This homemade corn crib was used by a local farm family for generations. We purchased it and took it apart carefully because the sills were completely gone and it was beginning to settle back into the earth.
A future blog will get more into what makes this corn crib really special and how it will be used, but working on the roof this week got me thinking that I would like to lay out in a blog our process of restoration as it involves roof systems and roof boards.
Old Barn Restoration: The Process
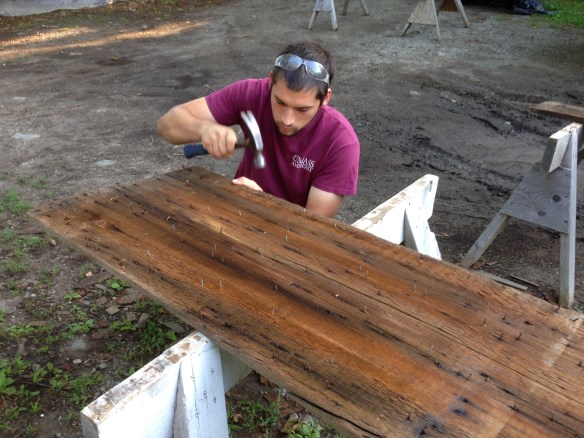
Our first step when we get the frame labeled, disassembled and home is to pull the many antique nails. And I mean many! When a frame comes to us, it has usually gone through several generations of roofing material. Often our barns were first roofed with cedar shingles. This roof will last for 30 to 40 years before it has to be replaced.
From Slate to Cedar Roofs
A barn built in the 1700s had at least two or three iterations of cedar before the next big event in New England roofing: the development of the slate industry. In between these generations of roofing materials, the nails were tapped down into the boards rather than being removed. That leaves it to us to get all that metal out. It is fascinating to see the generations of nails in a single board- from hand forged, to cut, to modern wire nails. We tap them from the inside first, careful not to mark the show surface with our hammerheads. Then we flip the board over and pull them out. We save the handmade nails, and throw the rest into our metal recycling bin. 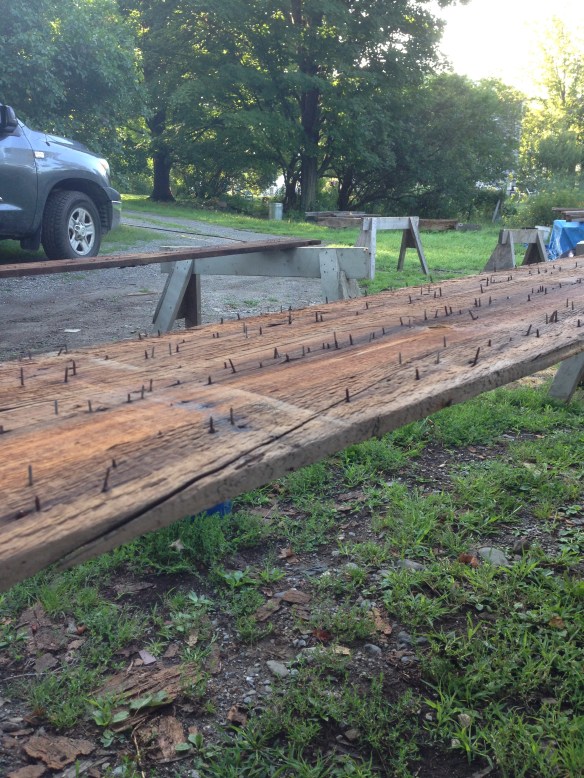
Washing the Timber Frame and Boards
Next, we wash the frame and the boards. It is amazing to watch two hundred years worth of grime fall away from the boards! It feels like painting in reverse – allowing the incredible patina to come through that only a century or two of light and air can create. It is a process that requires great care; if we wash with too little pressure, the patina does not come out, but if we use too much pressure or pause in mid-stroke, the water will raise the grain of the wood and cause an unsightly mark. 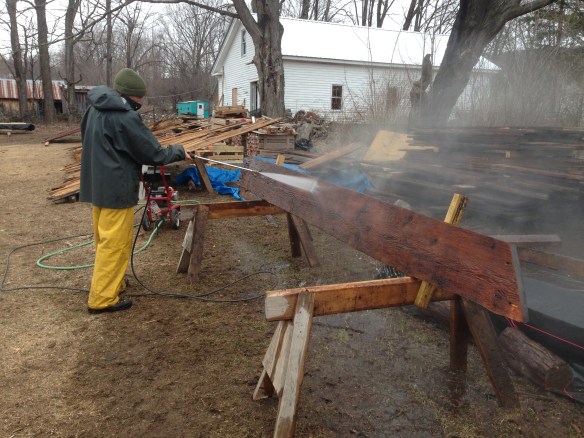
We can not put away the boards when they are wet because of the risk of mold. So we dry them in the sun like so much laundry on washing day. The end result of all this handling is worth it when we see the sun shining off these vintage boards. They will make a stunning ceiling when the barn is re-erected. 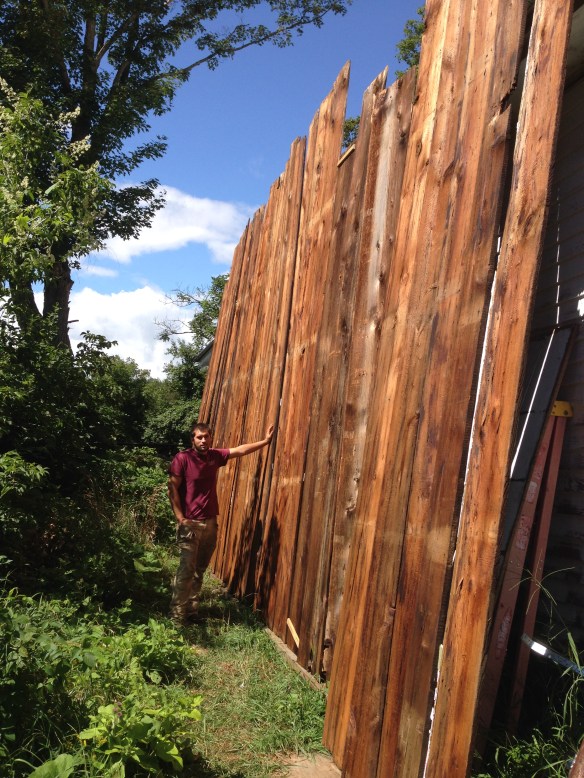
Reassembling the Rafter System
Next, we are ready to assemble the rafter system. We make any necessary repairs and replacements to the rafter system, and then we assemble one half of the roof at a time. In the next photo, you can see the five-sided ridge beam from a restoration we completed last summer. That particular roof had four braces that went from rafters to ridge beam.
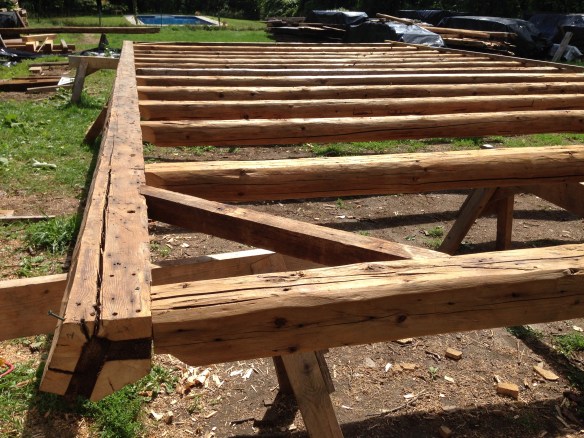
We check the peg holes to make sure that the new pegs will hold strong and true. If necessary, we re-drill a peg hole where a “new” rafter was installed or where we made a repair to a rafter tenon.
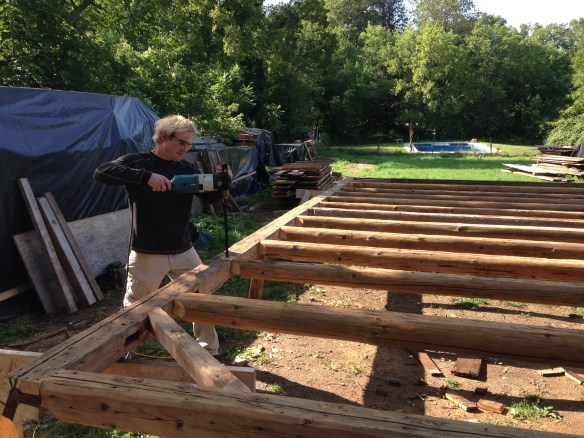
Laying out the Timber Roof Boards
Now we lay out the roof boards. All the roof boards are labeled as we take the barn down, but we very often have to straighten some edges and switch out fatigued boards for others with similar color. Remember all those generations of roofing material? Very often there was a drip somewhere at the end of the lifespan of each layer of cedar, and thus very often we have to replace some of the boards.
There are blond “shadows” on the underside of the boards where contact with a rafter shielded them from light and air. We do our best to line these shadows back up on top of rafters. Complicating this process is the fact that half-round or hewn rafters are rarely straight, so the spacing of the shadows varies depending on the spot in the roof. Doing this work while flat on the ground at the shop allows us to be as careful as possible with color matching, board spacing, and shadow hiding. 

Checking the Roof Board Labels
As our final step in this part of the restoration process, we carefully go through the boards and check the labels. We have a system of marking the outside of the boards so that we can efficiently apply them when the rafter system is standing.

The end result is a timeless visual ceiling. Or, perhaps we should rather say time-full. Here is what it looks like on one of our completed frames that now stands as a barn home:

Back to Roof Restoration!
Let’s get back to that roof restoration that we completed yesterday. Here are a few more photos from this week’s restoration of our little corn crib roof. With a footprint of 14×18, this barn is a miniature of some of the larger barns we work on, but it is not small or modest in craftsmanship.
The half-round rafters are beautifully tenoned into the five-sided ridge beam, and the rafter tails have an elegant “swoop” at the eve. When we put this frame back up on its new foundation, the roof system will be ready to support many future iterations of roofing materials.
Stay tuned to learn more about this restoration, and about the exciting future home for this frame.
Have questions about restored barns? Dream of living in a timber frame home?
Contact me!
Luke – 802.774.8972 | Luke@GreenMountainTimberFrames.com
Below – enjoy more pictures from the roofing project!

Tenons on the Pawlet Corn Crib rafters


Rafter tails with swoops on the Pawlet Corn Crib
