
Last spring, we tipped up a new timber frame barn here in Vermont. We had first begun discussing the barn with the family over a year previously, and worked closely with them on the design for a 28-by-40 foot barn.
We shaped the timbers over the course of the winter, and it was ready for the arrival of spring… as were we! The owners will be using the new post and beam barn as a seasonal living space and as a place to indulge in their wine-making hobby. The project and our clients were a delight, and we want to share the story of this frame.

During the design phase of the project, we decided with our clients to use local hemlock timbers, and settled on 10-by-10 inches as the size for all the posts, girts, and top plates. The timbers were sawn at a sawmill just five miles from the barn location.
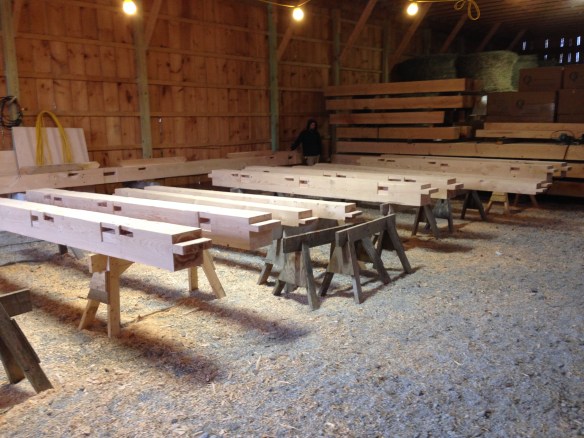
We decided to construct this frame using a principal rafter and purlin system. This means that each 28-foot bent section has massive rafters which support horizontal purlins. In this design, the roof boards are put on the frame running vertically.

Jesse shapes the “swoops” on the ends of the heavy purlin timbers.
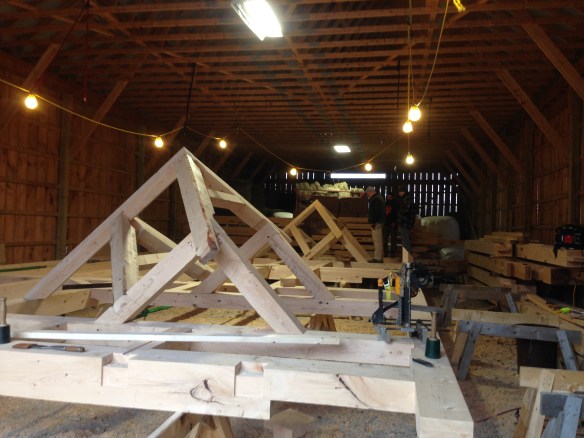
Another exciting feature of the barn design was the inclusion of four dormers in the roof structure. The barn will have a two-thirds loft where the dormer interior can be enjoyed up close, and the dormers in the cathedral space will provide natural light and aesthetic balance for the exterior.
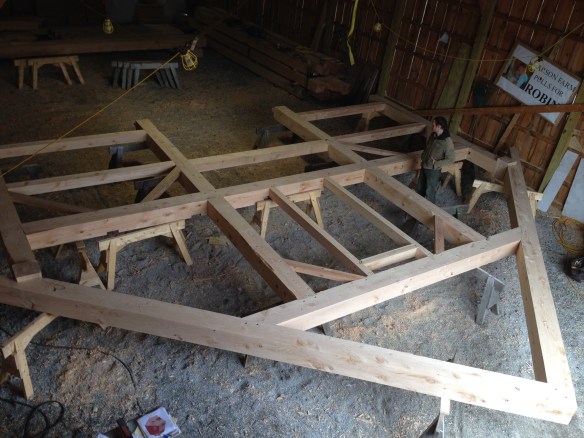
One of the beautiful things about timber frame construction is that we can craft each joint and wooden connection “on the ground.” That way, on raising day, each labeled joint slides together and receives the oak pegs. Since we wanted to go through this preparation process on the dormers as well as with the larger sections of the barn, we assembled each side of the roof system flat on saw horses and got to work.
This roof section is 40-feet long, and laying it out flat on the ground allowed us to check all the joinery and test-fit the dormers
We wanted to use a traditional ridge beam for the dormers. Because the pitch of the roof was 11 inches of rise for every 12 inches of run, the ridge beam had to be shaped to match the roof pitch rather than remaining at square, 90-degree angles. This made laying out and cutting the compound angles challenging. I remembered my grandfather’s old-fashioned miter box that he used when I spent time in his shop as a kid. We replicated my Papa’s angle box to cut our dormer ridge beam, and it worked great!

We built a jig box to help us cut the complex angles on the dormer ridge beams.

Matt inspects dormer joinery
We constructed and fit the four bents and assembled each of the 40-foot eve walls. We used math, geometry, and sharp tools to make certain that the frame would rise up straight and true on its foundation in the spring.
Jesse enjoys the completion of a gable bent. There is an upper doorway framed in this gable that will lead from the loft out onto a small balcony.
Soon enough, spring arrived, and we were ready to put the frame up. Our client and his son helped us to whittle the proper points on the oak pegs. We use a “shaving horse” to shape the pegs. This ancient design works beautifully to hold the peg hands-free while a draw knife or spokeshave is used. Footwork operates the clamping mechanism.

Our shaving horse works great for shaping pegs!
Next, we began assembling bents and driving the pegs to hold them fast.

Pegs are driven into a bent before it is tipped up
Before we knew it, we were tipping up the final bent.

We absolutely love the way the four post bent design draws the eye down the center of the building and gives the whole thing a cathedral feel.
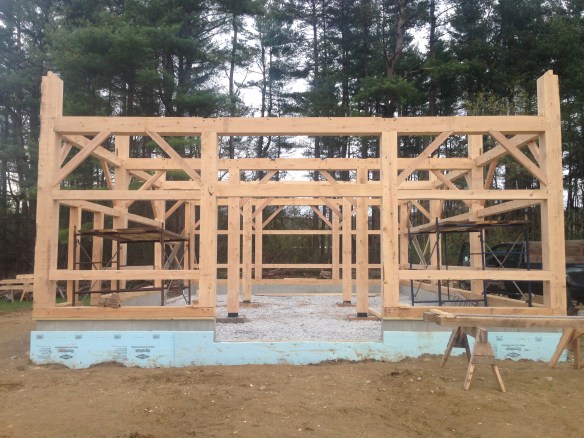
The lower cube of the frame is erected and pegged.
The next step was to install the top plates, which tie the bents together and support the weight of the rafter system.

Next, the principal rafters went up. As we set each pair, we fed the tenoned purlins into place, as well as the braces that we placed in the rafter system in order to make it ridged.

We set an eve purlin into place
It was great fun to assemble the dormers – this time standing upright on the roof system instead of sitting flat on saw horses at the shop. We set the little ridge beams, rafters, and dormer posts. The pegs went in, and we were delighted with the result.

The dormers are 5-feet wide, and the pitch is matched to the main roof.
Here is a crow’s eye view of the completed rafter system and the dormers:
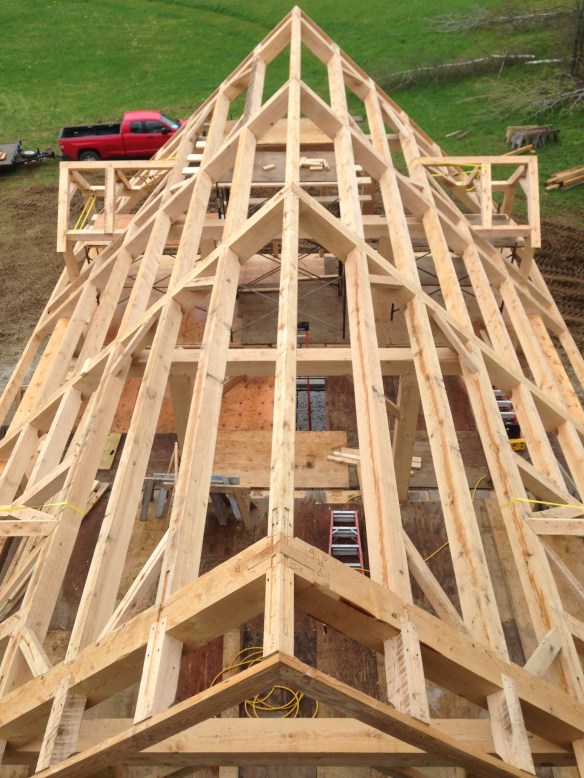
We used purlin extensions and steel plates to create a generous roof overhang.

The warm colors of the hemlock and roof boards are wonderful.
It was a great joy to collaborate with this family to create a structure in a beautiful setting that will be used and enjoyed for a very long time to come.
Here is hoping that many a glass of wine, crafted in this barn, gets raised by friends and family for generations! Cheers!
Do you dream of living, working or making wine in your own timber frame? At Green Mountain Timber Frames, we restore and build timber frame barns and homes, both new and old.
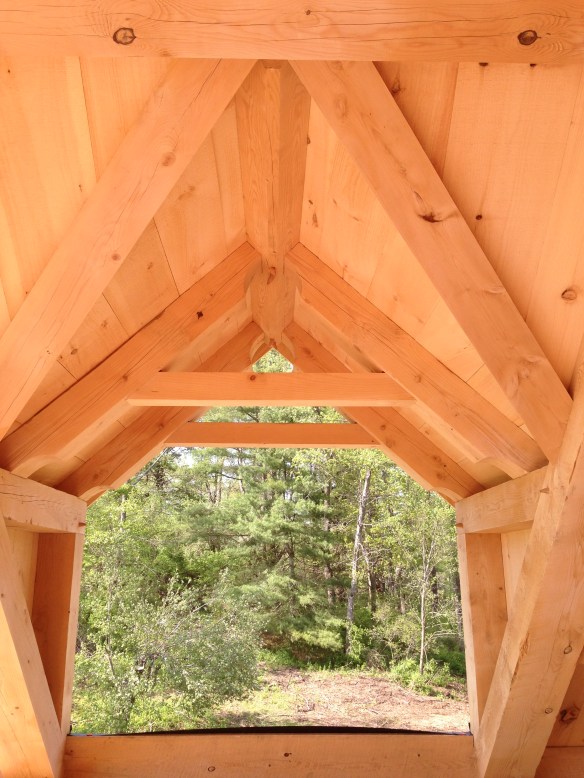
I can imagine sitting in this dormer with a cup of coffee and enjoying the view for a very long time!
