A Dream Complete: A New (Old) Shop for Green Mountain Timber Frames

Featured

Greetings from Green Mountain Timber Frames!
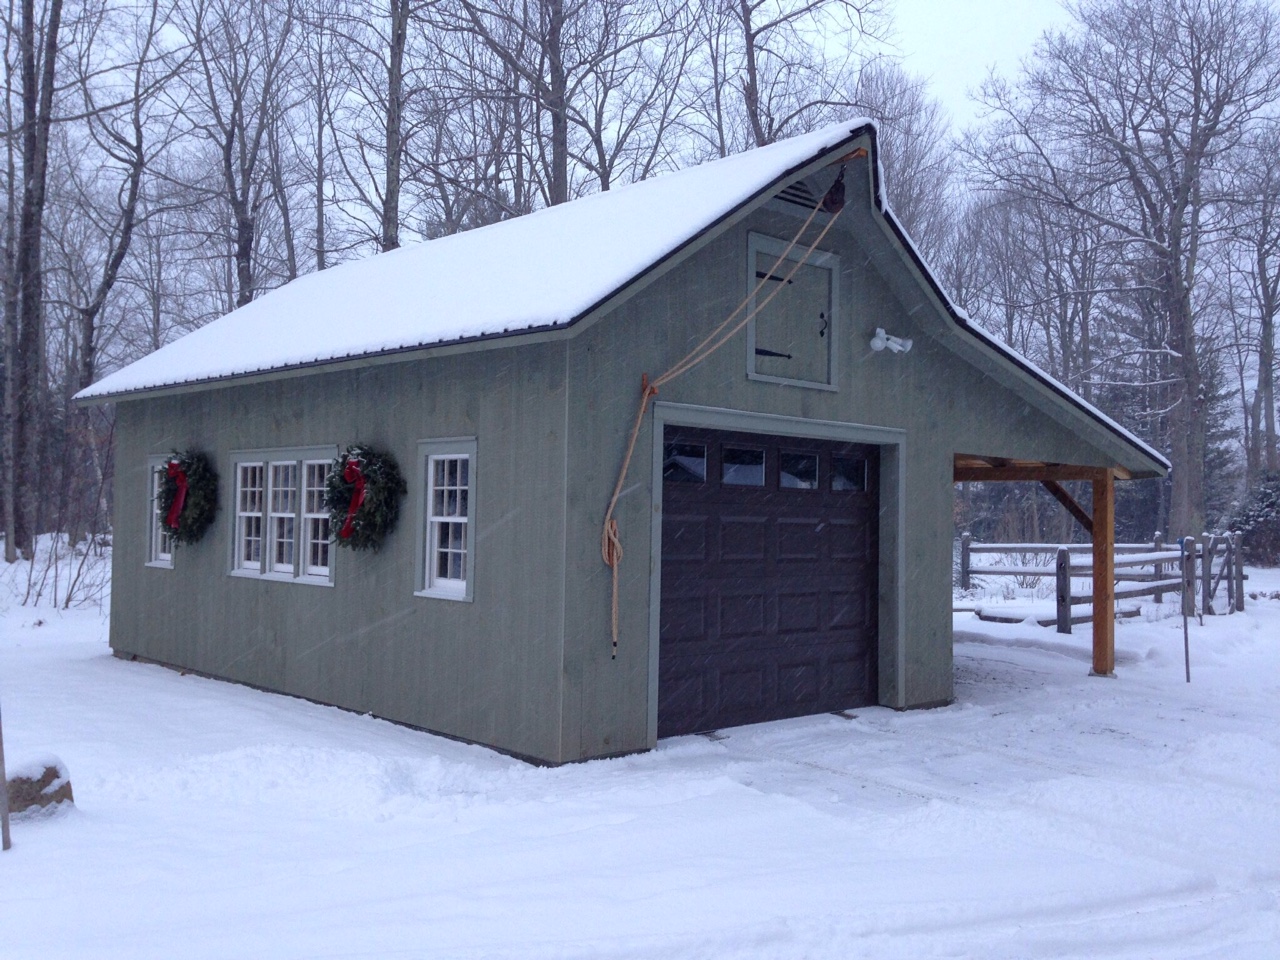
It has been such a busy few months of barn restorations. Now, at this quiet time of year, it has been good to take some deep breaths and to reflect on a very special project and the many people whose support and help made it possible. We have wrapped up work on the restoration of the Reuben Waite barn at our very own shop location.

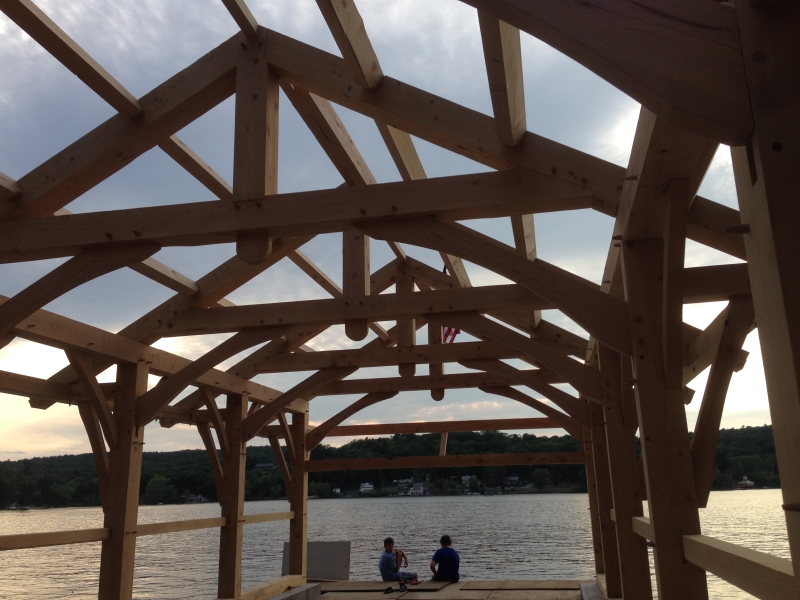
Back in July, we had our barn raising. You can read about the barn’s first life, and our preparations for the structure, here.

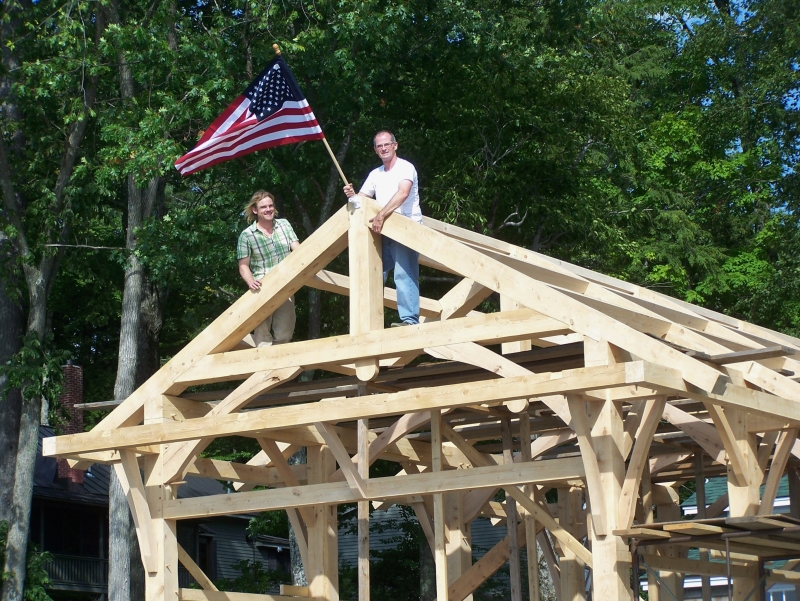
The raising was a success, thanks to our amazing team, family, and friends. The restored barn went up strong and true on the stone foundation.

That evening, we played some music in the newly erected barn.

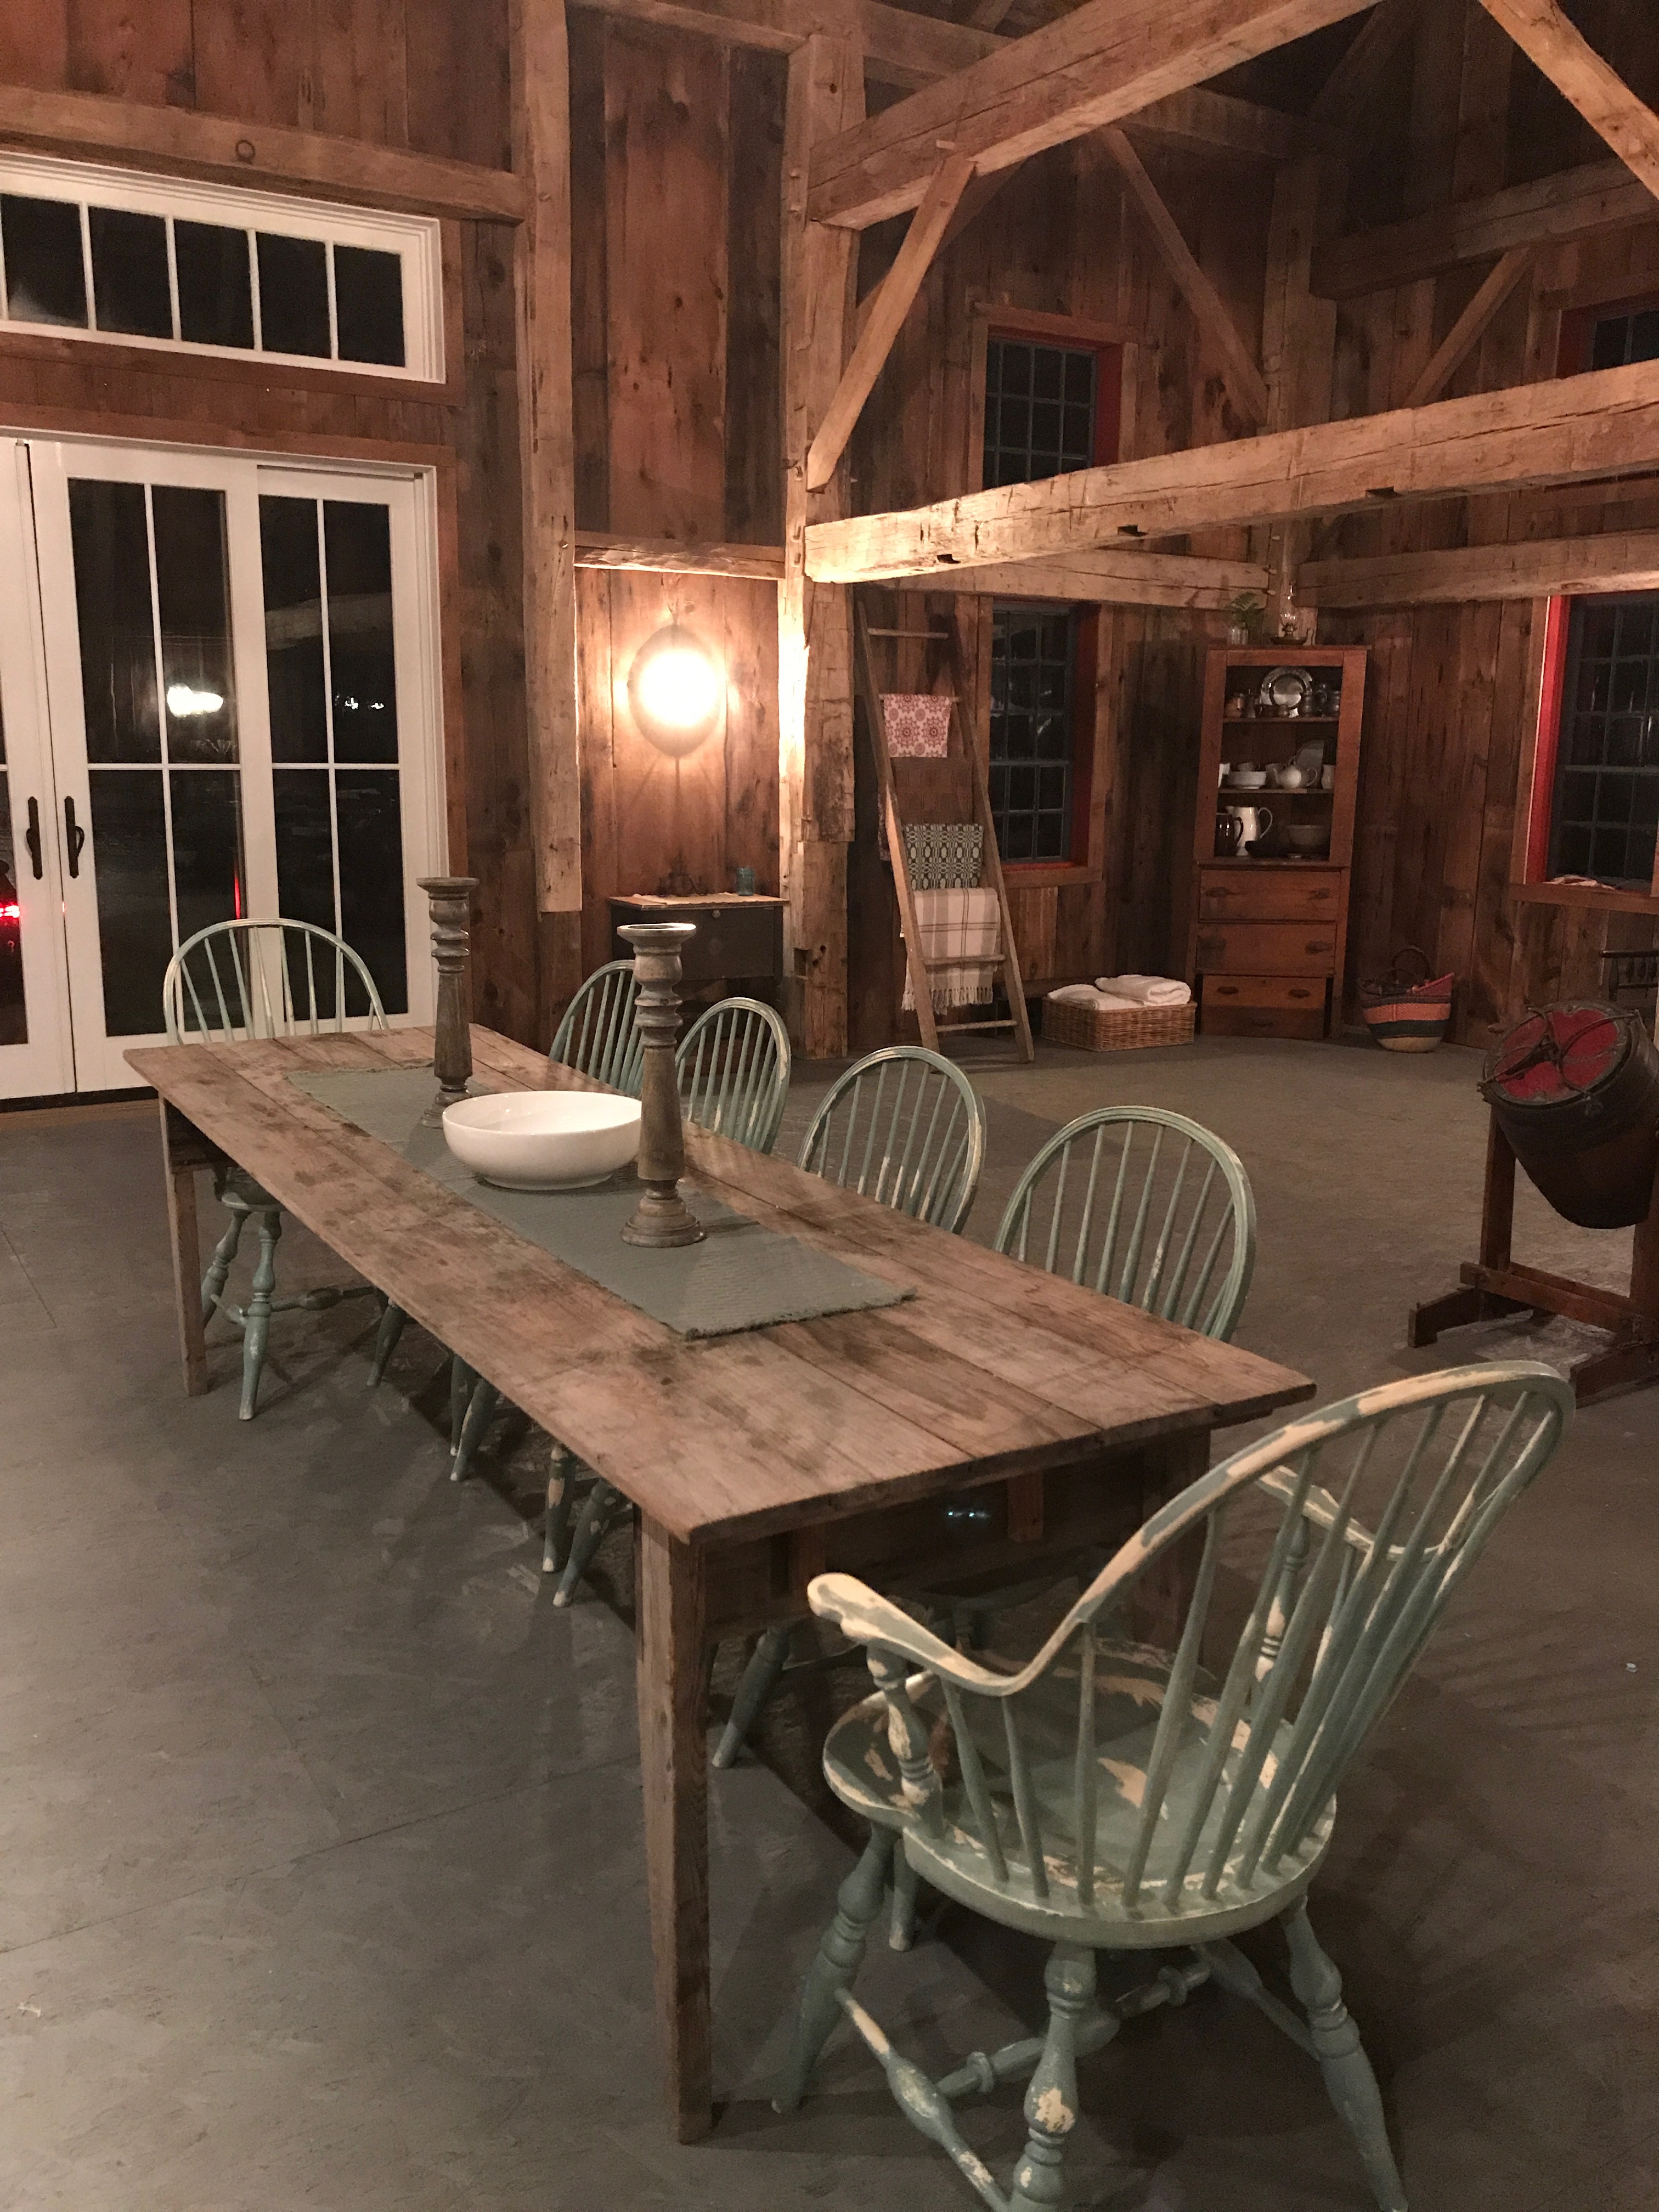
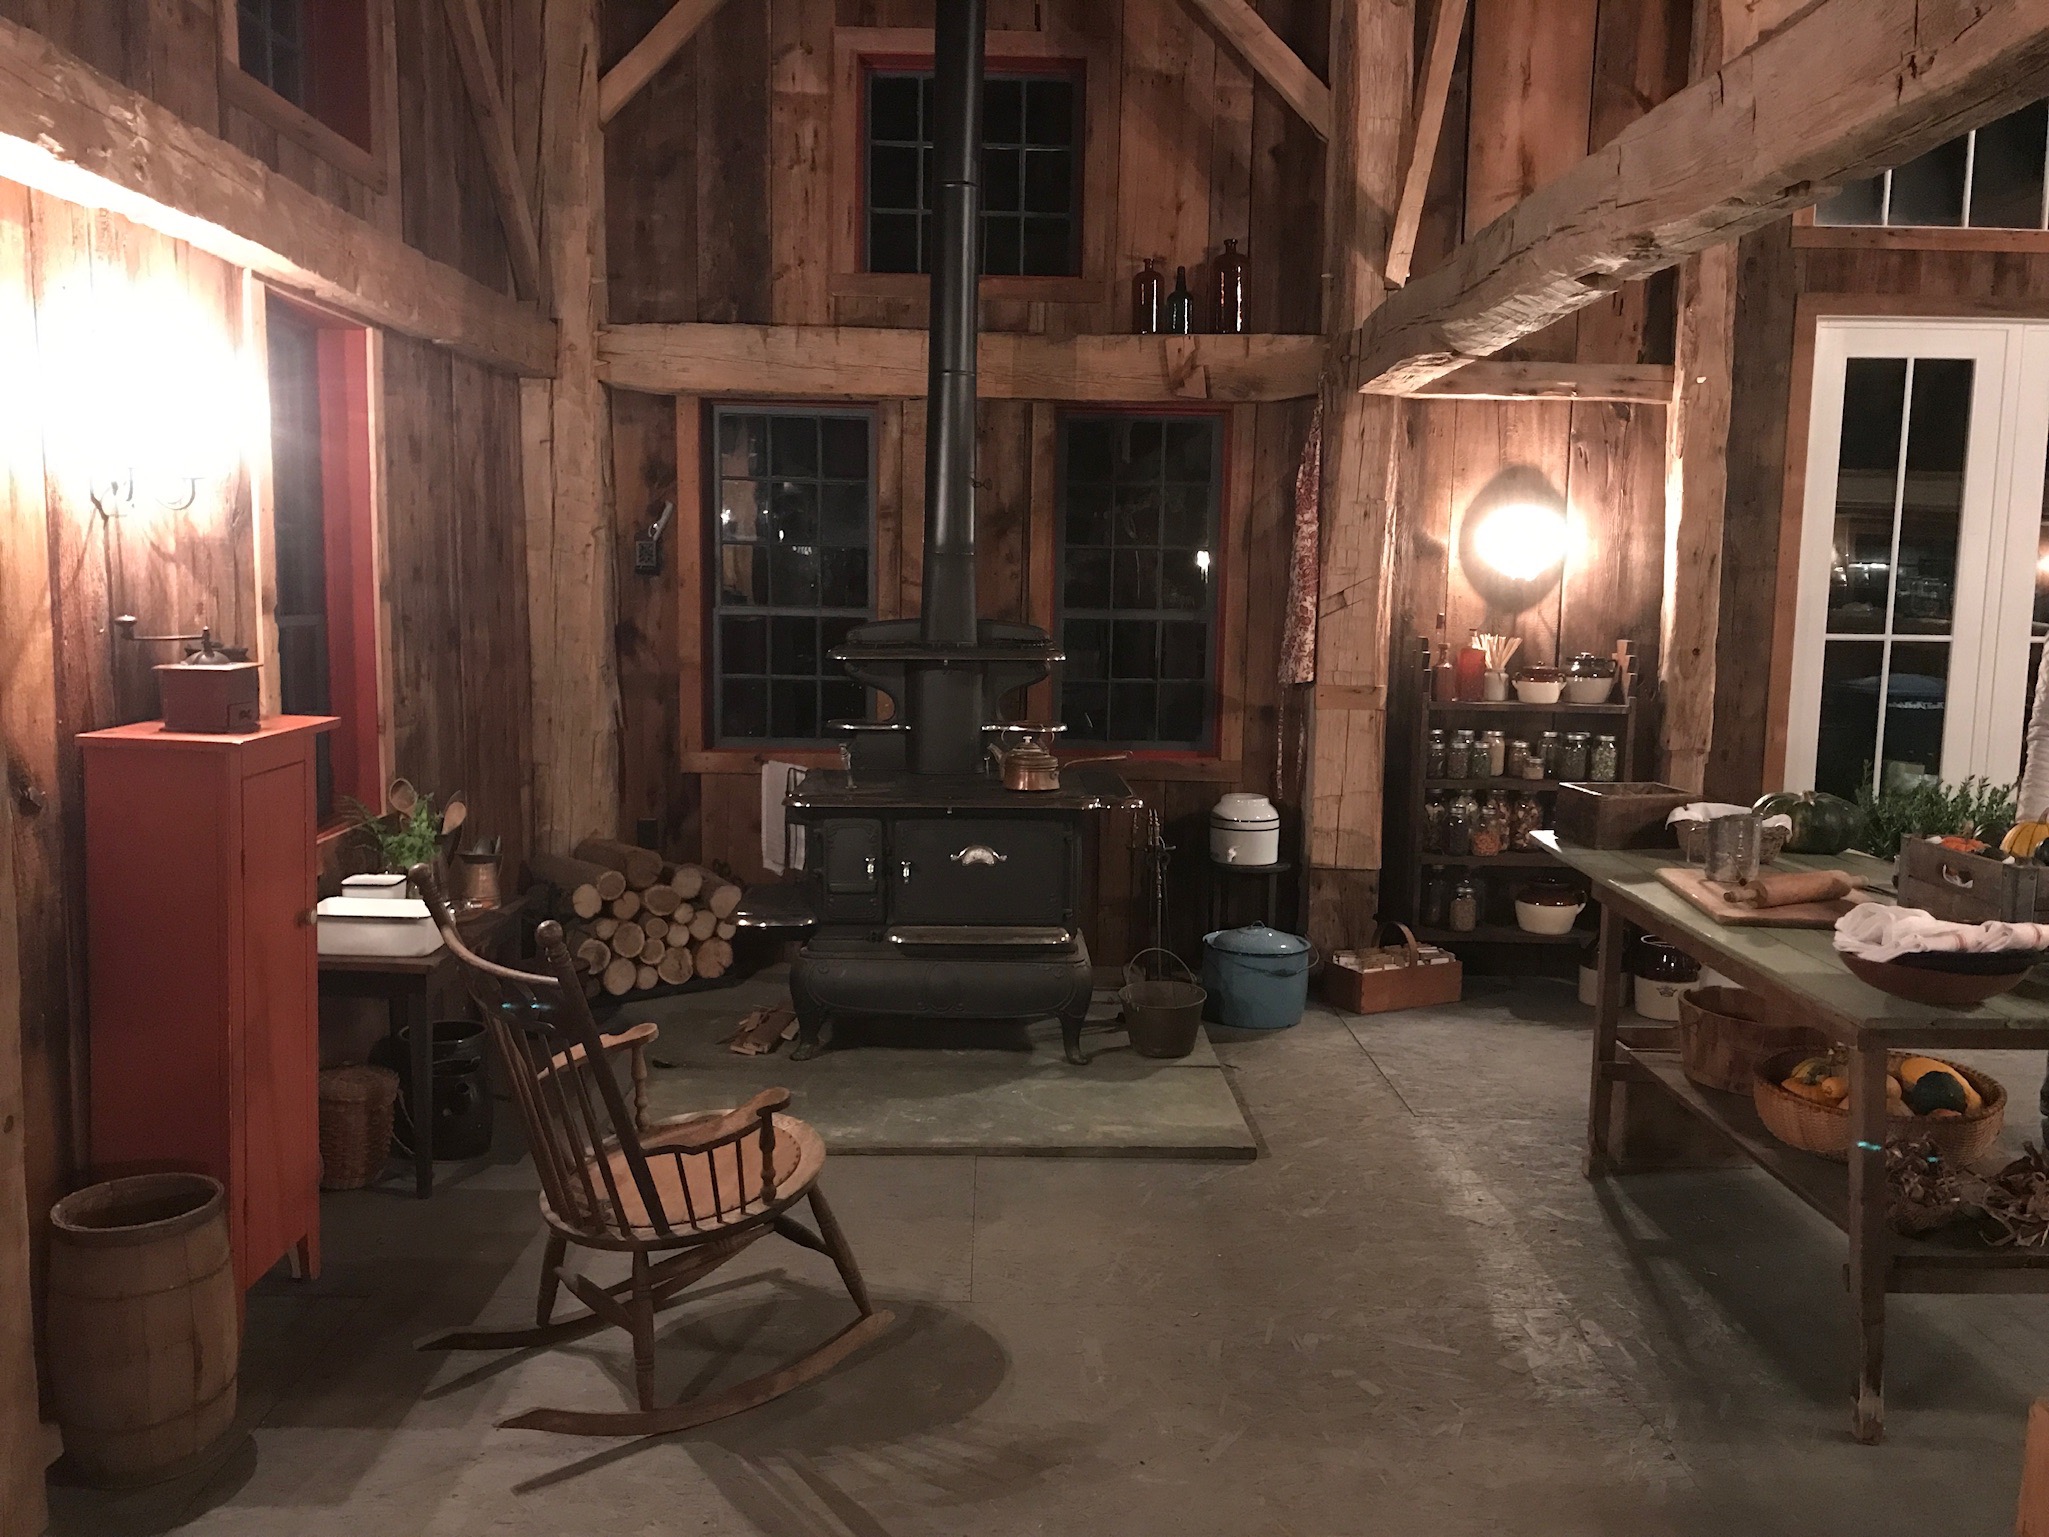
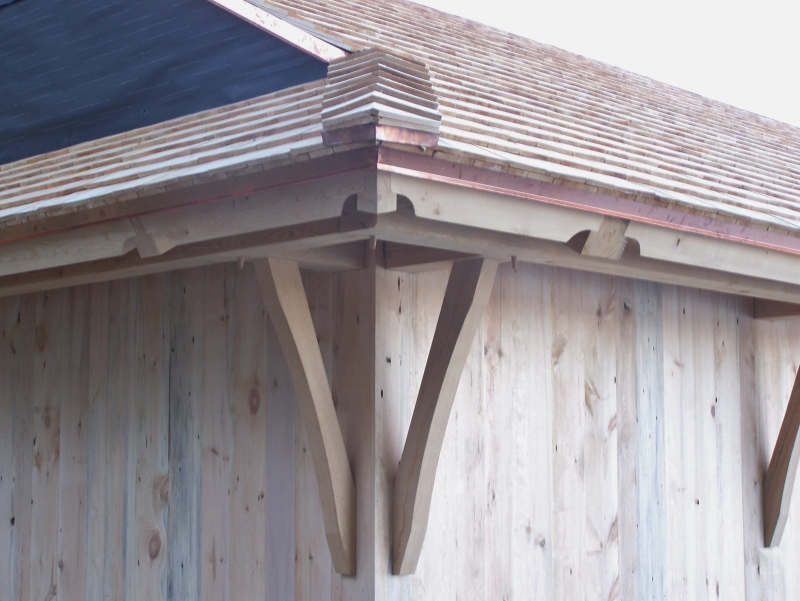
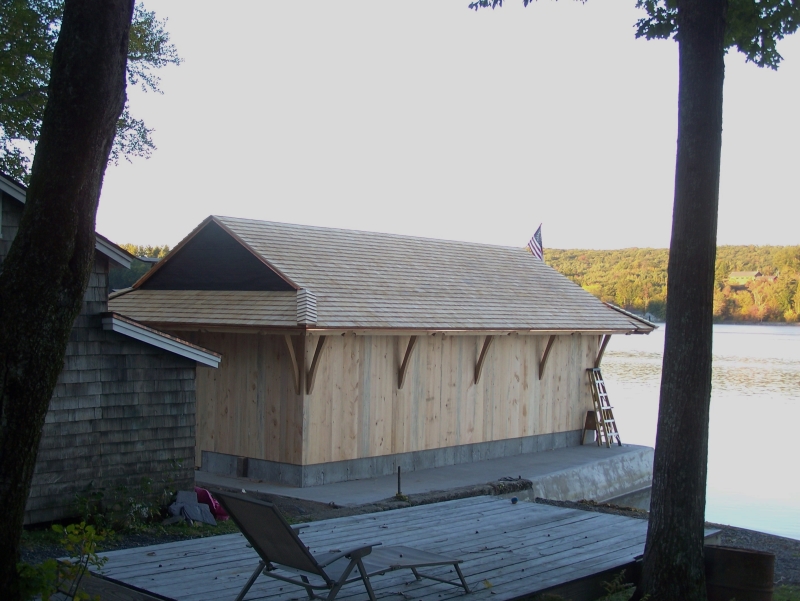
I look forward to sharing more about the experience and process of bringing this barn from a timber frame to a fully enclosed, wired, and insulated space. But for now, I want to share some wintertime images of the structure and space.

We restored antique windows with wavy glass for this building. It was quite the undertaking- a story for another time!
The exterior door is hand planed pine, held together with forged nails saved from this barn.
One bay of the barn is a hand tool workshop. It is a joy to begin setting it up with antique tools and work benches- as well as to pull out some nearly forgotten woodworking projects from the past to be finished in this quiet space. Above the workshop is a library loft.
One corner of the barn is set up for harvesting and cooking.
Dried fruit and vegetables from our garden make a wonderful snack while making wood shavings in the work area.
The center bay of the barn will host many future crew and community meals
We love this cozy corner next to our 1914 Glenwood cookstove.
As the temperature drops, and darkness comes early this time of year, it is lovely to sit next to the stove and watch the fading light through wavy glass.
This broomcorn grew in our garden right behind the shop. We look forward to learning how to craft brooms out of it!

What is next for this barn?

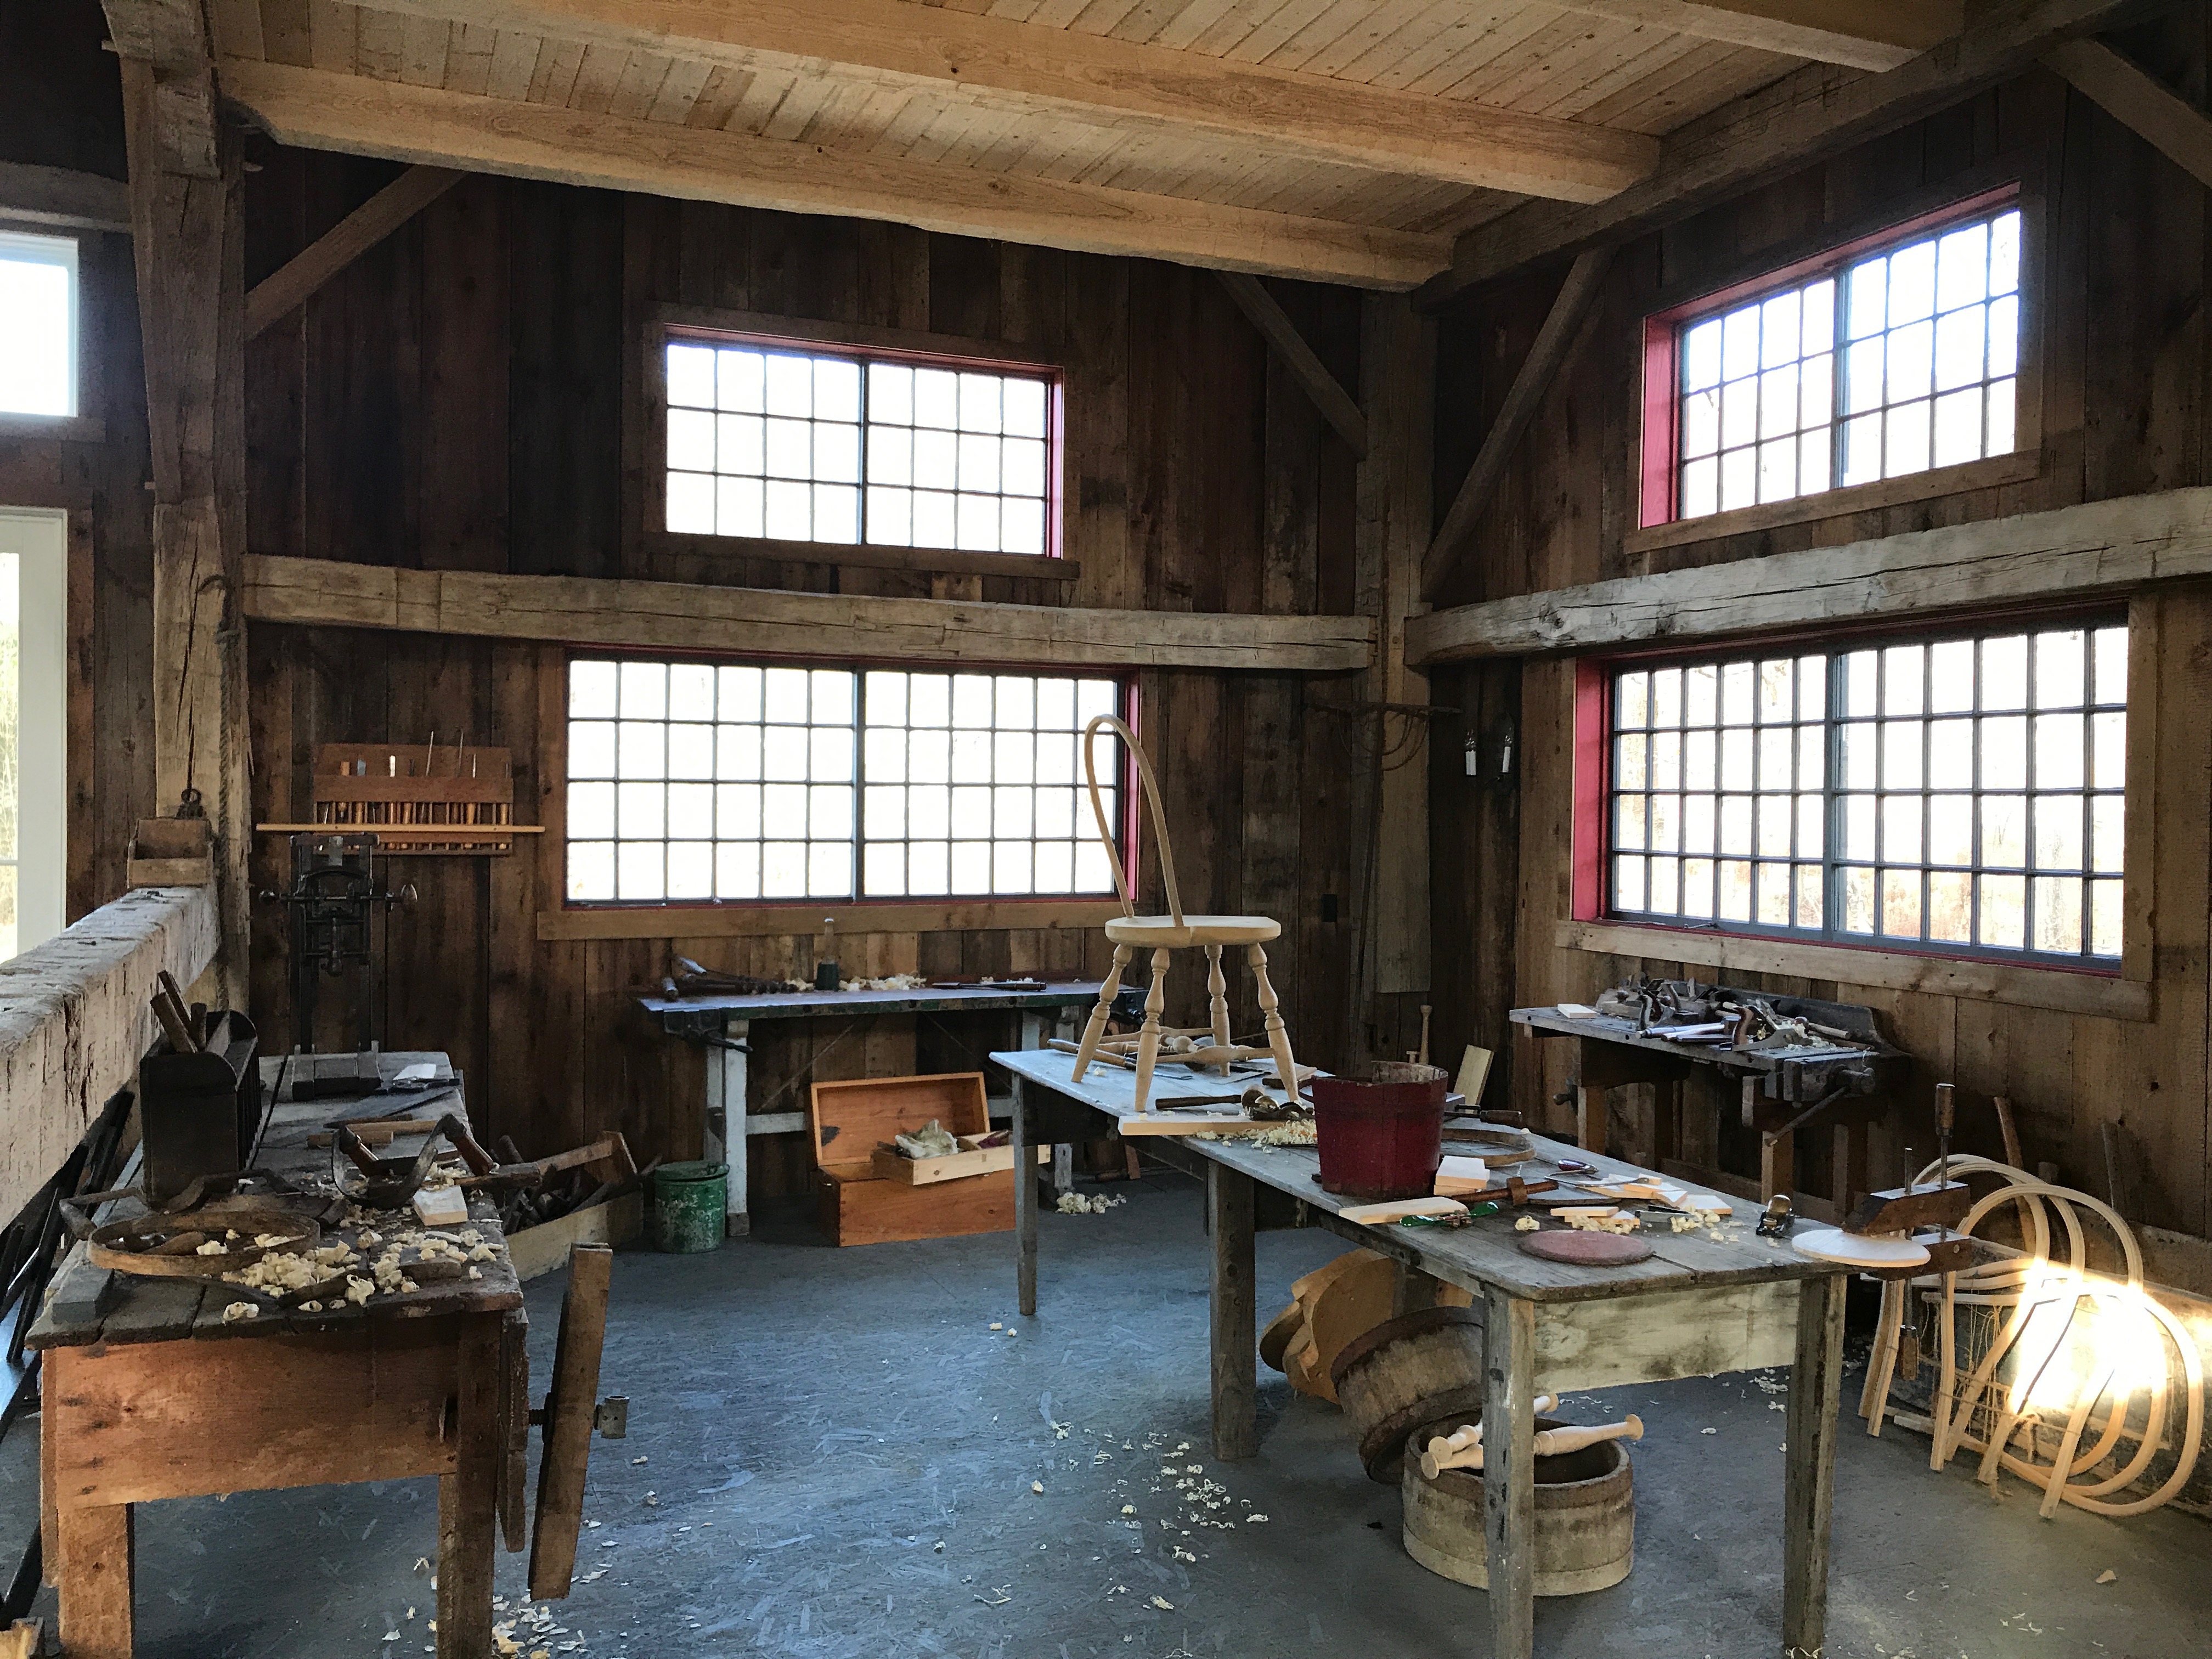
I have dreamt for years of having a space dedicated to community, traditional crafting, and the teaching of hand tool woodworking. Now, that space is coming together. Already I am finding that this barn invites people to reflection and exploration.

In the months leading up to this endeavor, my children excitedly planned their first projects in the “new” workshop. I was blown away by the wisdom of my 10-year-old son when we actually picked up tools in this space for the first time. Rather than diving right into his project, Leif said “Dad, I think my first step should be to get to know the tools.” He reached for a hand plane, and my heart nearly burst with gratitude for this lesson.

What a wonderful description of the type of work and learning that I envision in the Reuben Waite barn. Using tools and resources is a practice. It is about the process of having a relationship with both the tool and the piece of wood. How very different it is to read the grain of a board, feel the plane as it slices, and to listen to the sound as a sharp edge shapes the workpiece. How very different than reaching for the closest power tool that cares not which way the tree grew. Get to know the tools first, and then make something beautiful!

I believe there is a larger metaphor in Leif’s words that can teach us about a healthy approach to living and developing “practices” rather than seeking quick accomplishments.

Right away the workbenches were occupied. Beautiful wood shavings adorn our tree, and hand shaped pine gifts are on their way to loved ones.

I look forward to a time when we can open up this maker’s, teacher’s, and learner’s space to our friends and community.

Now, as we turn a corner and the days begin to get brighter, we wish a blessing on all of you. May the next year be full to the brim of joy, music, learning, and love.

Link

Last spring, we tipped up a new timber frame barn here in Vermont. We had first begun discussing the barn with the family over a year previously, and worked closely with them on the design for a 28-by-40 foot barn.

We shaped the timbers over the course of the winter, and it was ready for the arrival of spring… as were we! The owners will be using the new post and beam barn as a seasonal living space and as a place to indulge in their wine-making hobby. The project and our clients were a delight, and we want to share the story of this frame.

Timber frame barn in vineyard green mountain timber frames

During the design phase of the project, we decided with our clients to use local hemlock timbers, and settled on 10-by-10 inches as the size for all the posts, girts, and top plates. The timbers were sawn at a sawmill just five miles from the barn location.

Post joinery is cut for timber frame

We decided to construct this frame using a principal rafter and purlin system. This means that each 28-foot bent section has massive rafters which support horizontal purlins. In this design, the roof boards are put on the frame running vertically.

Shaping swoops on heavy purlin timbers

Jesse shapes the “swoops” on the ends of the heavy purlin timbers.

Another exciting feature of the barn design was the inclusion of four dormers in the roof structure. The barn will have a two-thirds loft where the dormer interior can be enjoyed up close, and the dormers in the cathedral space will provide natural light and aesthetic balance for the exterior.

One of the beautiful things about timber frame construction is that we can craft each joint and wooden connection “on the ground.” That way, on raising day, each labeled joint slides together and receives the oak pegs. Since we wanted to go through this preparation process on the dormers as well as with the larger sections of the barn, we assembled each side of the roof system flat on saw horses and got to work.

40 foot long roof system_Green Mountain Timber frames

This roof section is 40-feet long, and laying it out flat on the ground allowed us to check all the joinery and test-fit the dormers

We wanted to use a traditional ridge beam for the dormers. Because the pitch of the roof was 11 inches of rise for every 12 inches of run, the ridge beam had to be shaped to match the roof pitch rather than remaining at square, 90-degree angles. This made laying out and cutting the compound angles challenging. I remembered my grandfather’s old-fashioned miter box that he used when I spent time in his shop as a kid. We replicated my Papa’s angle box to cut our dormer ridge beam, and it worked great!

jig box for cutting ridge beam green mountain timber frames

We built a jig box to help us cut the complex angles on the dormer ridge beams.

dormer joinery on new timber frame roof

Matt inspects dormer joinery

We constructed and fit the four bents and assembled each of the 40-foot eve walls. We used math, geometry, and sharp tools to make certain that the frame would rise up straight and true on its foundation in the spring.

Timber frame bent assembled green mountain timber frames

Jesse enjoys the completion of a gable bent. There is an upper doorway framed in this gable that will lead from the loft out onto a small balcony.

Soon enough, spring arrived, and we were ready to put the frame up. Our client and his son helped us to whittle the proper points on the oak pegs. We use a “shaving horse” to shape the pegs. This ancient design works beautifully to hold the peg hands-free while a draw knife or spokeshave is used. Footwork operates the clamping mechanism.

shaping oak pegs green mountain timber frames

Our shaving horse works great for shaping pegs!

Next, we began assembling bents and driving the pegs to hold them fast.

Pegs are driven into a bent before it is tipped up

Pegs are driven into a bent before it is tipped up

Before we knew it, we were tipping up the final bent.

lifting final bent into timber frame baren

We absolutely love the way the four post bent design draws the eye down the center of the building and gives the whole thing a cathedral feel.

timber frame erected and pegged in Vermont

The lower cube of the frame is erected and pegged.

The next step was to install the top plates, which tie the bents together and support the weight of the rafter system.

green mountain timber frames new construction

Next, the principal rafters went up. As we set each pair, we fed the tenoned purlins into place, as well as the braces that we placed in the rafter system in order to make it ridged.

eve purlin placed in roof and dormers installed

We set an eve purlin into place

It was great fun to assemble the dormers – this time standing upright on the roof system instead of sitting flat on saw horses at the shop. We set the little ridge beams, rafters, and dormer posts. The pegs went in, and we were delighted with the result.

dormers and pitch on timber frame roof

The dormers are 5-feet wide, and the pitch is matched to the main roof.

Here is a crow’s eye view of the completed rafter system and the dormers:

purlin extensions and steel plates to create a generous roof overhang

We used purlin extensions and steel plates to create a generous roof overhang.

hemlock roof boards Green Mountain Timber Frames

The warm colors of the hemlock and roof boards are wonderful.

It was a great joy to collaborate with this family to create a structure in a beautiful setting that will be used and enjoyed for a very long time to come.

Here is hoping that many a glass of wine, crafted in this barn, gets raised by friends and family for generations! Cheers!


Do you dream of living, working or making wine in your own timber frame? At Green Mountain Timber Frames, we restore and build timber frame barns and homes, both new and old.

Give us a call.

completed dormer_Green mountain timber frames

I can imagine sitting in this dormer with a cup of coffee and enjoying the view for a very long time!

A Comparison of Timber Frame v. Stick Built Construction

Reading this in your email? For easier reading – Click here.

This week’s guest blog is from builder and timber framer, Glenn Tarbell. Glenn has collaborated on many projects with Green Mountain Timber Frames over the last two decades.  Recently, he built this beautiful timber frame garage for a client. 

Final Timber Frame Garage.jpg

Why Use Timber Frame Construction?

Recently I had a customer who wanted a new garage. They live in a beautiful wooded area with large oak trees near a wetland. Their house is not large and has a low sloping roofline. The siding is rustic, rough sided pine that is stained. They asked me to build a two bay garage.

Timber Frame v. Stick Built

I inquired if they would be interested in a timber frame garage rather then a traditional stick built garage if the pricing was not considerably higher. They loved the idea of a timber frame and we began the design process. The pricing for a timber frame style building was only slightly higher, so we decided to go with it!

Designing the New Garage 

In the design phase, we talked a lot about the height of the new building. The customer did not want a garage looming over everything. We talked about enclosed and not enclosed bays, power needs, and building materials for the roofing, siding and the timbers. They also needed storage for kayaks and canoes and windows on the south face for garden starts.

We decided that the final building would be a barn-garage. We would create a structure that looked like a barn with an extension for the traditional hay hook or, as we discussed, a canoe hook. The customer had a rope system with a vintage pulley that has already pulled the boats into the upper half story for the winter.

The structure we finally designed has one fully enclosed bay with an overhead door and a shed roof off one side for the second bay. We ultimately choose this look for two reasons: height and looks.

6_plate section for the shed roof

Building the Barn – The Construction Process

When it came time to start building the garage, we chose hemlock wood for the frame. This is a ridged softwood that works well for timber frames. We cut the joinery traditionally using chisel, saw and chain mortiser. Then, we dry fitted all the parts of the frame at my shop. Seeing the mortise and tenons fit together and then seeing the bent sections laid on the sawhorses was wonderful. Dry fitting the frame gives a sense of what the building will become, while also allowing for us to check for accuracy in layout.

2_All the bents are up

Here we are drilling 1-inch holes for the wooden pegs.

The barn posts are six by six, the girts are eight by eight, the rafters are four by four and the braces are three by six. As a big pile of wood it does not look like much, even with the joinery cut. But on raising day, wow, it takes on a look of its own.

4_4x4 rafters in place

Here you can see all the bents assembled and the frame with shed walls erected.

And here’s a look at the new garage once the roof sheathing and trim were on:

7_Roof sheathing and trim

Pricing Timber Frame v. Stick Built Construction

When pricing this kind of project and determining the cost difference between timber frame and stick built construction, I have to look at the two styles of building with the thought, “What steps will be different?” Siding will be applied in the same manner in both building styles, as will trim, roofing and sheathing. The only real difference then, is the framing.

It took nine days to cut out the timber frame and tip it up, including roof sheathing.

3_Drilling holes for pegs

The frame with all the 4×4 rafters in place.

To build a traditional stick built garage with roof sheathing, it may take seven to eight days to get to the same point. Therefore, the difference in this project was two days of labor.

Timber Framing – A Worthwhile Investment

In the end I think timber frame construction makes more sense both financially and aesthetically. Even if it takes a bit longer and requires a slightly larger initial investment, (usually 15-20% more) a new timber frame is strong. Barns built this way have lasted hundreds of years.

Standing in a timber frame feels good. You can see the craftsmanship of the builder and know that the history of barns and houses built this way dates back hundreds of years. So whether you build a new timber garage or use a vintage timber frame barn as the frame for a garage, from my experience timber framing is usually the way to go. It’s cost effective and the building can last for centuries if the roof is maintained.

Interested in your own timber frame barn or home? Let us know!

We’d be glad to hear from you! 

Luke – Green Mountain Timber Frames
luke@GreenMountainTimberFrames.com
802.774.8972

GMTF Takes Timber Framing to the Water: The Boat House Project

.Reading this in your email? For easier reading – Click here.

In our latest timber frame project, Green Mountain Timber Frames took to the water! We put in no less than 1000 hours of work to build this gem of a boat house:Timber Frame Custom Boat House Green Mountain Timber Frames

We built the new timber frame structure on beautiful Lake Bomoseen – literally on and over the lake. 

Lake Bomoseen_Green Mountain Timber Frames

Lake Bomoseen

The goal was to build a post and beam structure over a boat mooring, allowing a boat to come inside, be lifted out of the water and stored for the winter. 

Inside the Boat House_Green Mountain Timber Frames_Luke Larson

The view from inside the Boat House

Hemlock and Oak Wood, from the Property

One particularly exciting aspect of this project is that the hemlock and oak were cut from the property using a portable saw mill. Only on a few rare occasions has Green Mountain Timber Frames been able to cut a new timber frame using materials from the land where the structure will be built­. Luckily for us, this was one of them!

Designed in Collaboration with the Owners

When it came to designing the boat house frame, our very own Luke Larson worked closely with the property owners. It was a great pleasure to work together to create a design that fit the goals and desires of the owners and also worked structurally.

One of those goals was to have an attractive shed roof across the gables. We decided to accomplish this with a secondary top plate, which we started calling an “outrigger,” that turns the corner and wraps across the gable ends.

Outrigger detail of boat house_luke larson_Green Mountain Timber Frames_Vermont

aerial view of timber frame boat house_Green Mountain Timber Frames_Luke Larson

View of “outriggers” from afar

The various dimensions of this frame were each built on saw horses in our yard, so that we could check all the math, angles and joinery as we went.

aerial view of timber frame boat house_Green Mountain Timber Frames_Luke Larson

Using saw horses to work on wall of the Boat House

We used king post trusses to frame the bents and curved oak braces throughout the frame.

Timber frames_Green Mountain Timber Frames_Luke LarsonMost of the purlins in the frame were hemlock from the property, but we needed two pick points in the ceiling that would be strong enough to lift a 4,000 pound boat. Heavy oak purlins were installed at two places which are rated for well over 2,000 pound point loads each.

Purlins in custom boat house timber frames of custom boat house_Green Mountain Timber Frames_Luke Larson

The location of the timber frame presented challenges in getting it erected. Since the lay of the land was such that a crane or lull was not feasible, we put it up the old fashioned way – by hand.

Dan went out in his kayak to take this picture of the flag being raised. 

Flag Raising on boat house_Green Mountain Timber Frames_Luke Larson

Here is a what the rafter trusses look like with the roof boards and wall sheathing applied. These were also harvested on the property. Soon there will be a walkway around the inside edges of the boathouse.

Interior view of custom boat house_Boat house completed with siding_Green Mountain Timber Frames_Luke Larson


Corner details of boat house completed with siding_Green Mountain Timber Frames_Luke Larson

We were especially happy with how the hip corners and eve purlins turned out visually.

Custom Boat House_Boat house completed with siding_Green Mountain Timber Frames_Luke Larson

Next, the structure will receive beautiful salvaged windows, carefully restored, and a layer of cedar shingles on the walls. There will also be triangular windows in the peak. Take a look!

Boat house completed with siding_Green Mountain Timber Frames_Luke LarsonInterested in your very own timber frame boat house? Have another timber frame project in mind? Green Mountain Timber Frames specializes in historic timber frames and restoration projects, but we also erect new timber frames.

Contact us with any questions! Email Luke@GreenMountainTimberFrames.com or call 802.774.8972.