The Milkhouse


The Milkhouse  – a fun project to complete in a week, not months!

Historic Timber frame restoration

I traded this nearly un-restorable milkhouse in exchange for a playhouse for my grandchildren. The milkhouse needed some TLC, and was one of the smaller projects of our summers work. I am very pleased with how this little button of a building came out.

The frame measures 8’x10′ and was originally built in 1930.

My friend asked me to turn the little milkhouse into a backyard getaway spot where he can read, play music and find his muse beneath the rustic decor. Eventually, we plan to add a porch and another window, but for now it is ready to use.

We spent a good deal of time working on the roof. This next set of pictures shows our process.

Working on the roof of small Vermont post and beam compare

Below you can see it in the new location, but not yet restored. That’s the old playhouse in the background.

Restored Barn frame Milkhouse

One benefit of working on this little building was that it allowed me to use up some of the vintage wood and other salvaged materials that I have been saving from previous projects.

The “novelty” siding in this picture, for example, was salvaged from another barn. This kind of siding started to become popular around 1900.

Novelty Siding in timber frame milkhouse

Novelty siding

The vintage flooring was also left over material from another project. Here it helps warm up the white wash walls.

Vintage Timber frame with vintage flooring

Vintage flooring

The roofing was recycled as well – from the restored barn I worked on in Pawlet in 2012.

Opposing side of barn restored

Recycled, restored roof

Since I got to use up all these odds and ends, my workshop and yard are starting to look rather tidy and spacious, ready to fill with new vintage material for future barn restoration projects. So do let me know if you hear about available barns! I am always interested in at least looking at them.

Coming soon:

Here’s a closeup of the playhouse for which I traded the milkhouse. I built the playhouse over 30 years ago for my children, sold it to friends for their daughter, and it’s now coming back home to be restored for our family’s next generation. Stay tuned!

Timber Frame antique kids playhouse

Kids’ Playhouse

Interested in living in a restored barn home? Have a timber frame available for sale? Please let me know! 

Go back

Your message has been sent

Warning
Warning
Warning
Warning

Warning.

Before and After: The Ira Barn Restoration Project

Gallery

This gallery contains 11 photos.

Remember this 1770s gunstock frame from Ira, Vermont? I have written about this historic timber frame a few times – from this blog, when I first started working with the farmer to help him find a client over 2 years … Continue reading

Summer Restoration – The 1780s Corn Crib Revisited

I’ve had a busy spring and summer, restoring a number of vintage timber frames that were originally from Ira, Vermont and picking up a few other projects in between.

You may remember this corn crib that I first wrote about back in November. I am happy to report that we found an owner for this frame and its new home is in northern Vermont.

Vermont Post and beam corn Crib

Corn Crib from Ira, VT

While relatively small at only 450 square feet, this lovely, hand hewn beech wood frame boasts two floors.

Restoring timber frame roof

Dismantling the crib.

With the help of a wonderful crew, Green Mountain Timber Frames has carefully restored this frame – down to every detail including the famous signature stairway.

Restored Wooden Stairwell

Restored Wooden Stairwell

Here are a few pictures of the frame during the re-erection process:

Reerecting historic barn Old Barn Restoration

We were able to save most of the original roof, wall and floor boards on the interior, so the barn will maintain much of the look it had when it was built 240 years ago.

We wish the owner many happy days and nights in this new-old out building. Freshly restored, it can now be of use another two centuries.

—–

I really value historic structures and am always looking for the gems – the true diamonds in the rough. Do you have an old barn you want to sell? Are you looking for a timber frame to turn into a beautifully renovated home? Please give me a call: 802.774.8972.


Worth Saving? Assessing the Value of a Barn

Here at Green Mountain Timber Frames, we receive phone calls about old barns all the time. Owners want me to come look at barns on their property to assess their value and decide whether or not they are good candidates for restoration.

One of the first questions I am invariably asked is: “How do you decide if an old barn is worth restoring?” And the natural follow-up. “If so…how do you price it? There are many factors that go into deciding whether a barn can be restored, if its roof or wooden beams can be salvaged, or if it has no value at all.

To explain some of the key factors that go into making these decisions, I want to present you with a little side by side comparison. Below are eight sets of pictures. The barn on the left in each picture is a rare, valuable gunstock timber frame from about 1750, very early by Vermont standards. The owner is interested in selling the barn because he doesn’t currently use it. On the right are photos of an 1890s barn that Green Mountain Timber Frames will not be restoring. The owner is concerned it will collapse and would like to salvage parts of the barn before this happens. He asked me to put a value on the barn “as is”.

Evaluating Two Barns: A Side by Side Comparison
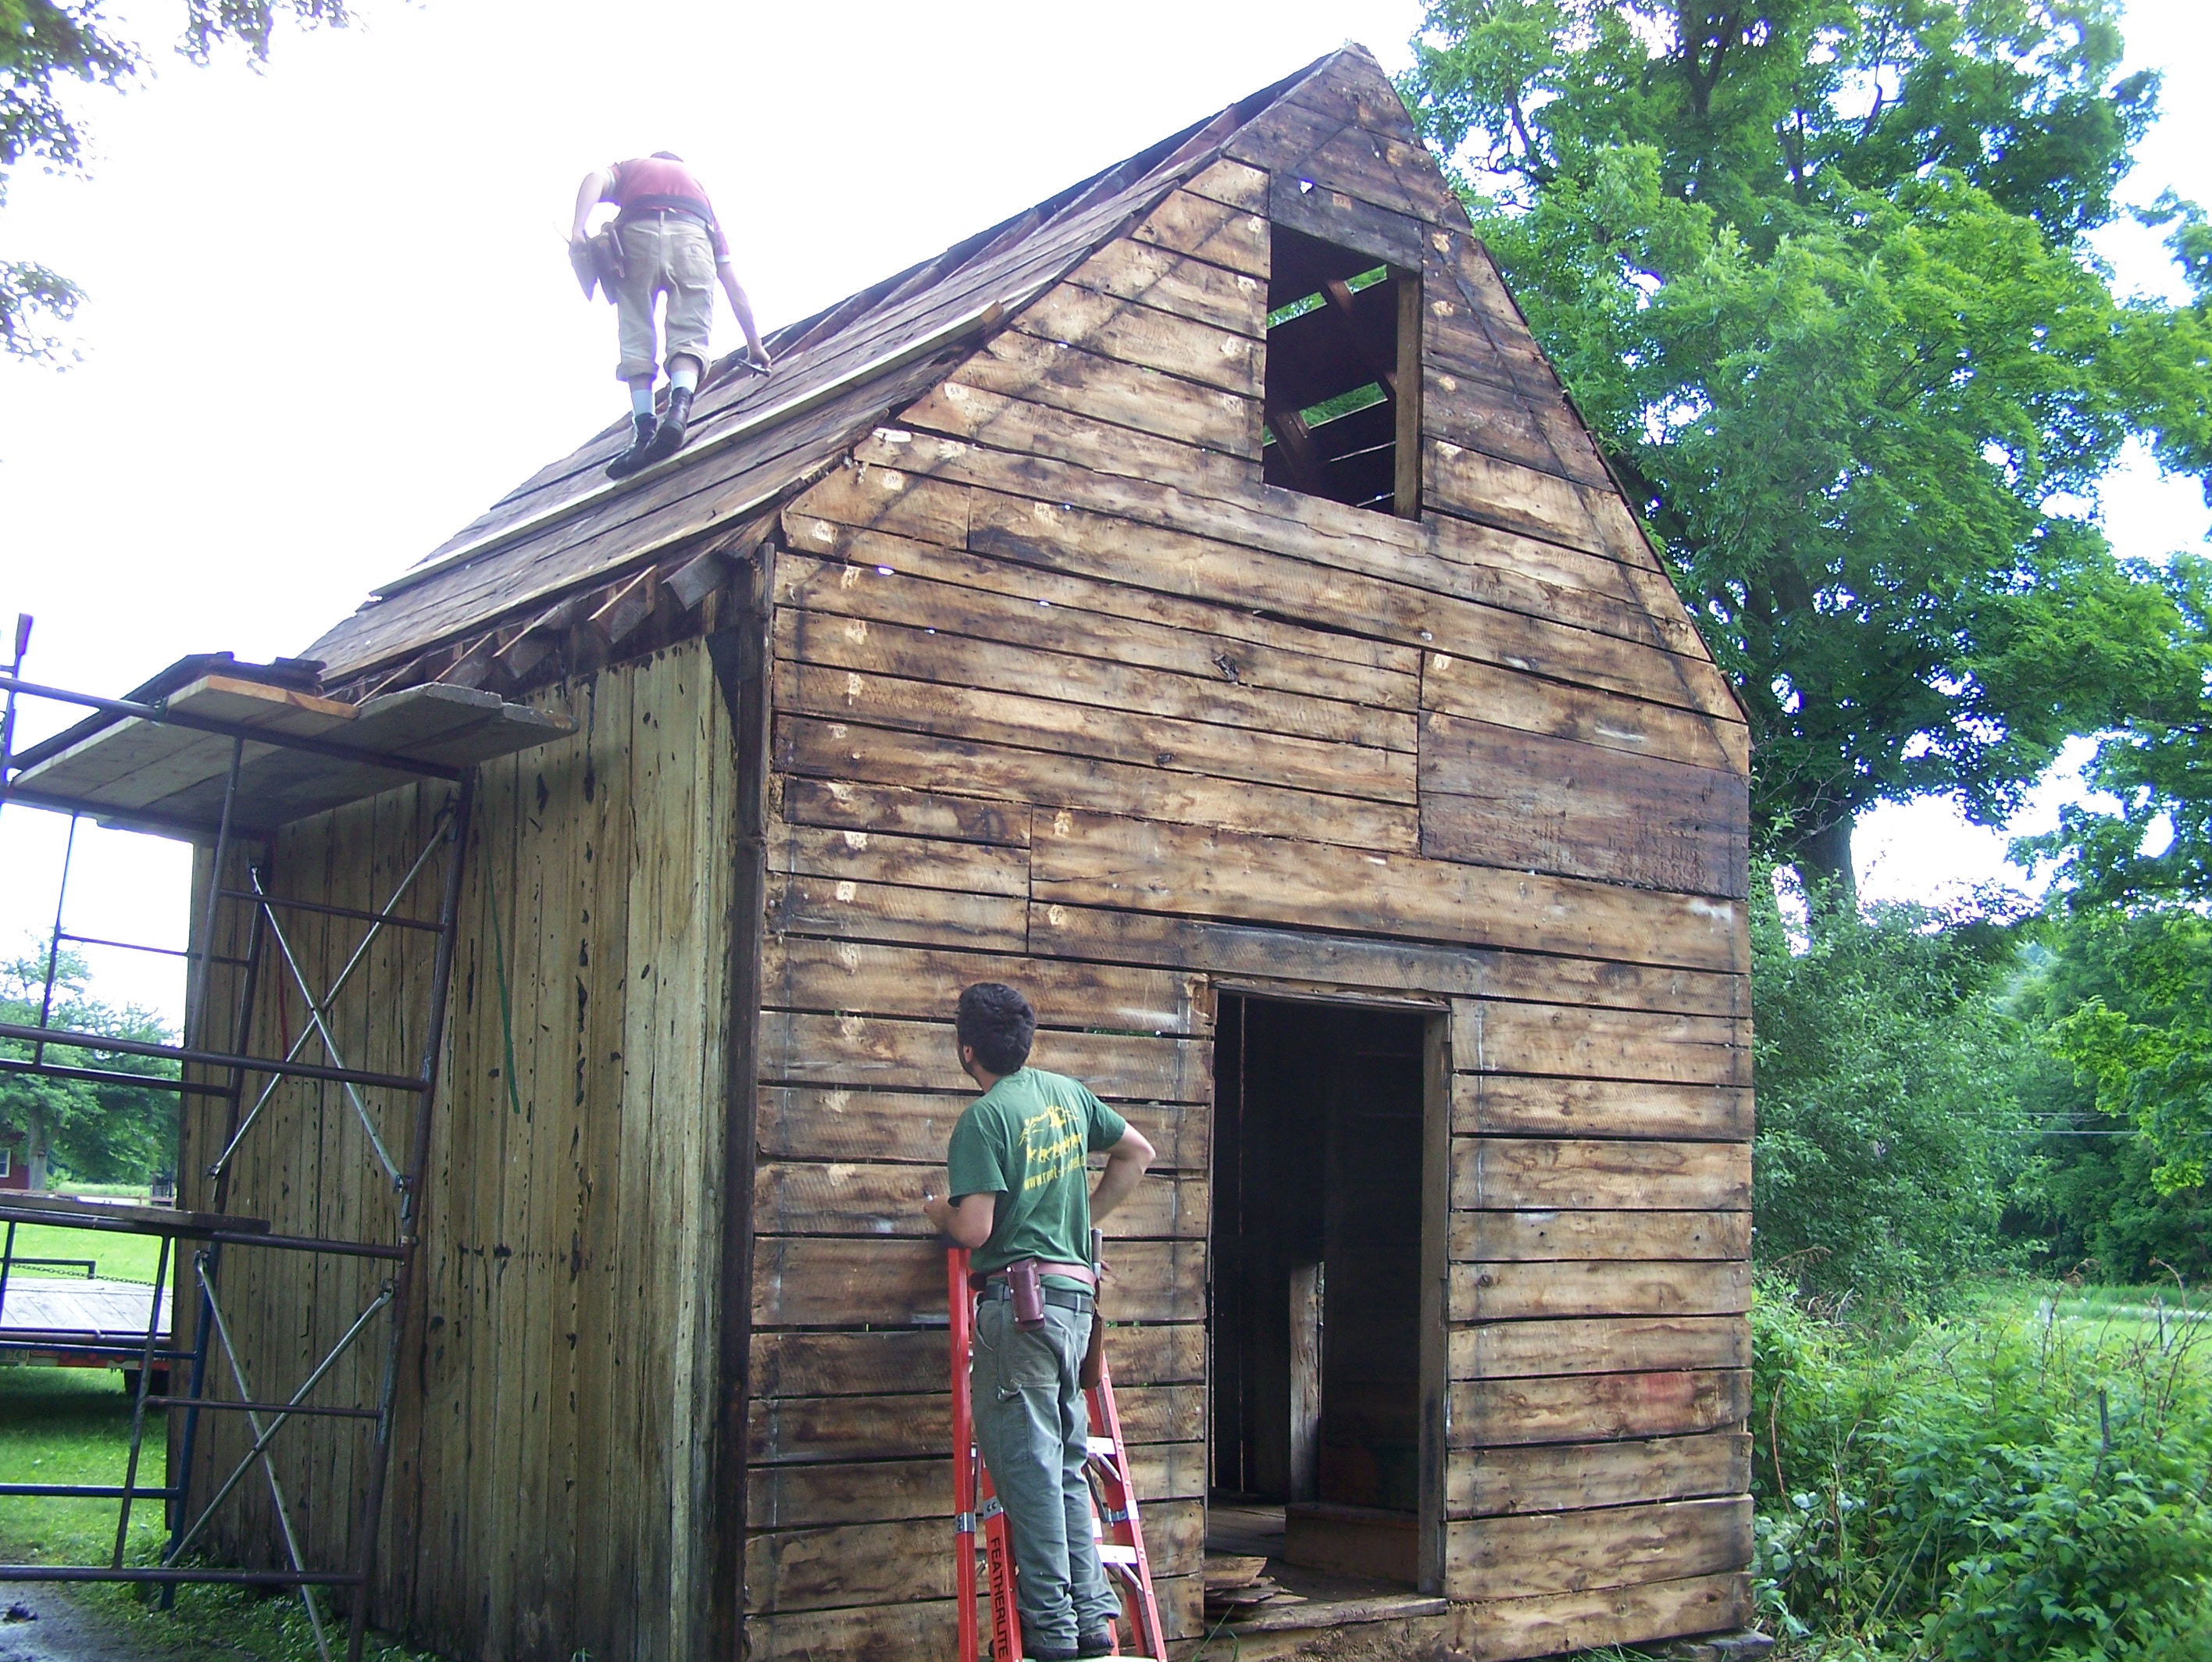
1. THE ROOF

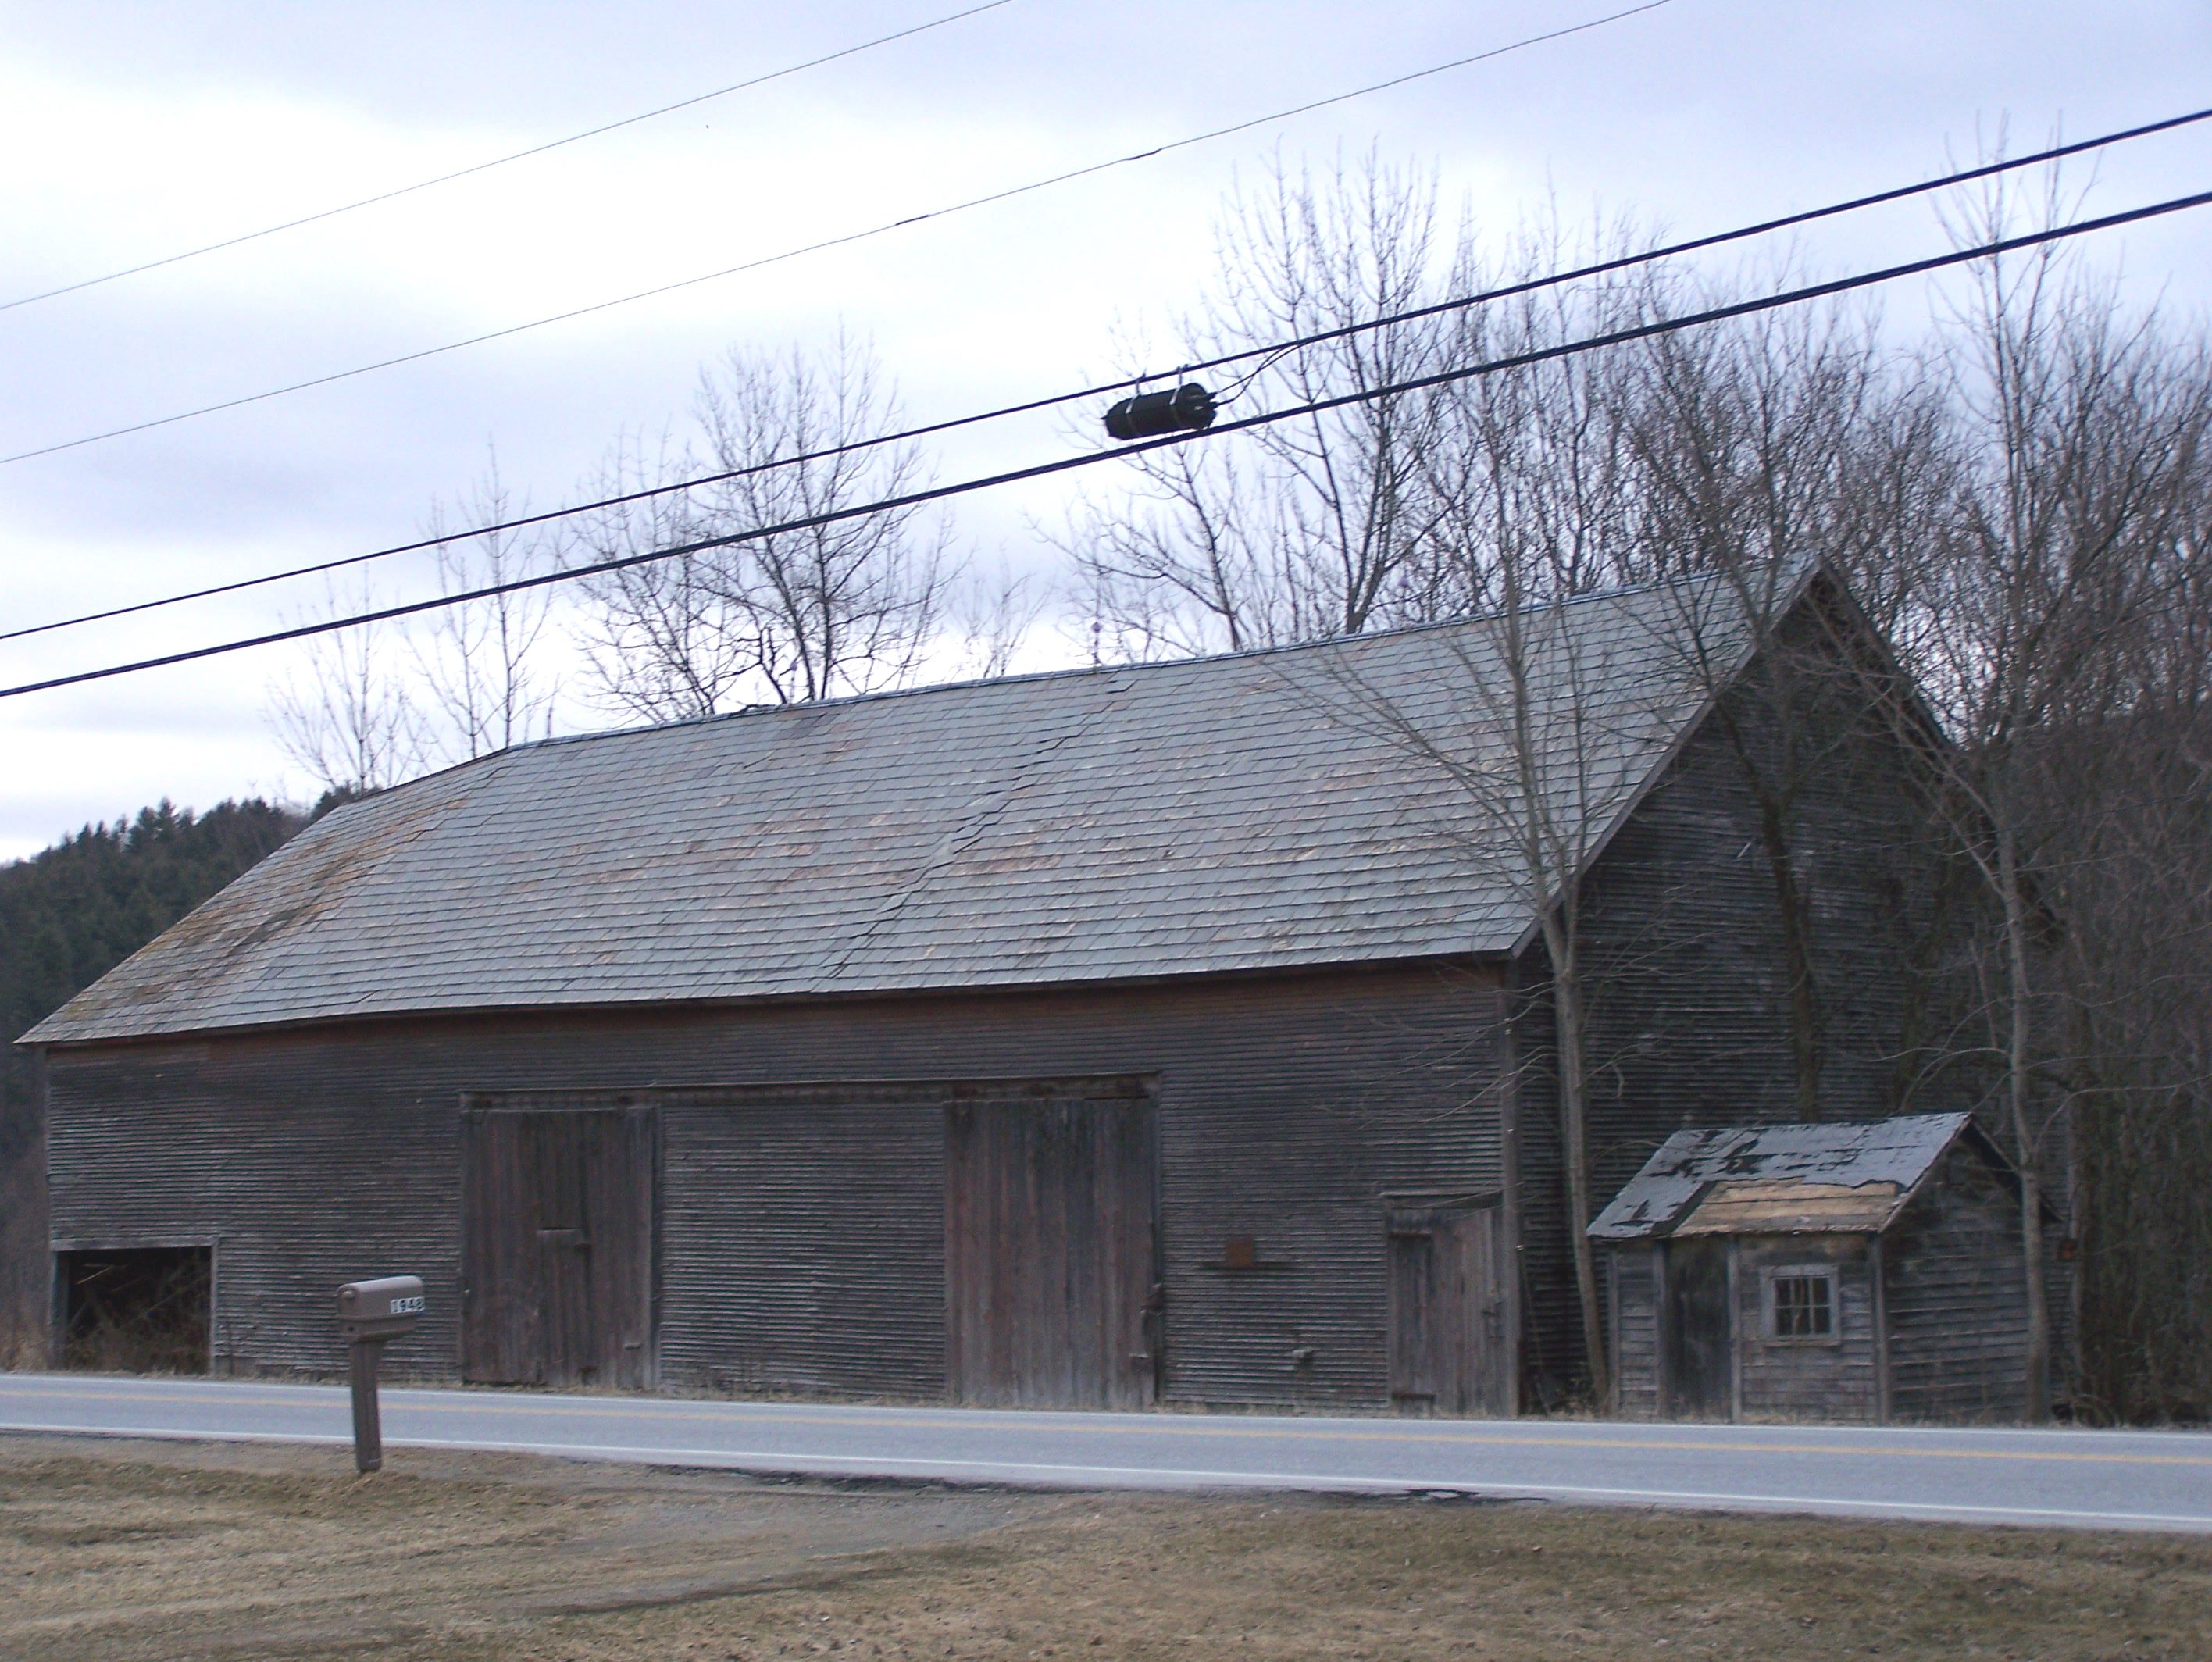
When I evaluate a vintage barn, I start off by taking a look at the roof. Having a straight, flat roof with no sagging says the upper timber structure has held together over the centuries. In our area, slate can create sagging roofs in earlier barns not designed for the heavy weight of slate. They were designed for wooden roofs, which, in the northeast, were mostly constructed from white cedar. 1_Roof Comparison on Old Barn HomesNEW 2. SIDING

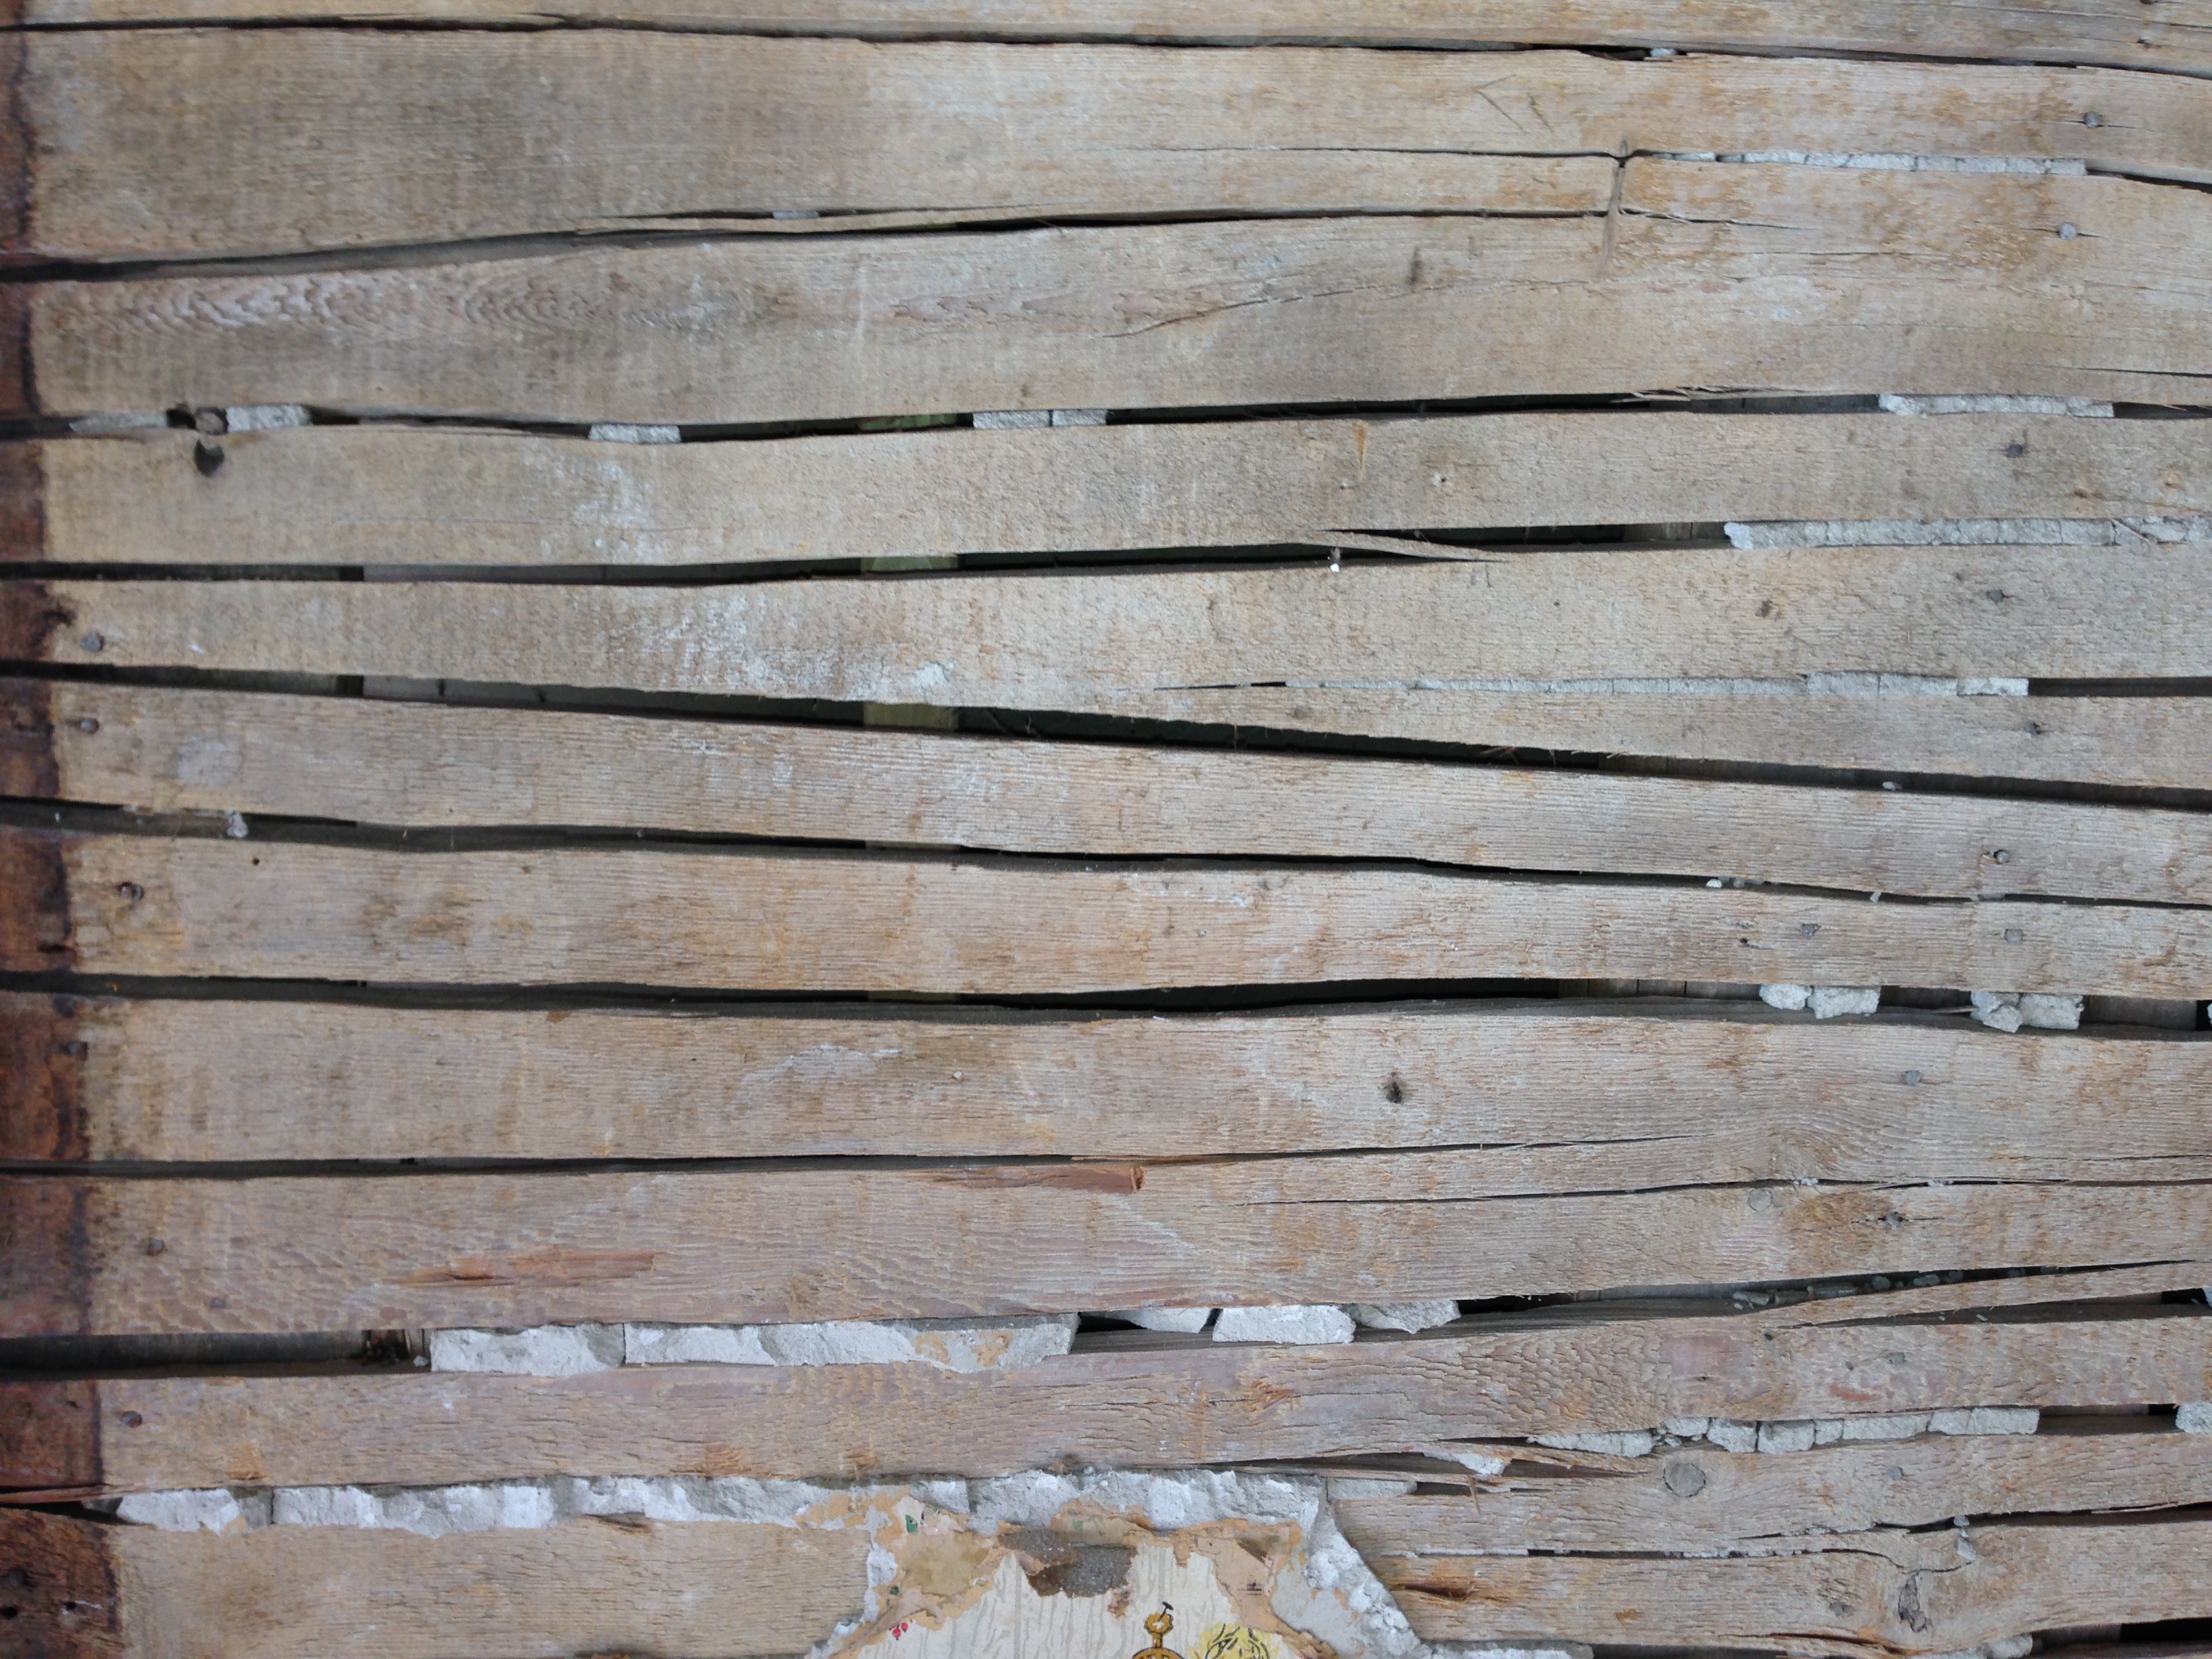
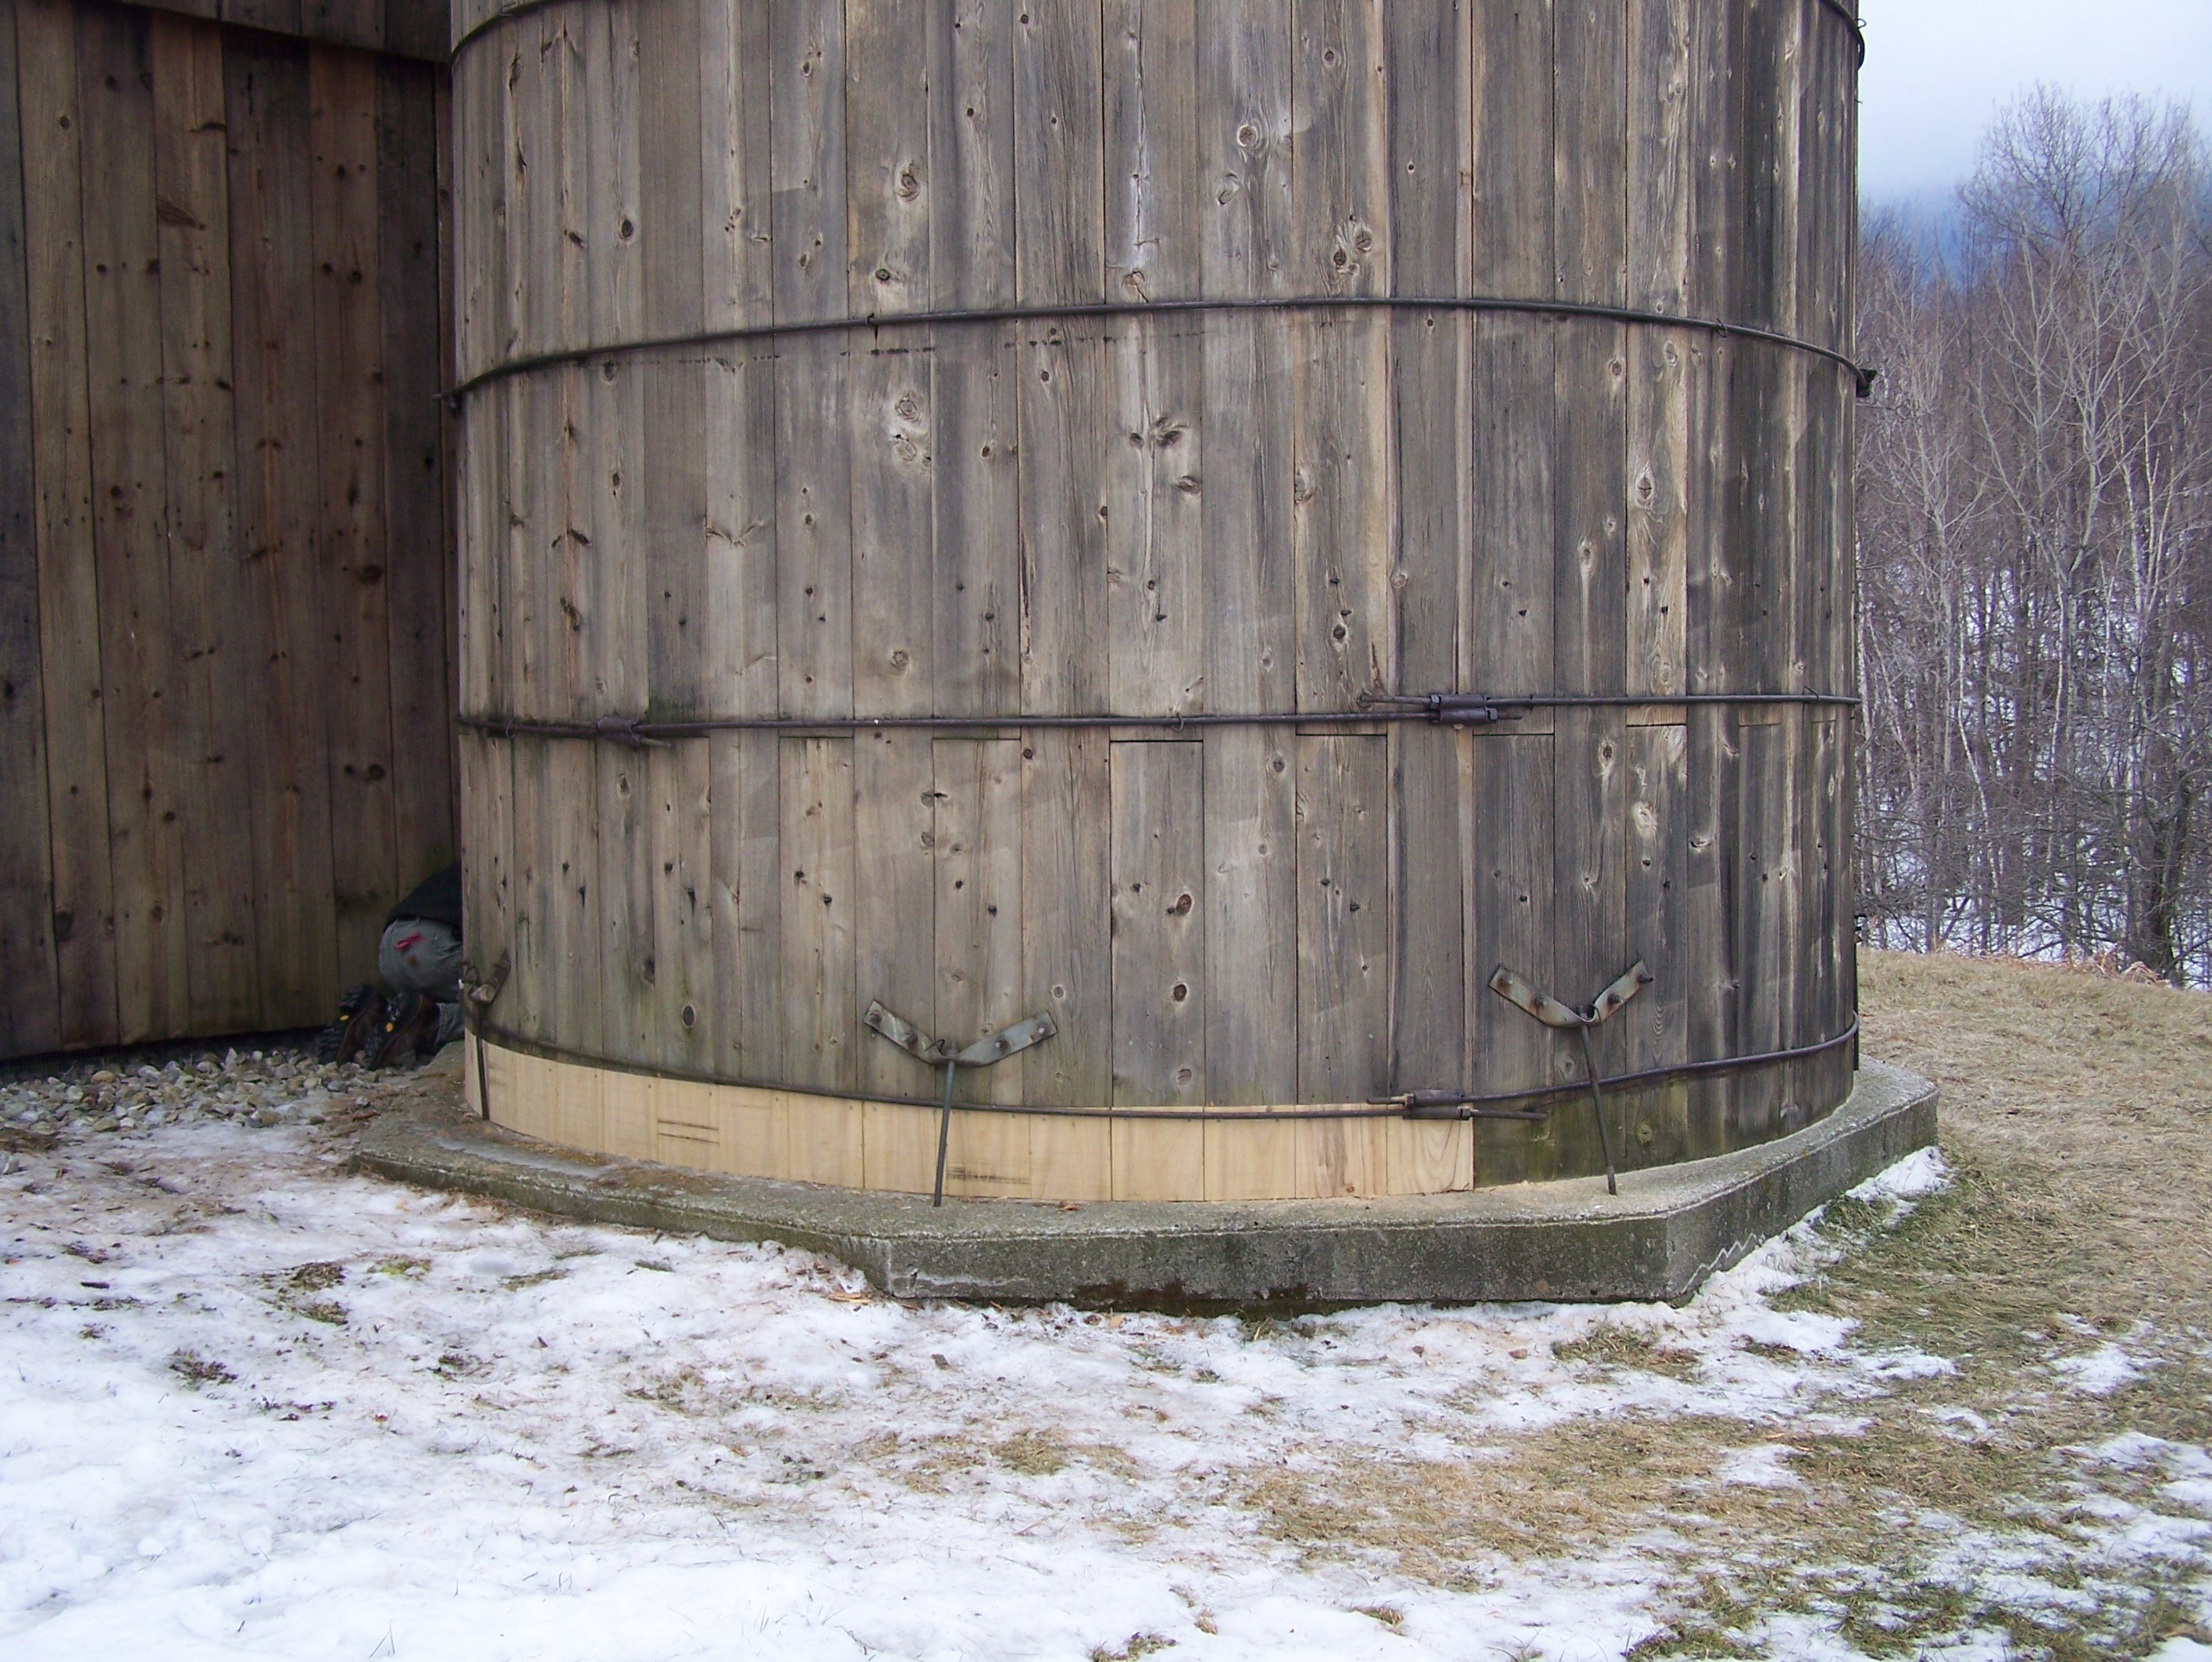
Next, I look at whether the barn has vertical or horizontal siding. Vertical siding, as in the 1750s barn, may mean the barn dates from before 1850. Builders began to use horizontal siding around the Civil War era. 2_Vertical or Horizontal Siding on Timber Frames3. IS IT OVERBUILT?

Notice the large numerous beams on the wall section of the 1750s barn. Contrast this with the 1890 barn, which has smaller timbers and even smaller 2″ x 4″ nailers. This represents very light construction when compared to the 1750s wall section. The large beams we see on the left are more valuable. 3_Over Built or Crooked Old Barn FrameNEW 4. GUNSTOCK POSTS?

Gunstock timber frames are always more valuable as they are very rare these days. Gunstock frames can be identified by their tapered posts. The posts start off 9″x 9″ square at their base and then taper to 15″ x 9 ” at the top, where they meet intersecting timbers. You can see this in the photo below of the 1750s barn. In the 1890s barn, the posts are very light, measure 6″ x  6″ and don’t taper.  4_Gunstock Posts on Timber Frame 5. ROOF RAFTERS

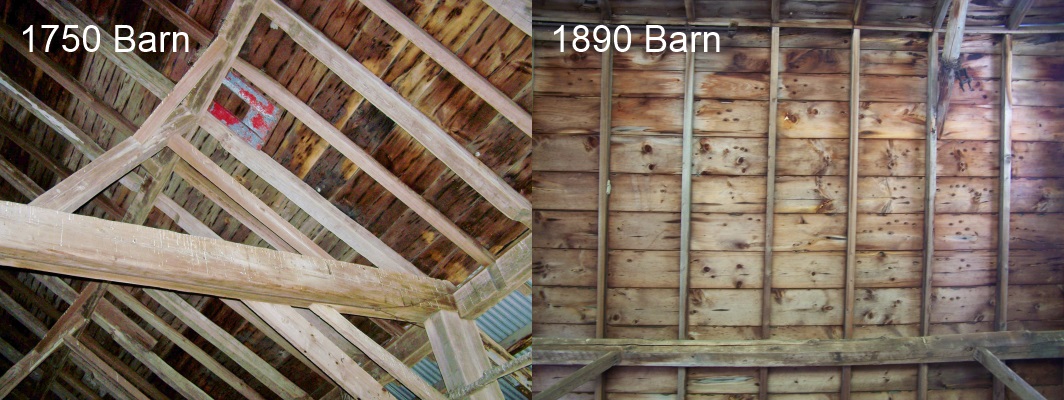
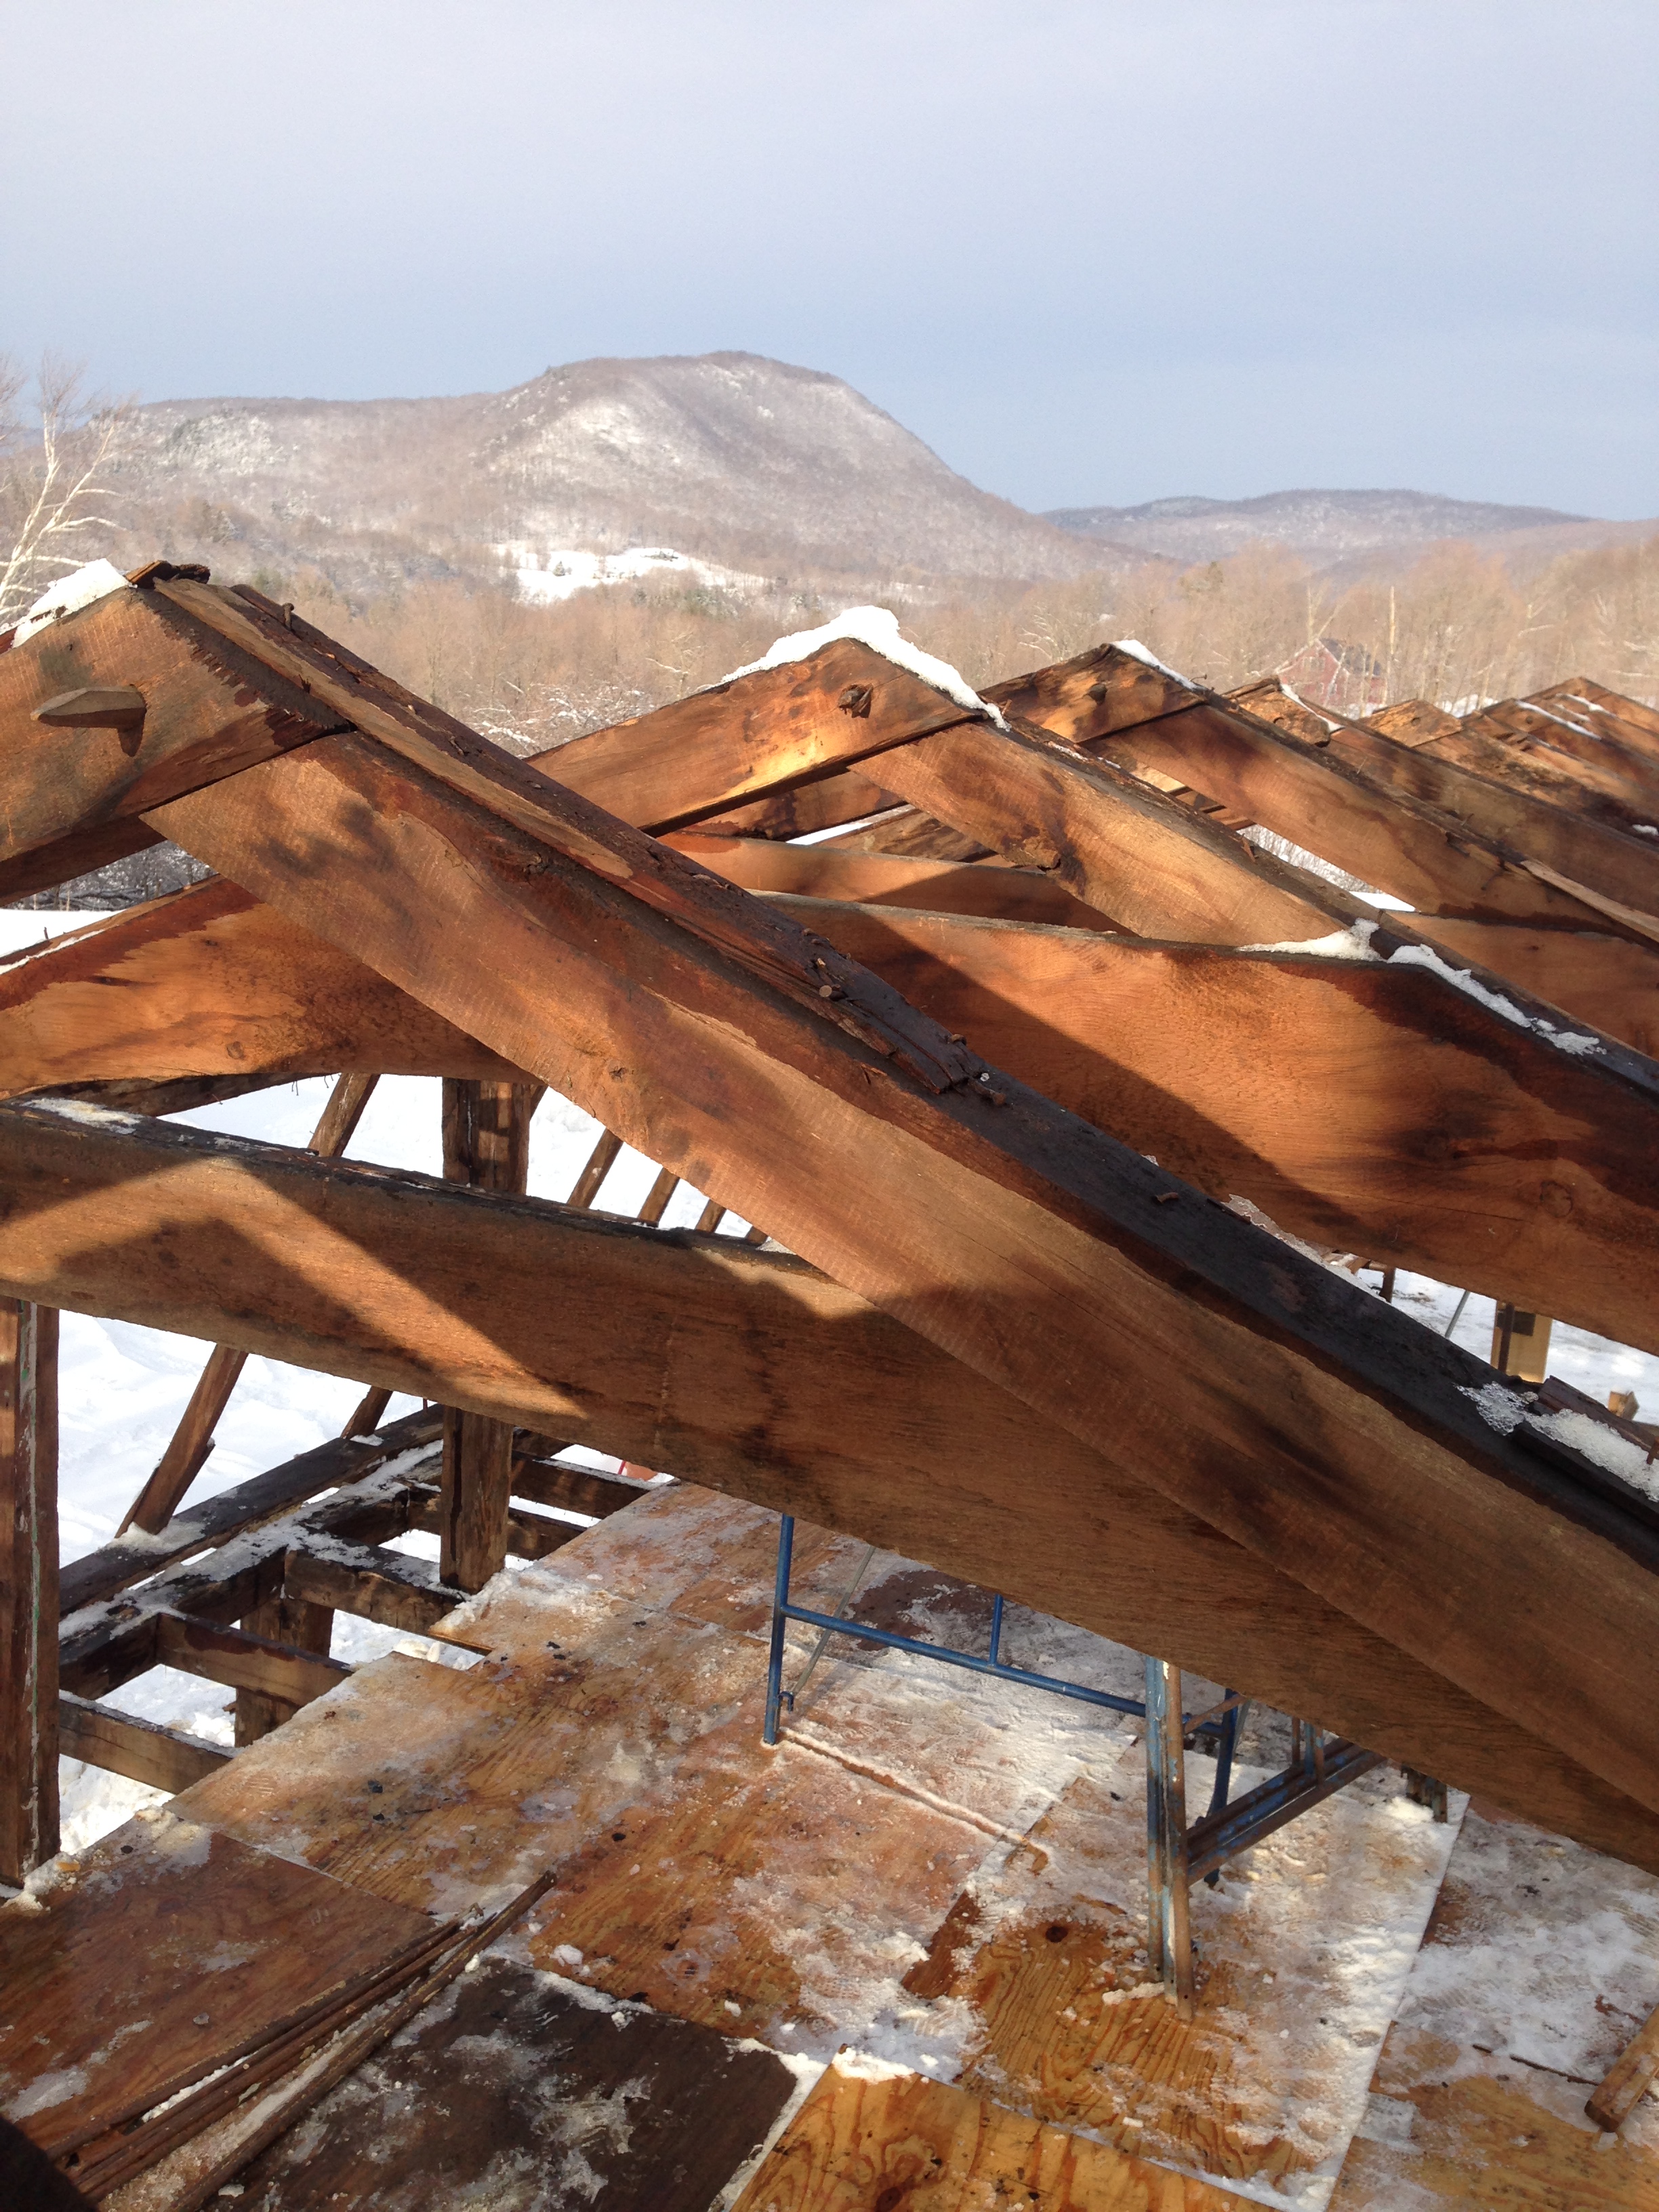
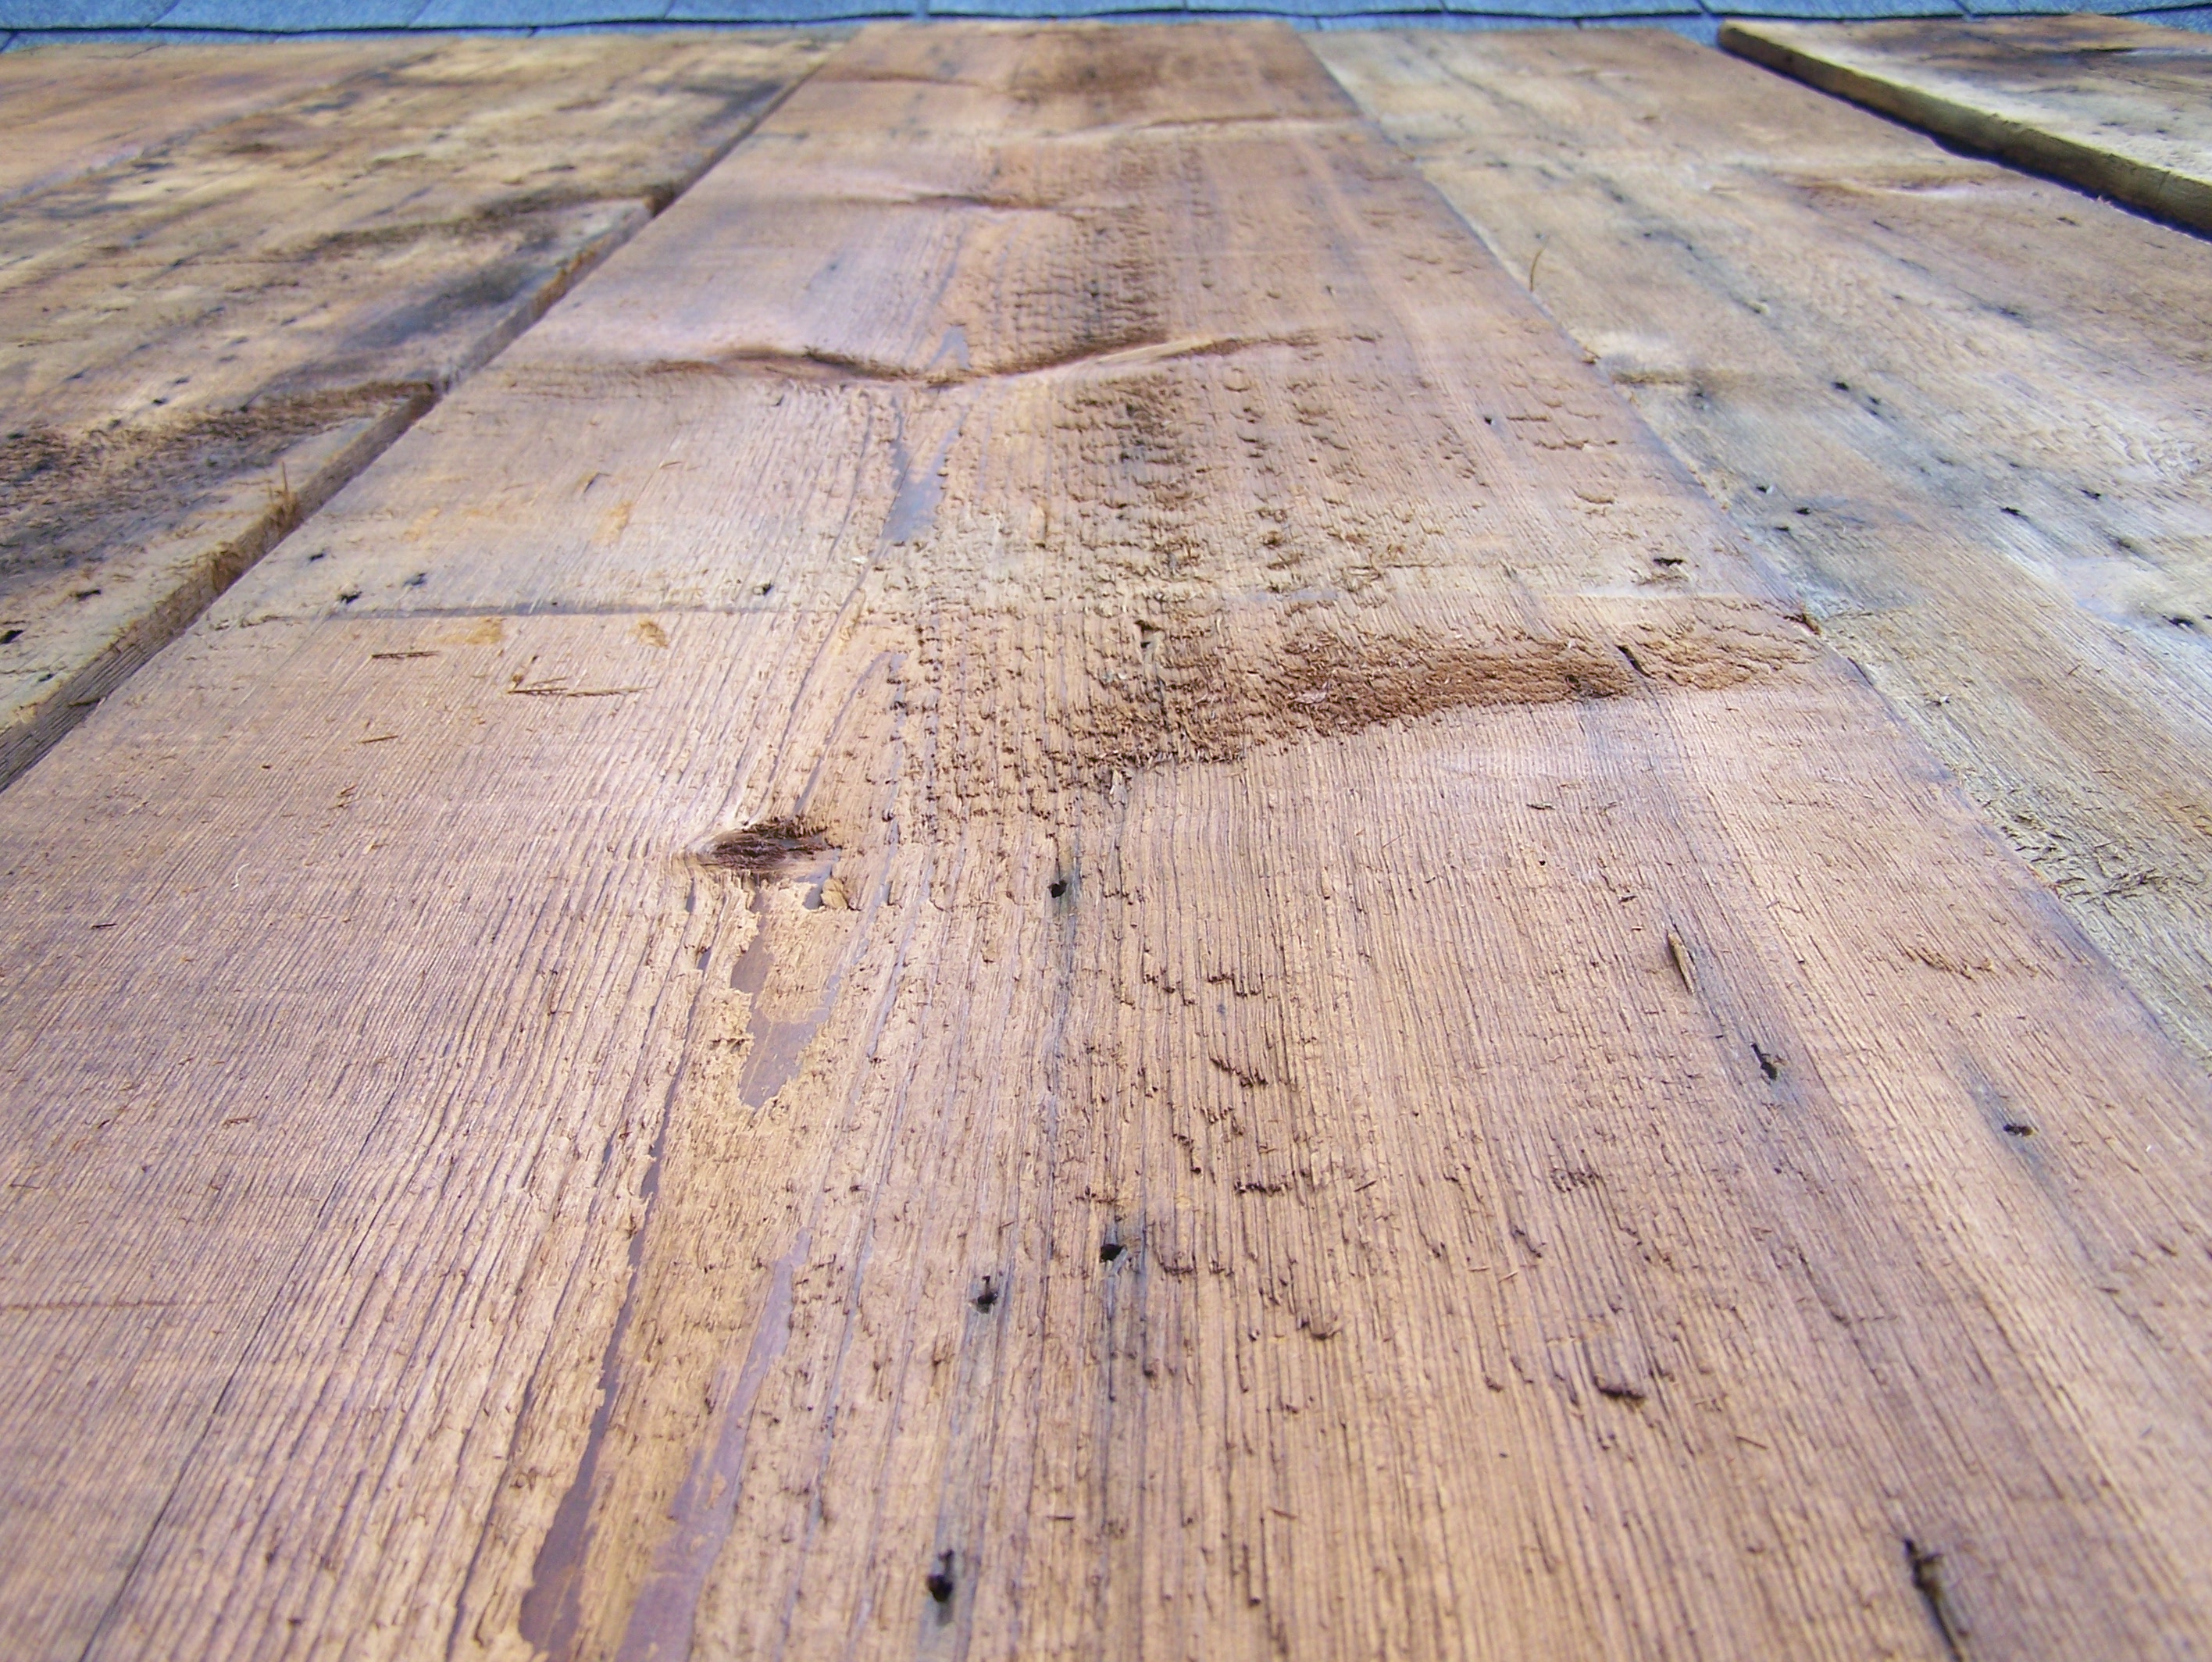
If a frame’s roof rafters are hand hewn square rather than “half round”, it indicates an earlier era. The 1750s frame has hewn rafters. In the picture the larger beams are the original rafters. The builder added in the smaller 4″ x 4″ rafters when they added the slate roof. Also, the 1750s barn has white oak roof boards, another indication of a very early frame. The 1890s barn has small, modern 2″ x 6″ roof rafters which are not valuable. However, because the pine roof boards are in good condition, they can be reused for other building projects. Most barns have softwood roof boards like pine, spruce or hemlock. It seems only the 1750 era frames have hardwood roof boards. I’ve come across only three hardwood roof board frames in the 30 years I’ve been doing this, yet another reason this 1750 barn is such a gem! 5_Roof Rafters on Timber Frame 6. TIMBER FATIGUE

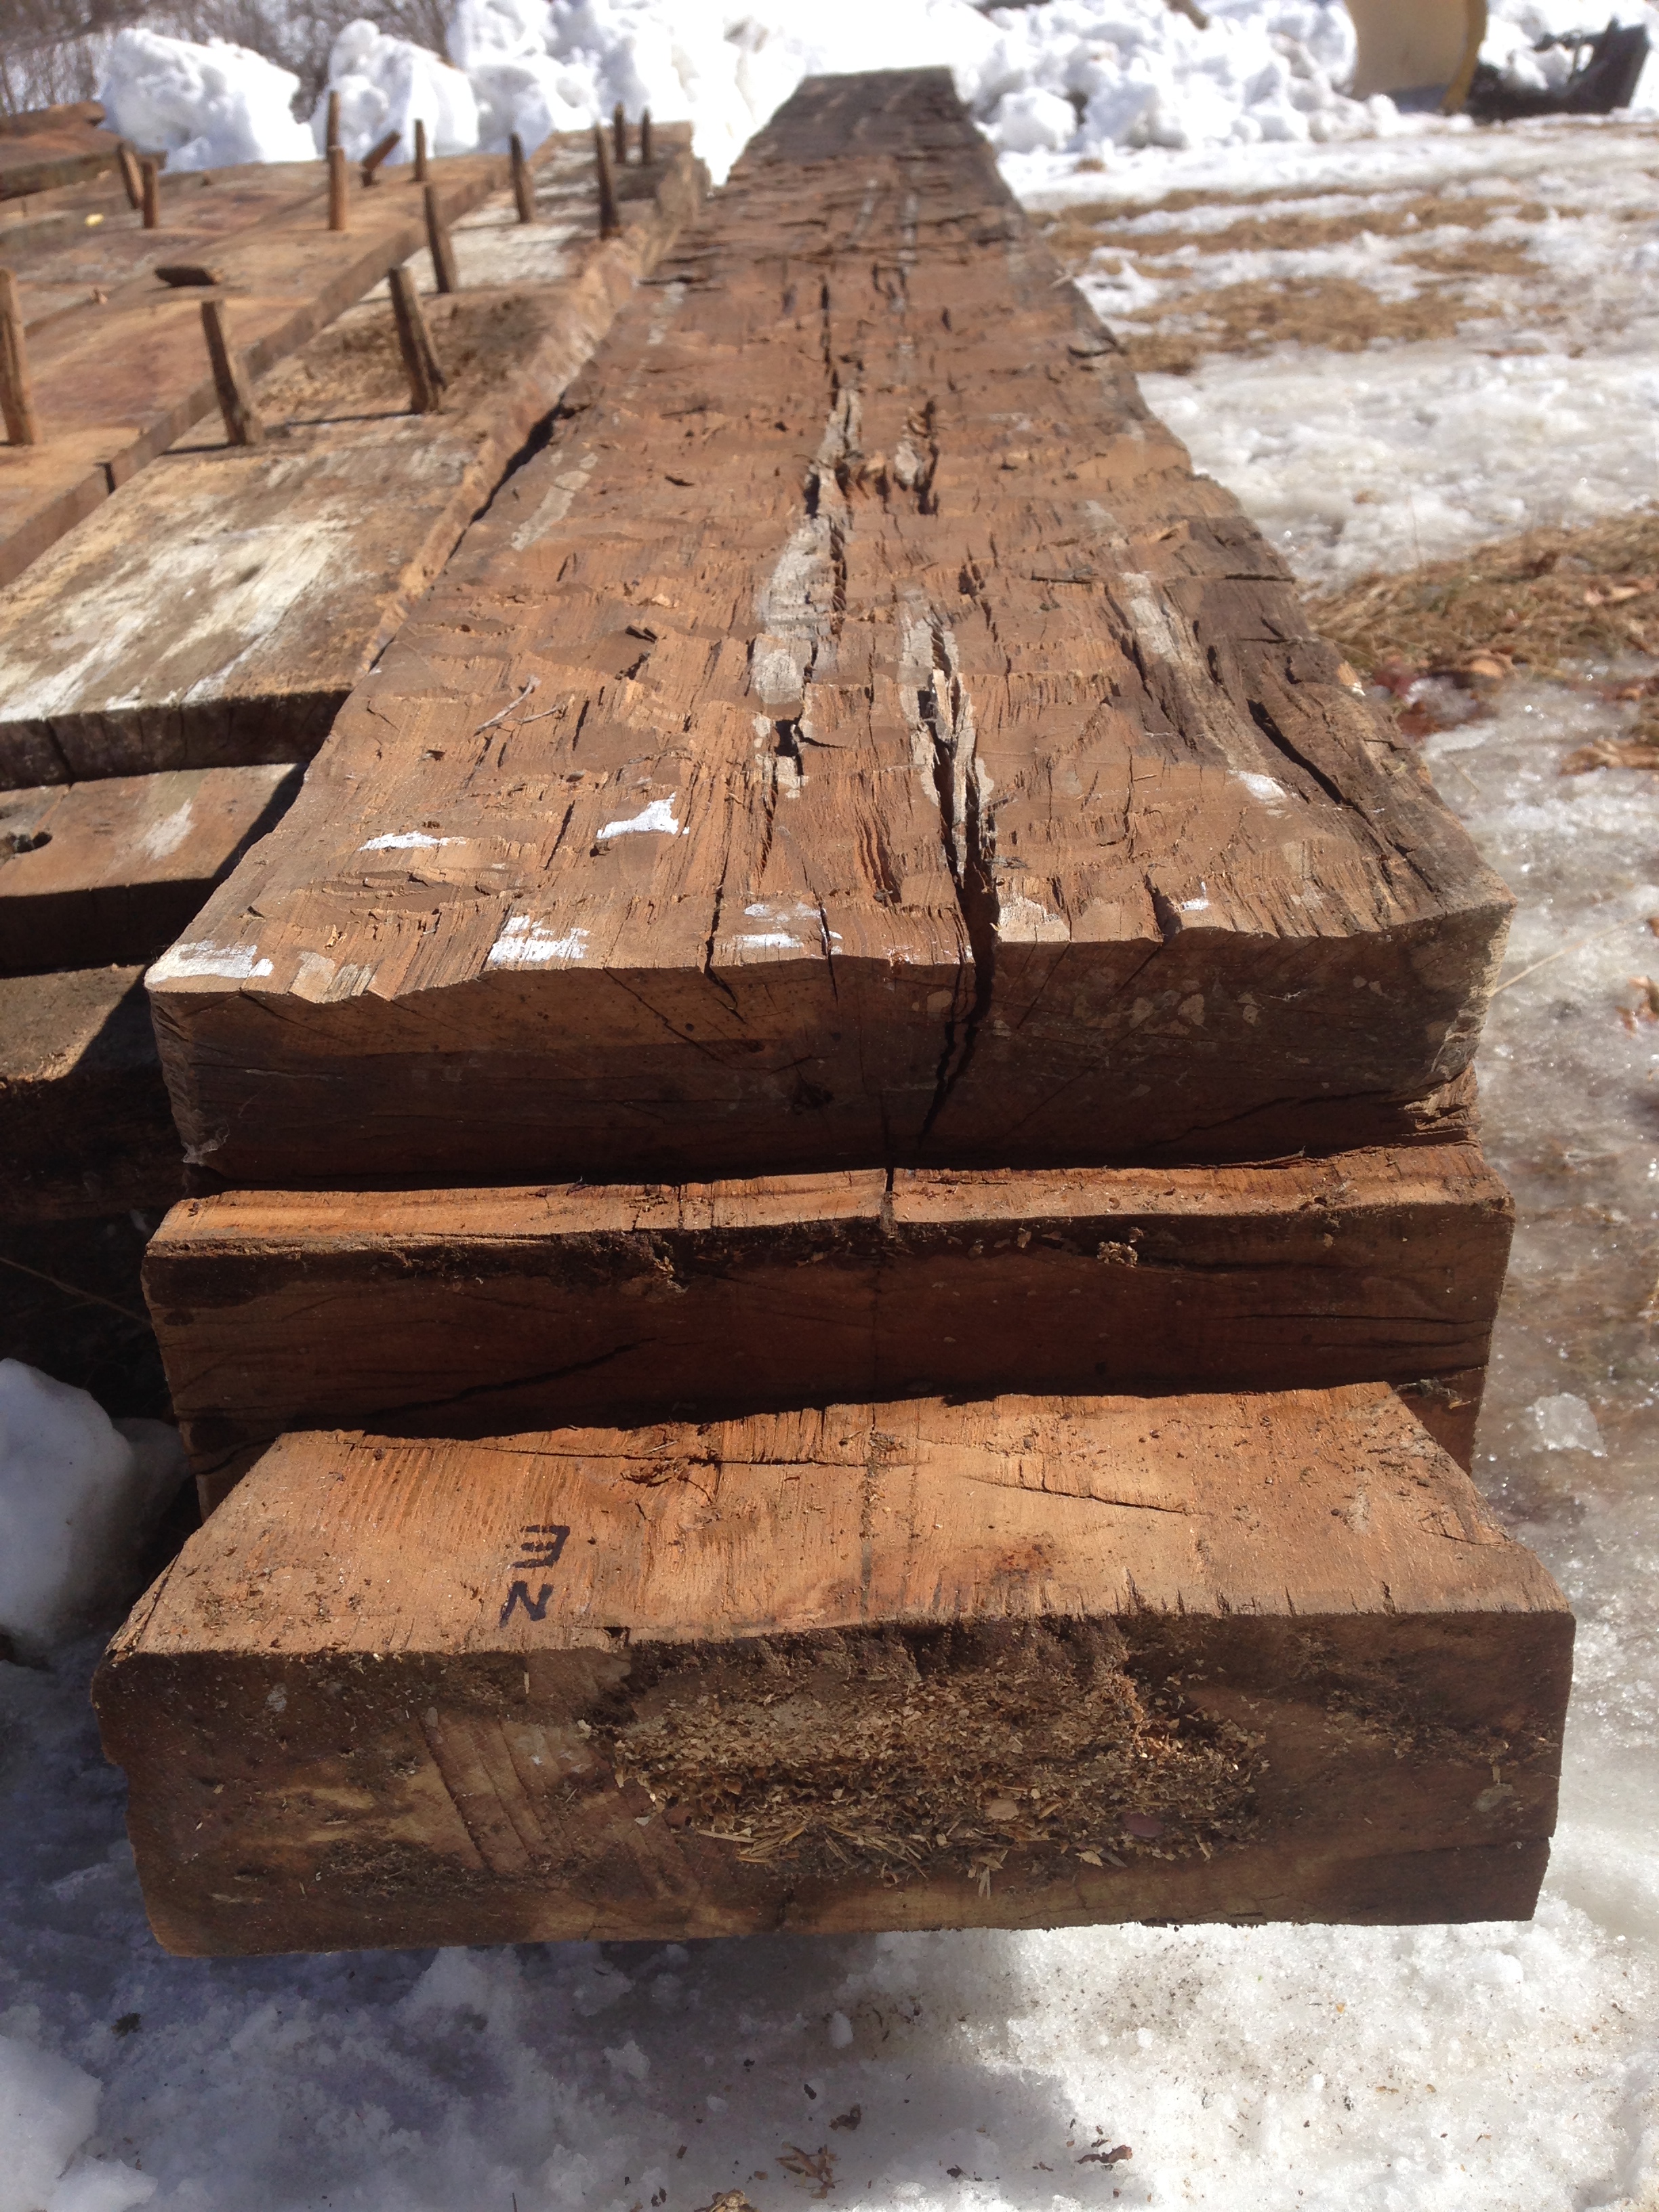
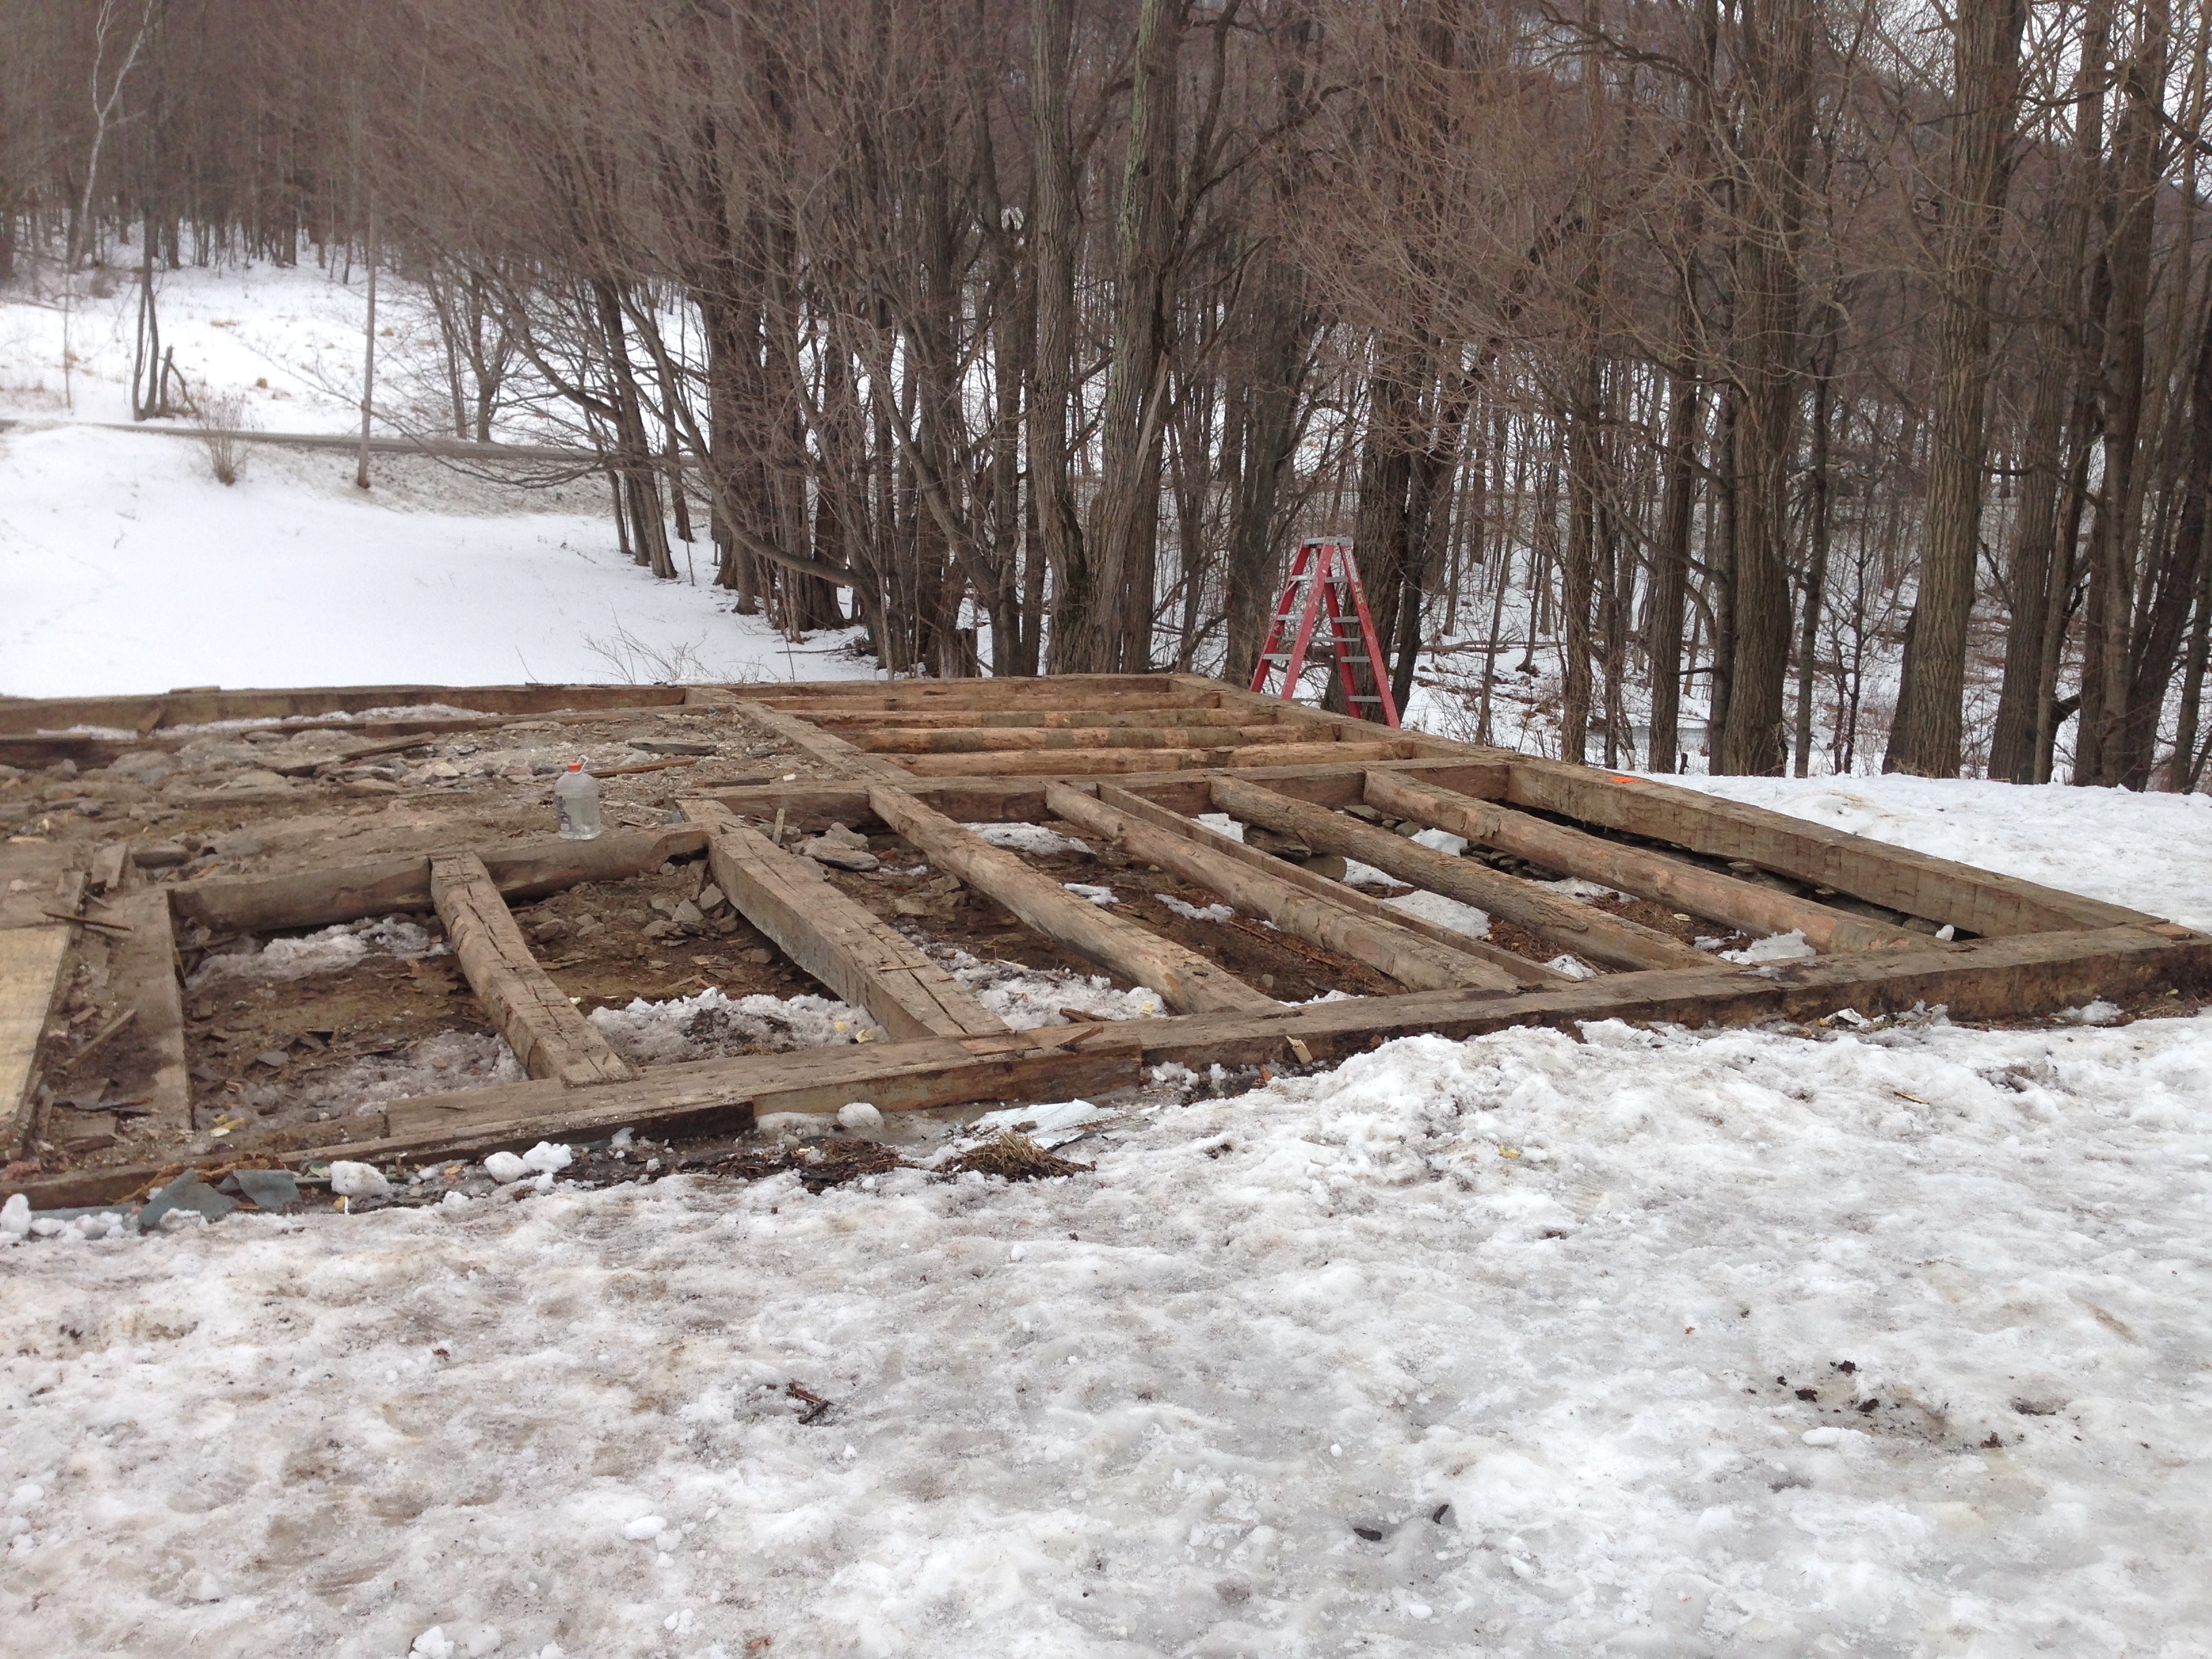
The dark area in the 1750s picture indicates water damage.The broken timbers in the 1890 picture is a bad sign. These are examples of timber fatigue. In pre-1800 frames, we can repair or replace damaged timbers. This 1890 frame has so much timber fatigue and the roof rafters are so “new” looking, that the building has value for parts only.

6_Signs of Timber Fatigue

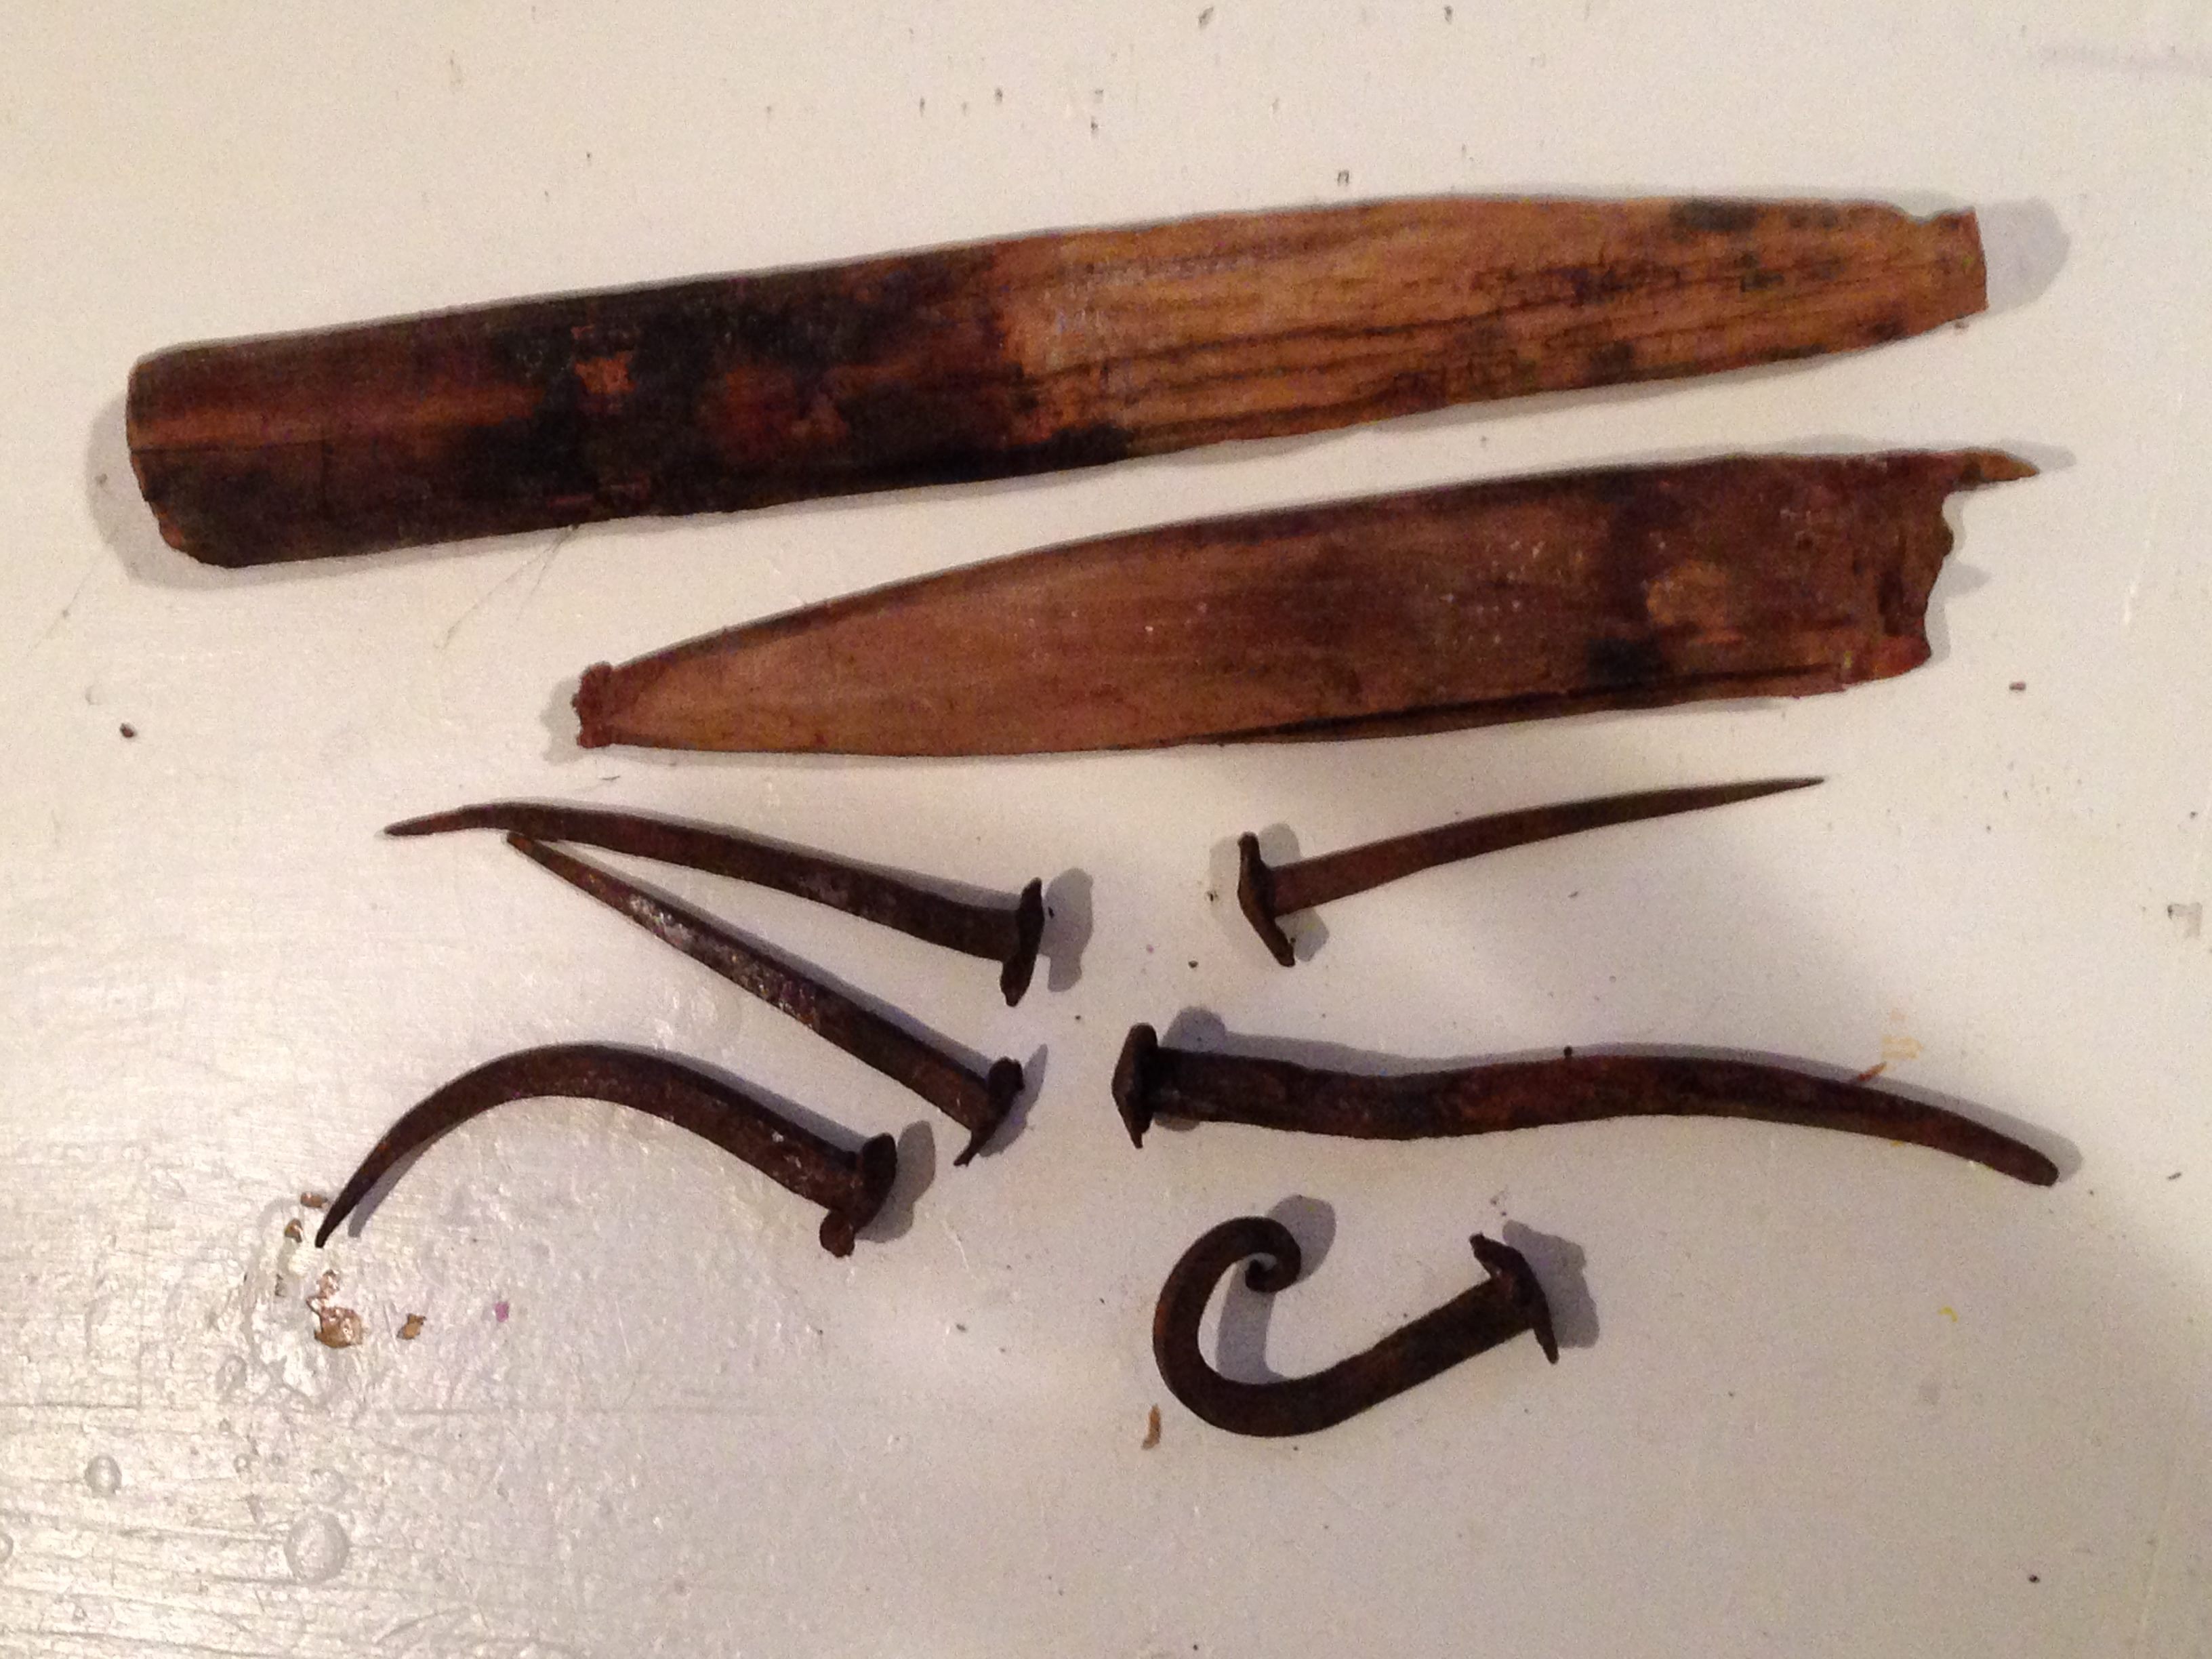
7. HEWN DIAGONAL BRACES

As I continue my assessment of a timber frame, I next look to see if the frame’s diagonal braces are housed into the timbers. The diagonal braces on the 1890s barn are simply 2″ x 4″s nailed in. This was common practice for that time. In comparison, the 1750s barn bracing is housed or “joined” into the timbers. This is called mortise and tenon joinery. A wooden peg then holds the brace in place. This is the usual standard. The 1890 frame using 2″ x 4″s and nails was the start of the transition out of mortise and tenon joinery. The very early frames used hand hewn braces. I’ve only seen this twice in my career, both times in timber frames from the 1750s era. The braces are almost always sawn. The picture on the left below shows the fine craftsmanship of hewn braces.

7_Diagonal Braces of TimbersNEW

8. LARGE GIRTS

In timber frame construction, girts are used to tie the walls together. Larger girts often mean an earlier era frame. The 1890s barn has very modest girts which may be the reason the timbers broke in the middle. The 1750 picture shows larger timbers being used as “girts,” while the middle girts have no center posts. No center posts are often a nice feature when reusing a frame for a home or shop area.

8_Girt TimbersFINAL

And What About Pricing?

When determining how to price a barn, I first think about how rare the frame is. A rare frame in good condition will always be worth more. I also consider the current market and how much folks might want to pay for something very rare. I will also calculate whether the barn is worth more as a whole or in parts.

Finally, I will discuss the options with the current barn owner. Some barn owners want to sell their barn for whatever value they can get. Others are tired of dealing with the maintenance costs or are fearful the structure will collapse. The price an owner is looking for will also have an impact on our pricing. It’s part of my job to assess how valuable a frame is, what condition it is in and how rare the construction is. With those things in mind, I can help the owner to determine a reasonable price.

In Summary…

The 1890s barn is not worth restoring, but the frame does have value as a parts barn. I can salvage the timbers for use on other restoration projects and reuse the roof boards, sawn beams, siding and slate. There are large labor costs to acquire the materials. This is where you have to balance the value of the material against the cost to dismantle. The 1890 barn may have an “as is” value of two thousand dollars. After all the materials are reclaimed, the barn site has to be cleaned. That often costs another two thousand dollars.

Labor costs can also quickly rise out of control. And the 1890 barn is a “liability” to the homeowner right now. With the costs of labor and cleanup, we really shouldn’t pay anything for this structure as long as we leave a clean site. But folks want to get something. I always work hard to be as fair as I can be to frame owners, without the salvaged materials ending up costing more than they are worth. The 1750s barn is a valuable find, a real diamond in the rough. To find a 1750s gunstock frame with post-medieval construction is rare in our area. This is the earliest kind of construction that took place in Vermont and to have such a frame is not only a blessing but an honor. It is definitely worthy of restoration and will make an incredible new home for a buyer who appreciates historic value. The current owner of the barn is asking 25 dollars a square foot for the frame. This may be what these very early barns are worth nowadays. The cost to dismantle, restore and

The 1750s barn is a valuable find, a real diamond in the rough. To find a 1750s gunstock frame with post-medieval construction is rare in our area. This is the earliest kind of construction that took place in Vermont and to have such a frame is not only a blessing but an honor. It is definitely worthy of restoration and will make an incredible new home for a buyer who appreciates historic value. The current owner of the barn is asking 25 dollars a square foot for the frame. This may be what these very early barns are worth nowadays. The cost to dismantle, restore and re-erect this 30 foot by 40-foot frame may be 85 dollars a square foot. But in the end, someone would have one of Vermont’s earliest structures to call their own! And, with a bit of restoration, it would last another 250 years!


Have more questions about old barns and timber frames? Want to know if you have a post and beam gem on your own property? I’d love to hear from you!  Contact Green Mountain Timber Frames at Luke@GreenMountainTimberFrames.com or 802.774.8972. 

Behind the Scenes: How do you restore old wood?

Today I want to share a bit about the “behind the scenes” work that goes into restoring historic properties. I am going to share the process we use to restore 240-year-old roof boards on a barn from 1774. And while I recognize that the technical sides of my work may be less fascinating to some of my readers, I do know that there are a few of you out there who are interested in learning about the nitty-gritty details of timber framing.

So how does one restore 240-year-old wood?

Restoring old timber frames and turning them into new custom barn homes is a multi-layered task with many steps along the way. A significant part of the work is spent carefully refreshing each piece of timber, from the siding to the roof boards.

As I walk you through the process step by step, I’ll show pictures from the 1774 barn roof boards we recently restored. Most barns we restore have slate roofs, but slate was only discovered in Vermont in 1834. This barn was originally roofed with local white cedar shingles as its first roof. Sixty years later they added a slate roof.

The first step in this project was to remove the slate shingles from the frame. We then created a temporary roof to protect the antique beechwood beams during the renovation process. In the photo below, we had already removed the slate over the winter months and covered the roof with a piece of strong black plastic to protect against the spring rains. This also helps keep the frame in good condition until we could officially start the dismantling process.

1774 Barn with slate roof shingles removed

1774 Barn with slate roof shingles removed

We then carefully removed each roof board. During this removal process it’s important to label the boards, using a system that is clear to everyone working on the project. After restoring the beams, the labeling system will help us as we reassemble the hand hewn frame and return each board to its original location in the post and beam structure.

Label vintage roof boards

Notice labeling on unwashed roof boards

Once we dismantled all of the boards and timbers, we loaded them onto a trailer transporting them to back to our shop in Middletown Springs, Vermont where we spent several weeks restoring the timber frame.

Transporting boards on trailer

Loading the boards on to a trailer

Back at my shop, we unloaded the trailer and carefully scanned each roof board for old nails. We removed all of the wooden shingle nails that we found in the wide roof boards, knocking out about 100 nails per board which is typical in pre-1800 timber frames.

Scanning the timber beams for wooden shingle nails.

Scanning the roof boards for nails.

The next stage was to wash the boards. In this project, we had a washing party to remove 240 years of Vermont life. As we washed the wood, it was fun to imagine all that has taken place beneath these boards and beams during their long watch – from Ethan and Ira Allen sleeping underneath the boards (or at least their horses!), to wheat thrashing, to generations of families tending animals and storing hay for over two centuries…

Washing vintage wood boards

Washing vintage boards

Washing old timber boards

After we thoroughly washed the boards, we left them out to dry for two sunny days.  Sometimes it can be a challenge to find two sunny days in New England!

Flip boards for dryingWe flipped and turned each board to ensure they were completely dry.

Drying vintage timber boards for restorationIn this final picture, you can see the results. Two hundred and forty-year old wood – restored for our future.

Restored wood from colonial time

A roof board first cut 240 years ago, restored. It’s amazing to think about. I stare at the 250 rings of growth and realize that these boards were ‘born’ nearly 500 years ago. Early timber framers in Vermont (1750 to 1800) had the luxury of being able to use the finest of materials – first cut trees, grown strong over centuries. Trees in New England had never been cut for lumber before.

In this restoration project, as with other barns we have restored from this time period, the wide pine roof boards were made from first cut timber. You can recognize this  beautiful wood from the tight bands of growth rings, showing slow, strong growth. In addition to strength, the aging process over 240 years give the boards a color that can’t be duplicated. Now the boards are restored and ready to shed water again.

I hope, as with each of our projects, that the future owners will maintain these structures. When this frame is re-erected, with all timber and boards restored, it will allow us to have a glimpse into the past. After the raising, we can imagine how proud these builders must have felt to erect such a fine barn. (And of course they did it without the help of power tools and cranes.) We are honored to restore their work which can now stand for centuries to come.

Want to come see some of the timber frames at our shop in Middletown Springs? Please let us know!

Go back

Your message has been sent

Warning
Warning
Warning
Warning

Warning.

Finding the milk house a new home

This past year, I’ve spent a good deal of time among the barns of Ira, Vermont.

This hamlet of less than 500 people is in Rutland County, on the western side of the state. Chartered in 1780, the tiny little town is big on barns with several valuable, historic timber frames, each with a story to tell.

You may be thinking of my previous blog where I showed the video of the controlled collapse of the end section of an historic barn from Ira, but that method of deconstructing a barn was the exception – – not the rule! While that specific part of the barn wasn’t salvageable, we are currently working on restoring the remaining 72 feet of the structure. You can read more about that restoration project here.

Today’s blog is about the tiny 8×10 foot milk house that was nestled next to that very same barn. You can see it on the right in the picture below.

Colonial era barn with milk house

Colonial era barn with 1900s milk house

The little milk house has found a new owner and we recently moved it to my hometown of Middletown Springs, VT.

Moving the milk barn for restoration

Milk house is loaded onto trailer

Placing the antique barn in its new home

Careful now! Don’t let ‘er fall!

So how did the milk house find its new home? 

30 years ago, I built a playhouse for my children. When my children grew older, I sold it to a local friend for his daughter. Now that I am blessed with grandchildren, I called my friend to see if I could get the playhouse back. He suggested we make a trade: a milk house for a playhouse.

I had been looking for the perfect owner for this adorable 1900s building, so I was glad to make the swap. My friend now has a milk house cabin in his yard and I get to bring home the playhouse and restore it for our grandchildren!

While the milk house needs continued TLC, it is now close by and convenient to work on. I will restore it, and plan to add a small porch to make it into a cozy, Thoreau-esque dwelling for the new owner.

Vintage milk house before restoration

Milk house in its original location, original condition

Vermont milk barn

Milk house in its new location waiting for some more TLC.  The playhouse  is in background.

Want to come see the milk house in person or visit some of the timber frames we have here at our shop in Middletown Springs? Please let us know!

Go back

Your message has been sent

Warning
Warning
Warning
Warning

Warning.


Controlled Collapse of Ira Barn – on video!

Remember the old Ira Barn we have oft-written about?

The original barn had three parts: the main frame we wrote about earlier, a 32-foot frame that we are currently working on dismantling, and a third, 14-foot timbered section on the far end that was not salvageable.

Below is a picture of the old timber frame – to help jog your memory!

Timber Frame Barn in Ira VT

Timber Frame Barn in Ira, VT

While this isn’t our usual MO here at Green Mountain Timber Frames, it was too dangerous to dismantle this small section by hand so we organized a controlled demolition. In my over 30 years of experience in timber framing, I have never before done this kind of demolition before. In this case, however, the safety concerns warranted this more dramatic approach.

We first salvaged material from the failing section of the barn. In the picture below, you can see us using a tractor to remove equipment from the barn before the controlled collapse.

Controlled Collapse of Timber Frame Barn

Controlled Collapse of Timber Frame Barn

We then used a block and tackle, a maple tree and four chains in order to do the demolition of the small timbered gable end section. We captured the whole thing on video! You can view it below, or on our new Green Mountain Timber Frames YouTube Channel!

As you may recall, we also found some vintage horse-drawn equipment in this old barn. When we last wrote, the equipment was soundly frozen to the ground, but with spring’s thaw, we were able to remove the equipment. Here are some of the treasures we found inside: Horse Drawn Equipment from Ira Old Barn


Restoring a Barn Home – with Guest Blogger (and Carpenter) Luke Larson

Today’s blog was written by a guest blogger, Luke Larson.

A tremendous thanks to Luke of Larson Carpentry for sharing this with us – not only his pictures and story, but his talent with wood. Luke and his crew recently dismantled the Gambrel style timber frame which I wrote about earlier in the winter. You can read more about the English Gambrel style home, which was built in the 1790s, in my blog here.

This beautiful vintage timber frame is looking for a new owner. Interested in calling this frame home? Contact us! 

Vermont Timber Frame Gambrel Roof_Crew Shot

Dismantling the Gambrel Frame – Luke and Crew

Gambrel Roof Timber Frame

Timber Frame Home with Gambrel Roof from Danby, Vermont

When we first began inspecting this home back in the fall, we were guessing it was built in the 1820s. Throughout the process of gutting the house down to the original ingredients, we have made the exciting discovery that it is an earlier timber frame, built in the 1790s!
We also discovered that the house is featured in a Vermont architectural survey, described as an early and rare example of craftsmanship. The frame size is 28 x 38 feet and the stout timbers are made out of American chestnut, beech and white oak wood. The main beams are hand hewn while some of the floor joists and the rafters are water sawn. These were likely crafted at a river mill within a few miles of the site.
Gambrel Roof Timber frame in New England Snow

The Gambrel Roof Timber Frame in New England Snow

“Gambrel” refers to the double pitched roof seen above. It is a style that is uncommon here in Vermont. One of the major benefits is the wide open and spacious feeling of the second floor. There is a 22 X 38 foot clear space in the center. With the uncommon arches collar ties on the back half, this will make a remarkable master bedroom! The posts on both floors are gunstock, meaning that they get larger at the top and make for exceptionally strong timber frame joints.
I had a great crew of 10 for the day we lowered the frame to the ground. It is an amazing thing to remove the oak pegs that have been holding the building together for the past two hundred plus years. And it is amazing to be learning my craft from master builders who lived more than two hundred years ago. Every piece of this house is now labeled and carefully stored away.
2014-03-14 17.24.20

Beautiful Joinery on New England Frame. Note the arched collar ties!

Let’s return to the detective-like task of uncovering the date the house was constructed. After about 500 hours of tearing out additions, sheet rock, wiring and insulation, we were finally able to get a better look at the original ingredients. A major clue as to the date of the house came from the nails used. Most were rose head nails, meaning they were formed completely by hand with a forge. The term “rose head” comes from the beautiful shape of the nail head, which was pounded out with four quick strokes of the blacksmith’s hammer.
Some cut nails (made by machine) were also used on this house, primarily on the flooring. It was exciting to discover that these cut nails were of the earliest variety, as evidenced by the way the metal sheets from which the nails were cut had to be flipped over during the process, creating a slight metal bur on opposite sides of the nail. Only a few years later, the technology had developed enough that the nails were “stamped out” of sheet metal without needing to be flipped over, creating a different bur pattern.
The earliest machine-made nails still had the heads fine-tuned by hand, but with only two strokes of the hammer. It was a very narrow window of time during which these nails were made and it helped provide the time frame for this home’s construction.
 Rosehead Nails for Timber Frame Wood

Rose Head Nails

Another clue in the dating process involved the plaster and lathe. Very early homes such as this one used split board lathe to hold horsehair plaster to the wall. It was made by chopping a wide board with a hatched, thus stretching it apart like an accordion. This was then nailed to the wall. As sawing became more economical during the early 1800s, later home builders used narrow lathe that was sawn rather than split. This house had accordion lathe throughout, as the next photo shows. This picture is just one wide board that has been cut and spread apart.

Accordion Lathe on colonial timber frame

Accordion Lathe

Here I have stripped the house down to the original siding boards:
Gambrel 1

Original Siding – up to 22 inches wide!

The boards you see above are one and a quarter-inch thick hemlock planks. Many are over twenty inches wide! Imagine the trees that the boards came from! At this stage in the process, I was able to discover all of the original window and door layout, which I have carefully documented. Notice the tiny windows out in the eves. These would have allowed light into the area right under the rafters.
Joinery Summer Beam
Here is some of the amazing joinery. In the picture above, you can see the end of a summer beam, meaning a beam that runs mid-span and supports floor joists. This joint is “dovetailed,” meaning the joint is made in such a way that it cannot physically pull apart.
Finally, we were down to the first floor after the upper structure was down. Once the beautiful wide flooring boards were removed and saved, I labeled each of these sills and floor joists. Even without a foundation, the rot-resistant tendency of American Chestnut means that many of these sills are still in great shape and ready to be used again!
First Floor of Timber Frame with Upper Structure Down

First Floor of Timber Frame with Upper Structure Down

It was a pleasure working on dismantling this frame and I enjoyed uncovering details at each step along the way!  Below are a few more of my favorite photographs from the dismantling process.

In may ways, it was both a joyful and sobering task to take this houses down. There were many poignant moments when I thought about all of the living that has taken place in this space, all of the generations and families that have called this building home.

My hope is that the time-darkened timbers and patina laden boards of this house will again be someone’s home. I intend to honor both the craftsman who chopped these beams from the forest as well as all those who have cared for it since as I embark upon my next step: the restoration of this beautiful timber frame.

Below are a few more of my favorite photographs from the dismantling process:

Timber Frame of Gambrel House

A Beautiful Timber Frame!

Removing Timber Beam for Frame Restoration

Lifting Down One of the Five 38-foot Beams

Dropping Gambrel Frame into the ground

Preparing to Lower the Rafters

————————–

Please contact Green Mountain Timber Frames to learn about the vintage timber frames we have available – or to share your own story about barn restoration! We welcome guest blogs!

Go back

Your message has been sent

Warning
Warning
Warning
Warning

Warning.


Repairing a Silo – without letting her tip!

I recently repaired this wooden silo in Danby, Vermont. It was originally built in the 1850s. While the silo is not currently being used, the owner wanted to maintain the look and feel of his New England barn home and asked me to repair the vintage wooden structure. It had originally been used to store silage for cattle.

The silo had a 38-foot circumference and most of the bottom boards around the base were rotten. I was hired to fix this tall task!

Rotting timbers in silo - historic properties in New England

Rotting boards along base of silo

Luckily, only four inches of the base wood was rotted. To restore the silo, we cut seven inches up to get back into solid wood. The original silo boards were either spruce or cypress, but I used locust wood for the repair. Locust is plentiful in our area and is our natural “pressure treated” wood species, meaning it is very resistant to moisture rotting the wood fibers.

We had the new pieces of wood custom sawn to the exact dimensions we needed to ensure they would match the size of the original silo boards.

Restored timber frame silo in Vermont

New boards on silo

In order to repair the frame, we first built an internal frame on the inside of the silo. This frame enabled us to screw the short pieces of locust wood back into something solid. This system ensures the integrity of the repair and will help the silo stand tall for decades to come.

New beams in timber fram silo

Support system seen from inside of silo

I used a three-tier system, shown below. The first tier board was fastened to the concrete floor at the base of the silo. The second board was for fastening the new seven inch locust replacement silo pieces.

In the third level,  I attached the original section of the silo board. With these three levels in place, the silo boards are now secure and there is plenty of space for air to circulate inside the silo. This air circulation will help prevent rot in the future.

New timbers for silo Vermont timberframe

Prototype of interior fastener

The silo’s wooden walls are two inches thick, so I could not use my preferred routing method to duplicate the original tongue and groove boards Instead, I used three table saws to carve the tongue and groove system for the replacement pieces. Tongue and groove joints allow two flat pieces of wood to be joined together to make a single flat surface. It’s a wonderful system that ties all the boards together.

Table saw for Vermont Historic Properties_Silo Project

Table saws for creating tongue and groove system

We cut one three-foot section at a time, secured them to the internal framing, and then moved on to the next three-foot section. There are twelve sections in all. Nine feet of the original boards were still solid and did not need restoration.

Restored timber frame silo

Repaired timber frame silo

I feel good about the repairs we did to this beautiful historic property, and I believe this system will hold up another 150 years. We left some locust boards in the silo, so if another repair is needed in the next 50 years or so – they are ready to go! That untouched original 9 feet of silo might need repair in 30 years!

In working on this silo project, I was once again grateful to live in New England and to work together with people – like the owner of this silo – who value history and are willing to invest in ensuring that old barns and silos remain part of the landscape for generations to come.  We all benefit from their passion to preserve our heritage.

To see more examples of historic properties and old barns I have restored at Green Mountain Timber Frames, please see the completed projects on my website!

First Light of Day After 55 Years

We spent five cold and snowy weeks preparing this 1770s gunstock barn frame from Ira, Vermont for dismantling.

Slate roof on Old Barn in New England

Gunstock Timber Frame from Ira, VT

Historic Old Barn with Slate Roof Removed

Temporary roof on Ira timber frame

With a great team of five fellas, we tallied 370 hours clearing out the interior of the old barn of horse-drawn contents and everything else imaginable.  Removing the 40 square (a square is a 10′ x 10′ surface area) of slate roof took another 80 hours. We then put on a temporary protective roof, seen in the picture above, so the spring rains won’t damage the roof boards and timbers.

At times it wasn’t easy, given the freezing temperatures and the mounting piles of snow. Here is a picture showing the take down of the slate roof in the snow. Half the slate is still on the left side of the roof.

Removing slate roof from Timber frame and braving the New England Elements

Part of what made this project particularly interesting is that the barn was full of antique farming equipment. As we shoveled out the old hay and debris from each of the barn’s five bays, we got to inspect the equipment closely.

Antique farm equipment from post and beam frame

Corn Chopper

Much of it is in great condition and we dragged all of the equipment out into the field around the barn. Imagine the fun of cleaning up and inspecting equipment that had not seen the light of day since 1959! When these machines were last used, they were harnessed to horses and pulled to the fields nearby.

Farm Fleet from Old timber frame barn in Vermont

Corn chopper and hay rake.
Pallets of slate in background.

With the barn emptied out and the rugged beech timbers sighing relief from 15 tons of slate removed, the next step is to dismantle the antique hewn beams and truck the frame to the shop for restoration. We’ll dismantle the frame in late April. First, we have to get rid of two feet of snow and survive mud season!

Here are some more pictures of the treasures we removed from this antique timber frame.

Antique Farm Equipment from Tmber Frame Old Barn

Hay rake being removed from the barn

Removing equipment from old barn for sale in new england

Sled for carrying a maple sap barrel or timber

Cultivator from Old Post and Beam Barn

Cultivator/planter for seeding hay

Moving antique timber frame for restoration

Delivery of horse drawn equipment its new owner in Northern Vermont

Antique Farm Equipment Vermont

Antique Farm Equipment sees the light of day

Phase One is accomplished!

Clapboard removal from antique timberframe

Finishing up clapboard removal.
Removal of sheathing boards will have to wait for Phase Two.

Stay tuned for Phase Two. We’ll let you know when we start dismantling this Vermont Republic frame from Ira!

I’ll leave you with a fun fact: This little Vermont hamlet is named Ira after Ira Allen, brother of Ethan Allen, of the famed “Green Mountain Boys”.