In an effort to save this beautiful historic barn home from demolition, I am posting a few videos of the beautiful house in Tinmouth, Vermont.
Please share – and contact us if you are interested in owning this timber frame!
Exterior:
Interior:

In an effort to save this beautiful historic barn home from demolition, I am posting a few videos of the beautiful house in Tinmouth, Vermont.
Please share – and contact us if you are interested in owning this timber frame!
Exterior:
Interior:
Reading this in your email? For a better view of the blog - click
here!
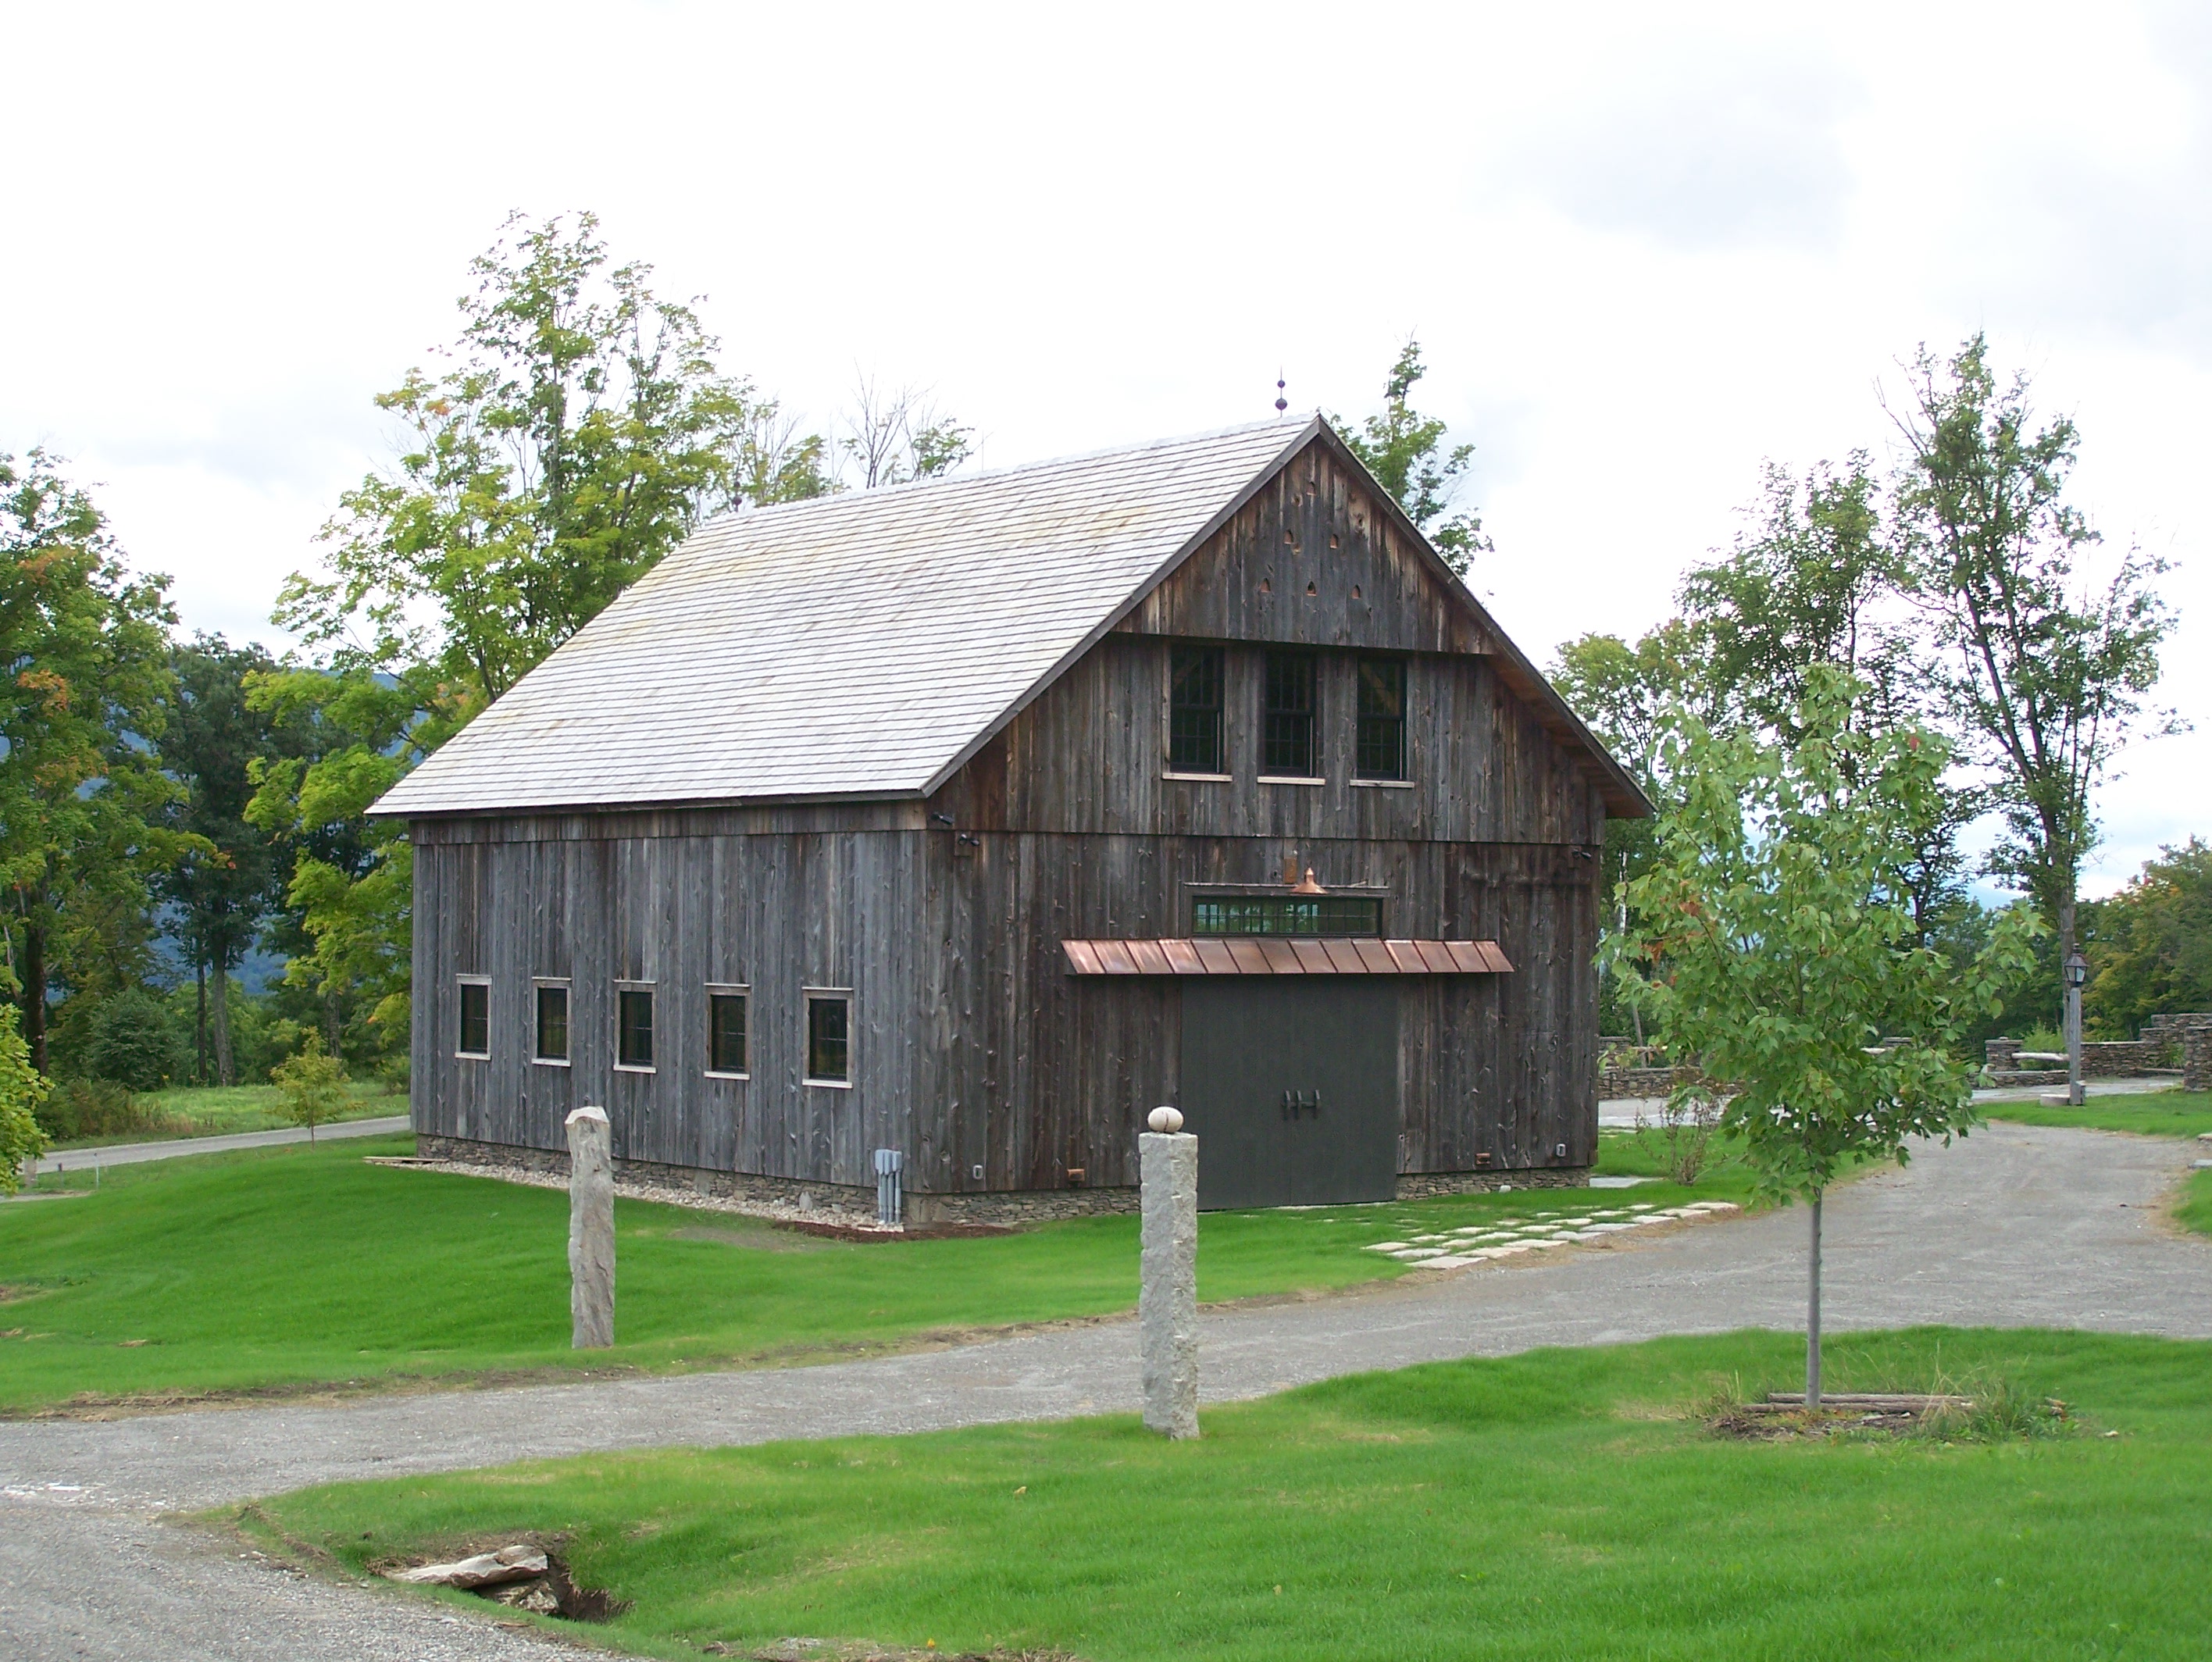
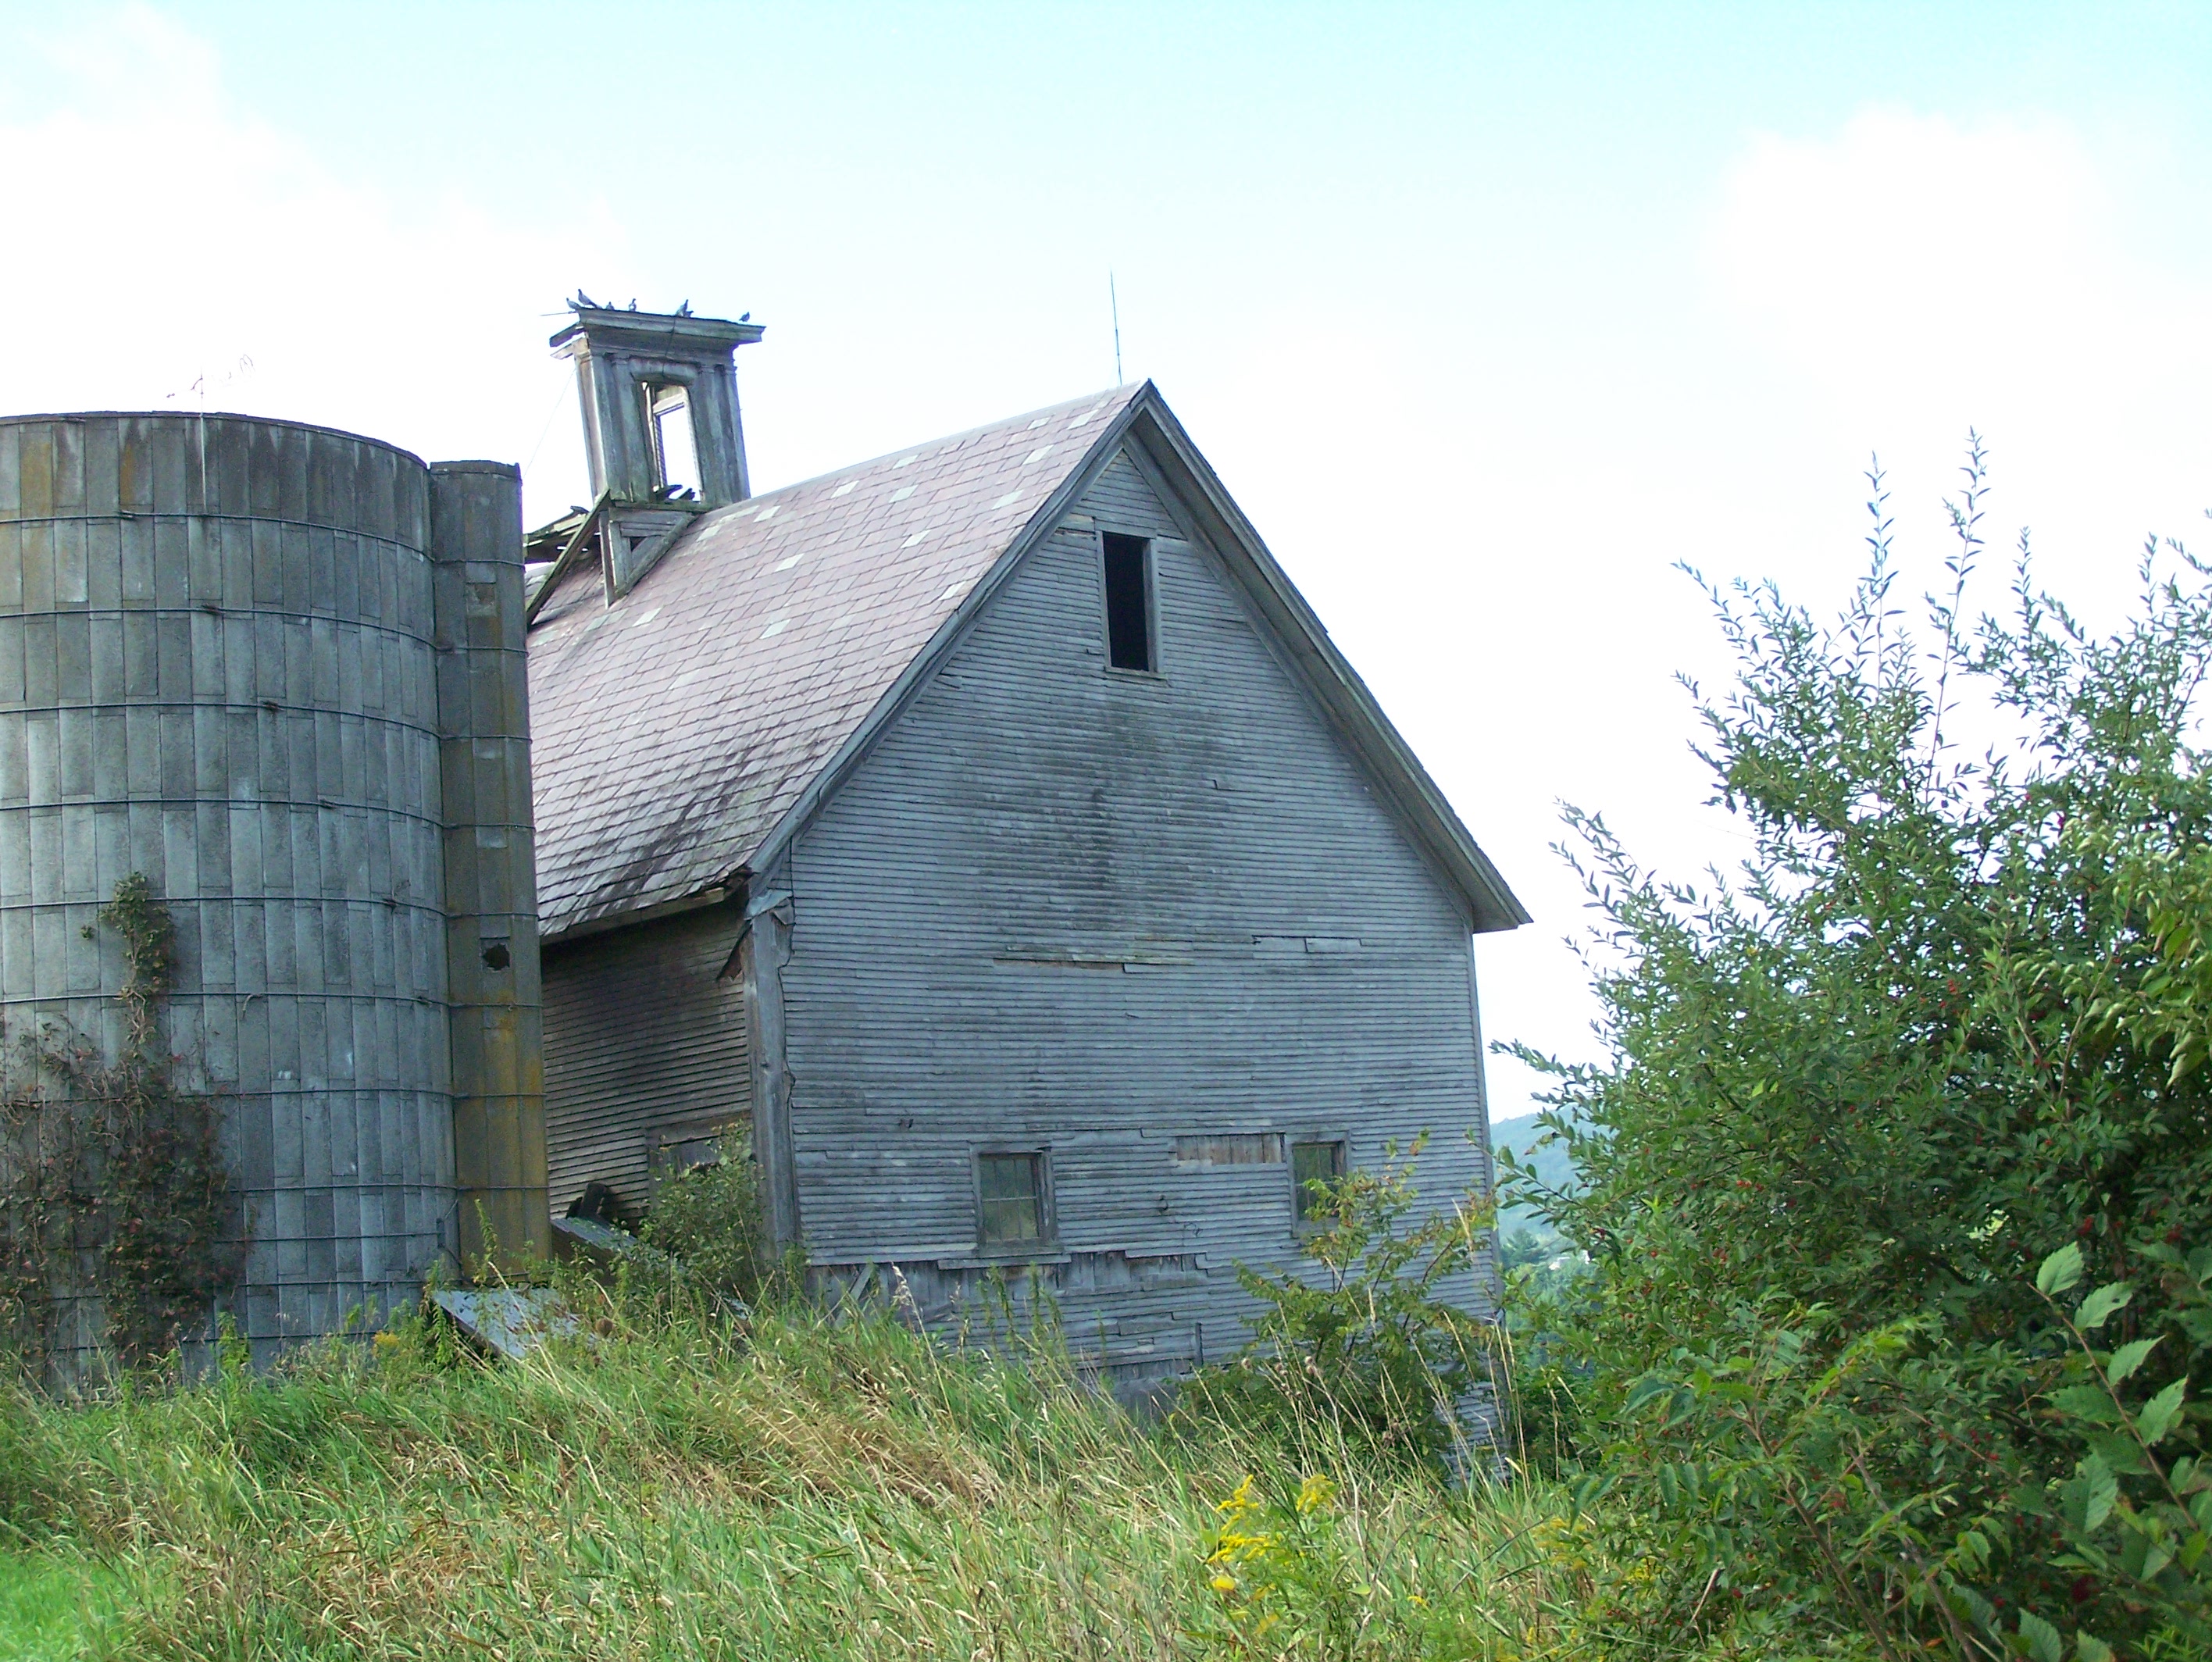
This grand timber frame home will be demolished in February….UNLESS a new owner is found. Known as the Hod-Hepburn house, it has stood on a back road in Tinmouth, Vermont since about 1780.
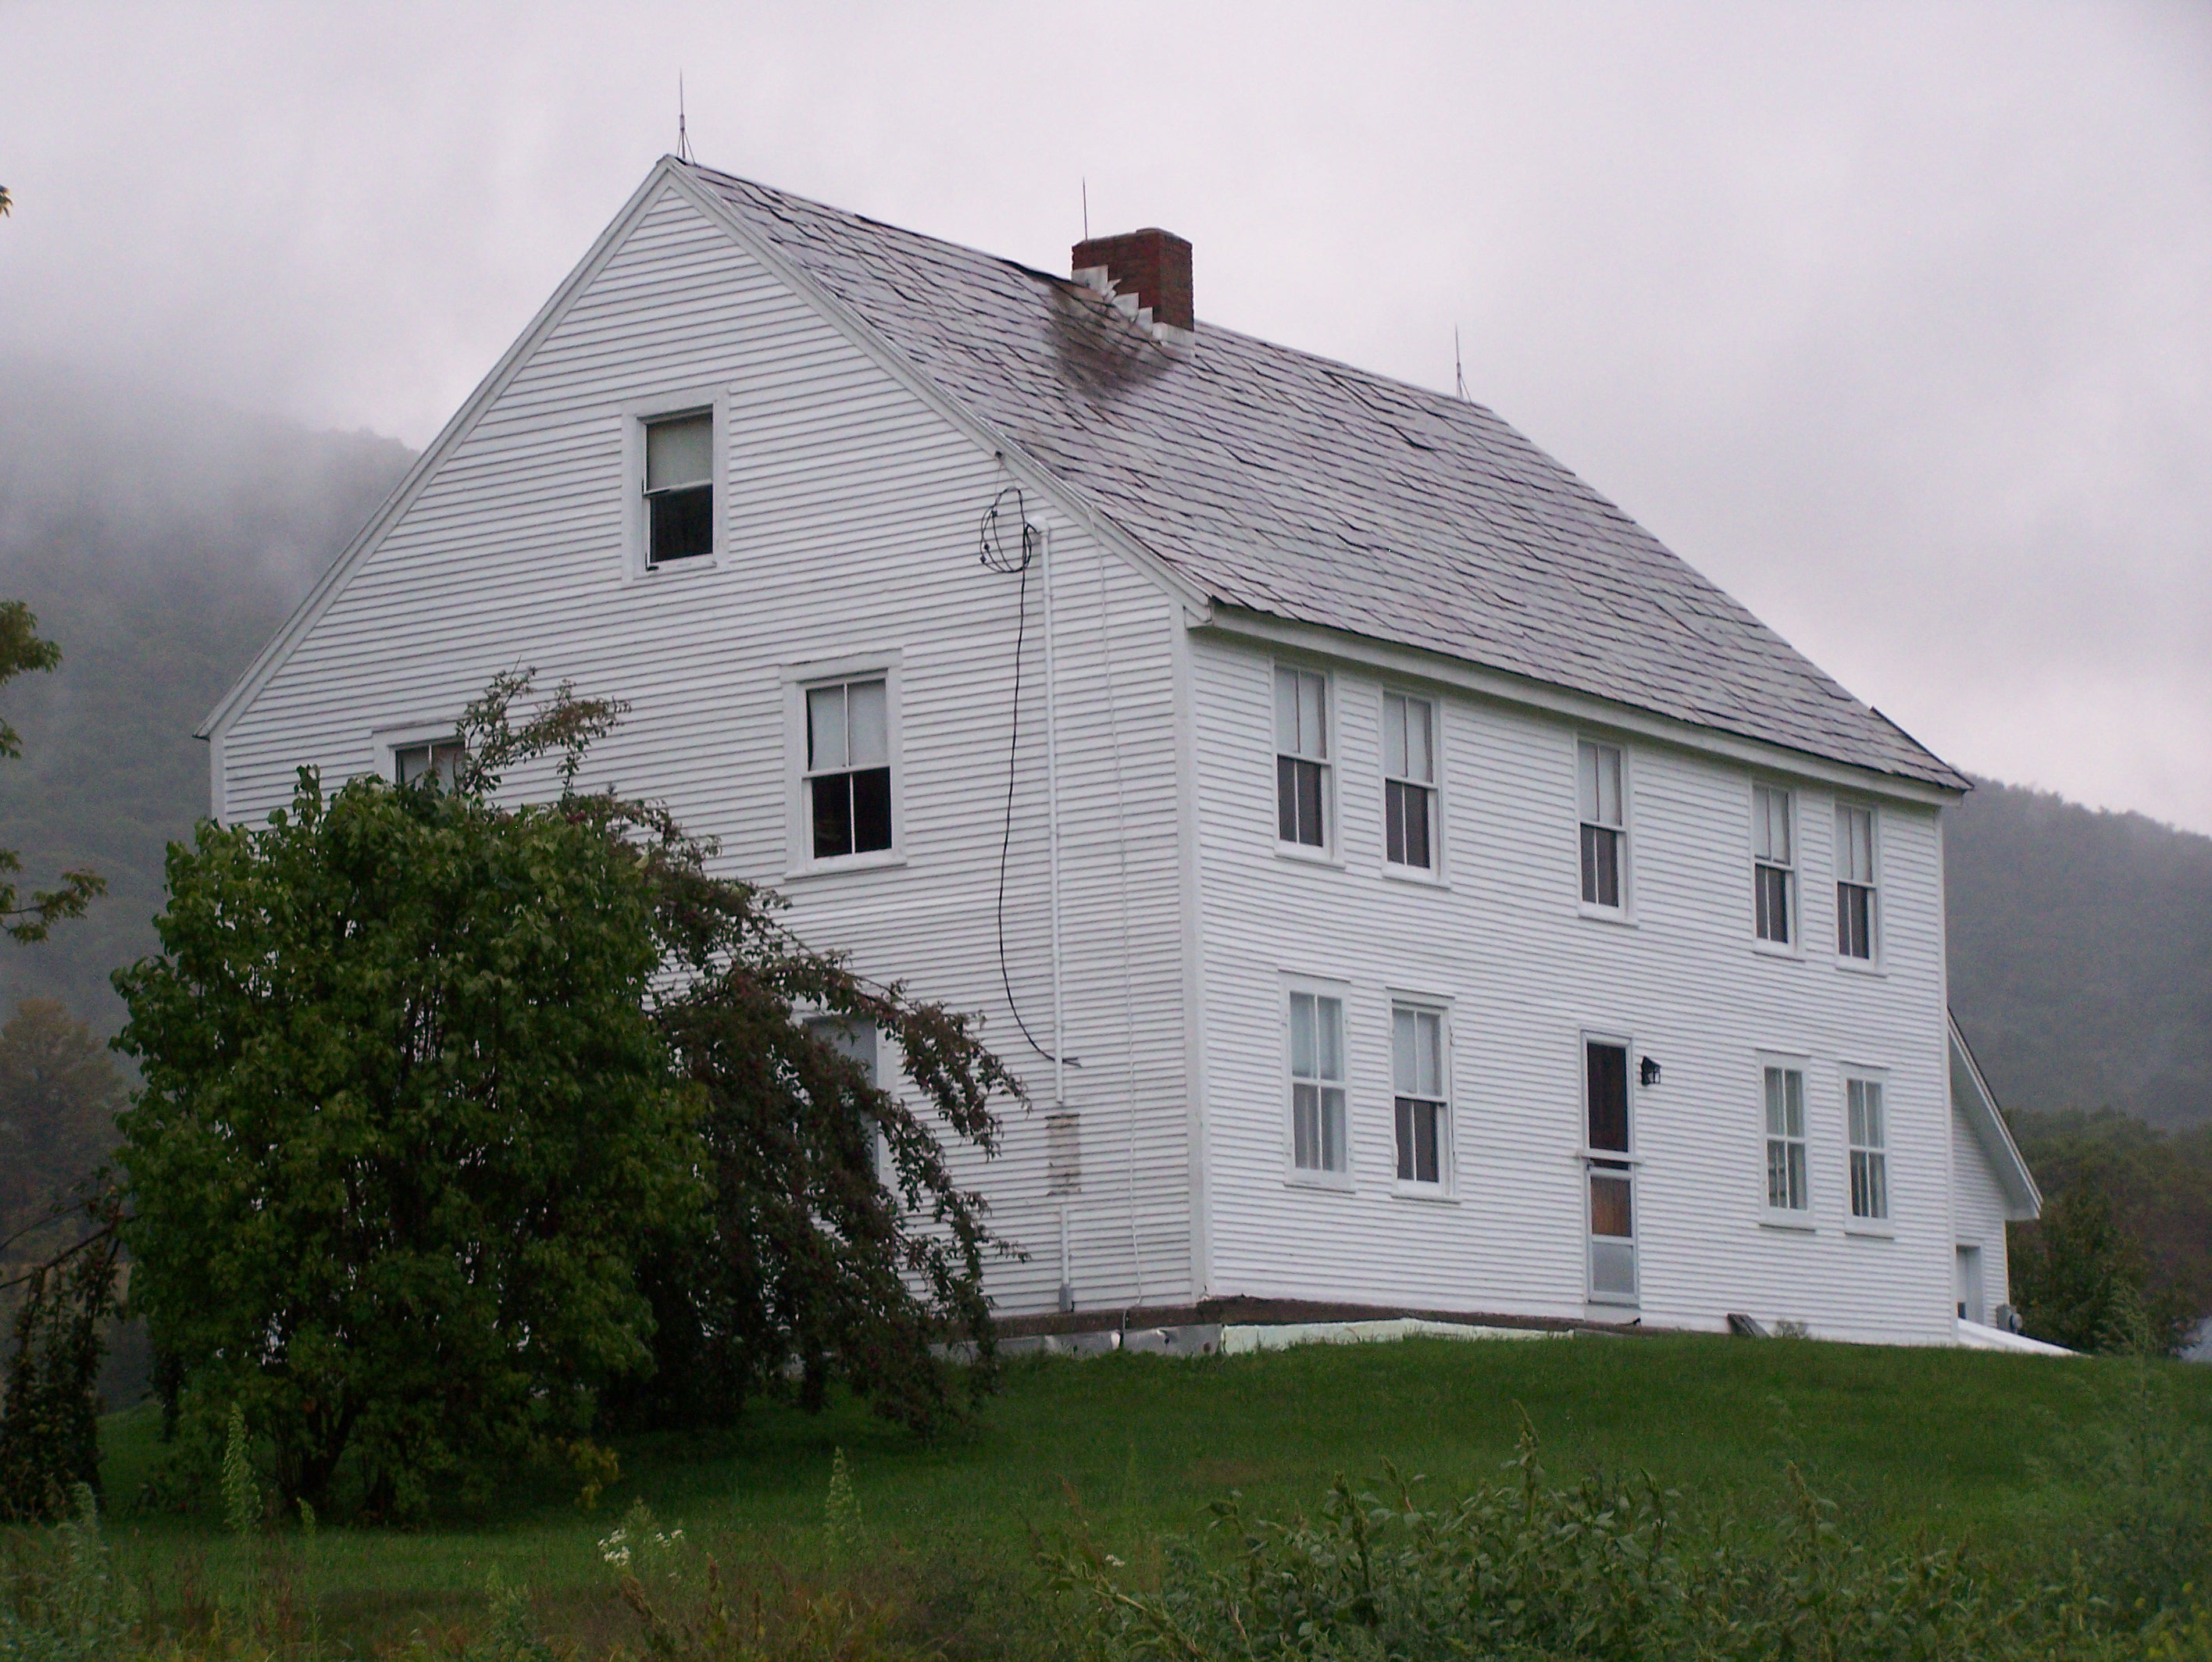 The two-story home is a great example of post medieval construction. It’s a trusty farm house that has weathered 234 New England winters. We hope to find a new owner interested in having Green Mountain Timber Frames take down and restore the hand hewn frame. This beautiful structure could be erected on the client’s site, with a custom layout to fit today’s needs.
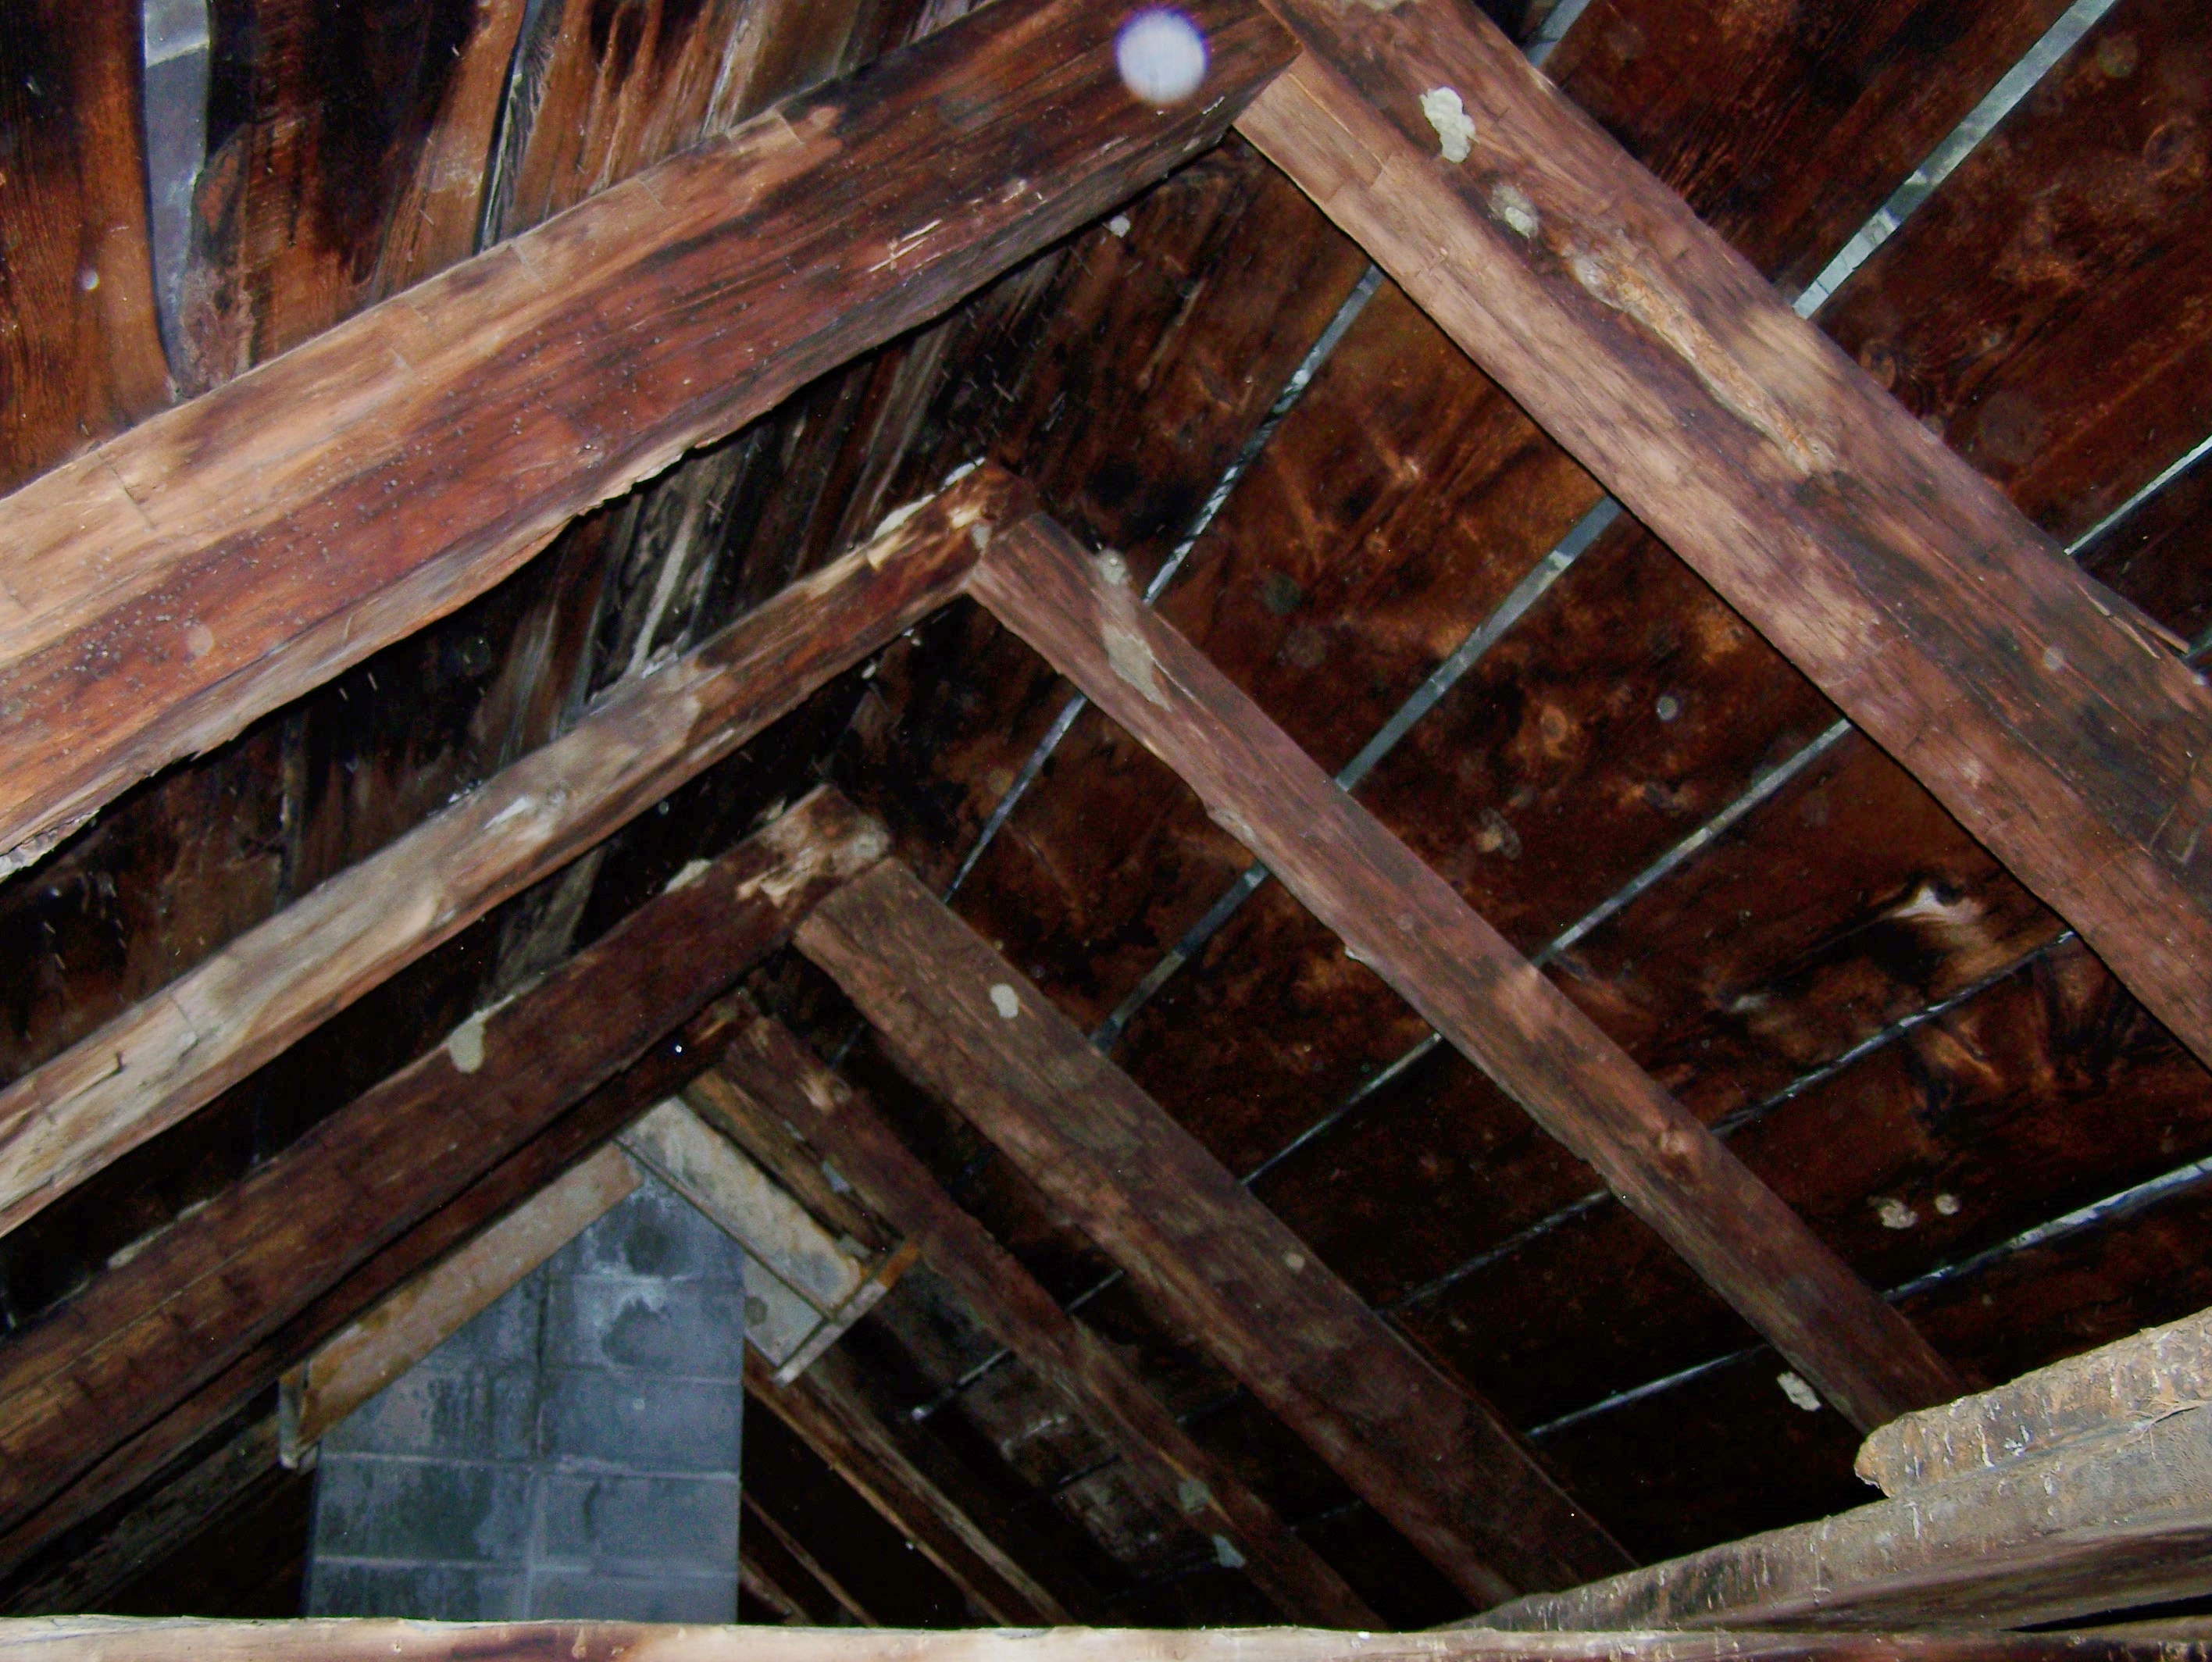
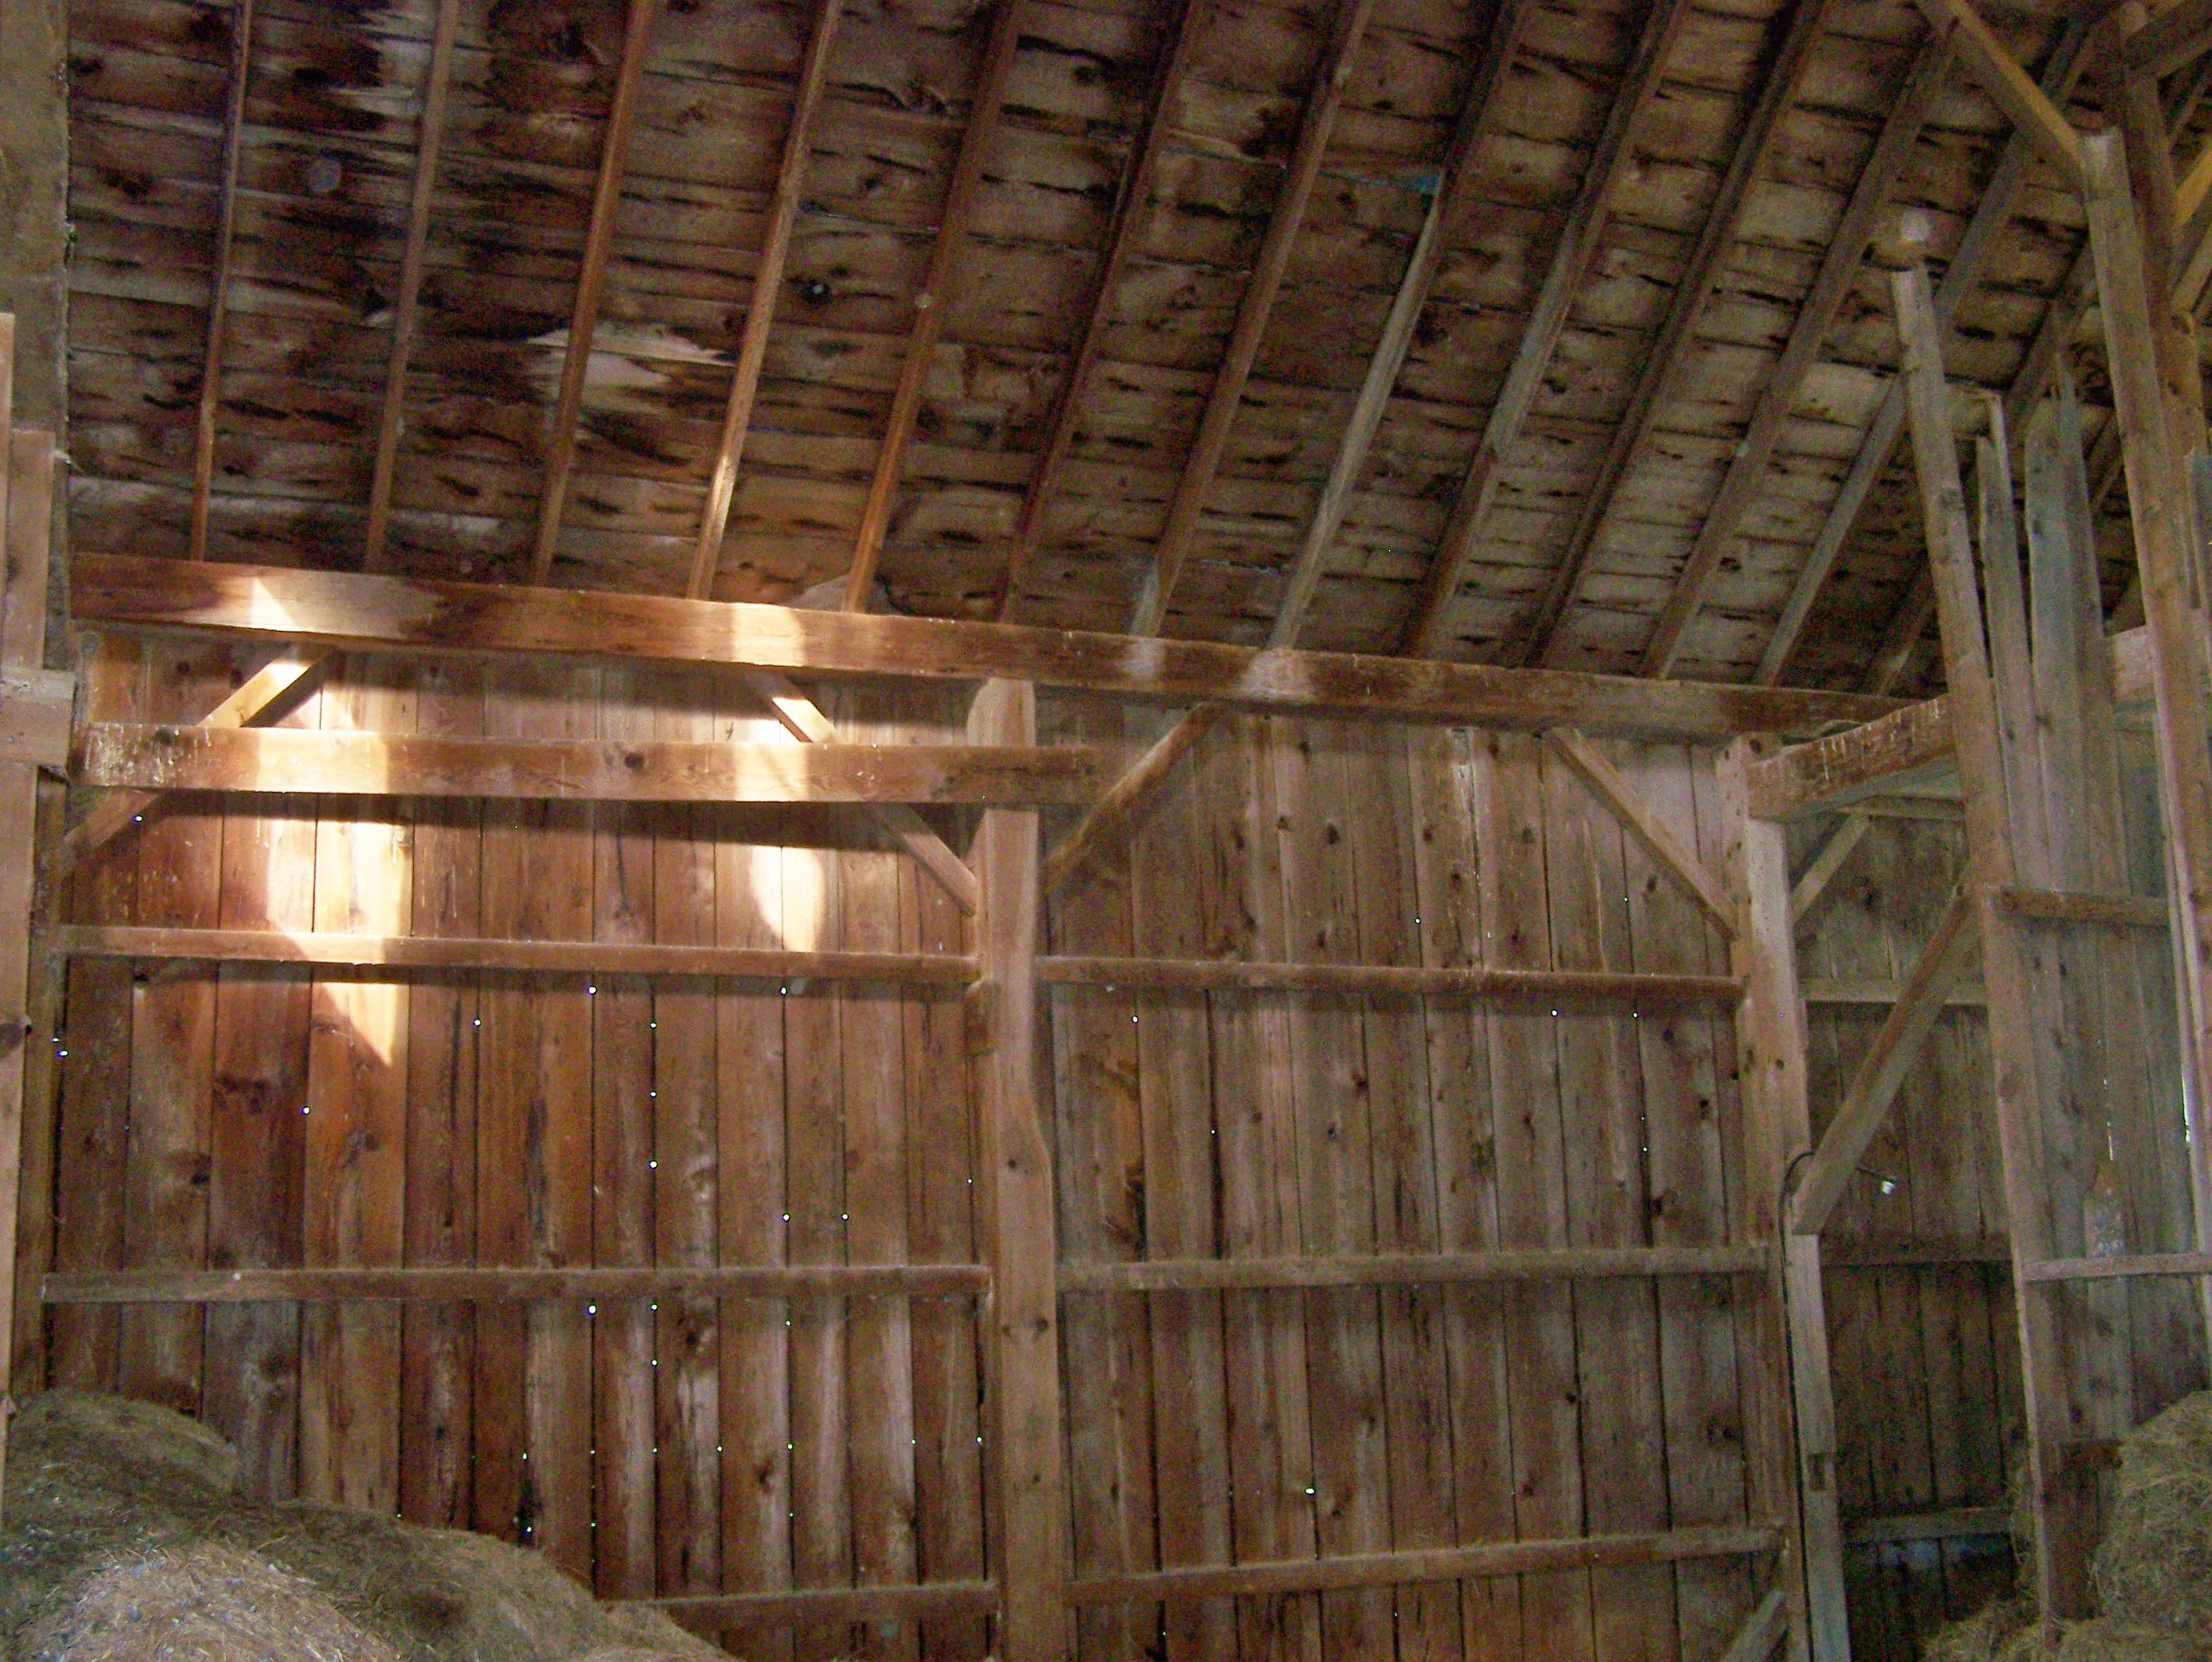
The frame features rugged rafters as you see below.
 Here is another shot of the principle rafter system:
 When we visited the house, we found all sorts of treasures inside, including….
 these magazines from the early 1900s and…
 …a TV from the 1960s!
We don’t know the exact date the house was built, but the house was referenced in local deeds from the 1780s, so we are assuming it was built by then. The truth is, it may be even older!
Here is a picture from the house taken around 1950.
 Here is a nice winter shot of the back of the homestead:
 Interested in learning more about this “Vermont Republic” home and perhaps making it your own? For more information, please contact me!
Reading this in your email? For a better view of the blog - click
here!
This week’s guest blog is from architect and historian Jane Griswold Radocchia. You can learn more about her work in her personal blog. She writes here about her encounter with one of Dan McKeen’s barn restoration projects and how she could determine that the builder of this 1791 barn used geometry to build the original frame.
“I invited myself to a Green Mountain Timber Frames barn dismantling earlier this fall. Of course I was glad I went.
Here’s what I saw:
 The three barns sat, connected in an L shape beside the road on the uphill slope of a valley. None of them faced the road, on their west and windy, side. Instead they faced south and east, creating a protected barnyard, a sun pocket. In the middle, protected from storms and wind, was the corn crib. Other farm buildings repeated the pattern, facing south, no doors on the west.

Hartford NY Corn Crib
The main barn also had a door on the north, directly across from the one facing south. It fronted on the farm road and looked at the house across the way. Two doors across from each other were for threshing and ventilation; a north-facing door was for bringing in hay and grain on the shady side of the barn in summer.

North side view of timber frame
 How could I tell that geometry was used in building this frame?
After we had climbed up to the rafters, Dan McKeen handed me prints of the frame measured and drawn up by James Platteter. James Platteter is a master furniture maker and Dan was lucky enough to work with him on this project and have him dedicate his time to drawing up the detailed plans. (Do take a look at Jim’s beautiful work on his website.)
To have a sense of the building, I checked some of the dimensions. The framer really did make his barn 30’- 1” wide! He also made it 42’-6” long. The diagonal of a 30’ x 30’ square will be 42‘-6” long. The shape of the floor for the barn is based on √2.
Both that extra inch and the √ are indications that the master-carpenter for this barn used geometry to determine its size and framing.
The carpenter had a pretty good rule! Over 30′ and his rule was only off by 1”. But how did he share his dimensions with apprentices if their rules differed from his?
He used geometry!
Geometry is a language, one most of us haven’t mastered. Our ancestors spoke (drew!) it well and used it for construction.
How did the farmer build his barn?
He probably hired a timber framer, a master builder. The framer knew about how big his barn should be and how it would be used. He began his design with a square with 30′ sides. This initial measurement of 30′ set the foundation for all the measurements of the barn.
How?
One side of the square would become the width of the barn. Then, the builder crossed the square with its diagonals – corner to corner – and swung his compass, extending the diagonal to meet the side of the square. The length of the diagonal became the length of the barn.
Above, is the floor plan of the barn: 30′ wide, 42′-6” long.
The new rectangle on the end of the square was also a good height for the wall of the barn. So the framer drew a square on each corner. Using the diagonals for those squares he swung an arc to locate the ridge. You can see the squares and the diagonal in the diagram below.
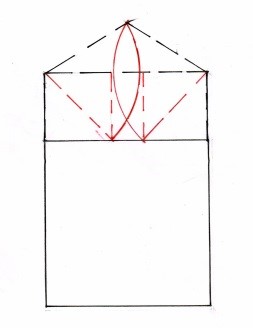 The framer may have used the barn floor for his layout just as carpenters today use the floor of a house to lay out rafters for the roof above. If so, it would have looked like this:
 Here is the drawing of the end elevation showing that layout.
 The red x on the right is the original square. The dashed line is the arc locating the ridge. To locate the second intermediate post the framer used the side of the square, the height of his wall, as an arc.
 Where it crosses the diagonal, he placed the post.
 The north and south walls used the same geometry. The right end was laid out as was the end wall. The space for the door was a square. The left side was divided in half, as marked below by the diagonals. I enjoy finding that the braces followed the line of the diagonals. The barn door height was determined by the point where the arcs cross.
 The east wall used the same geometry – first the square at its diagonal marking the right hand intermediate post; then the remaining space divided in half.

The framer applied this same geometry as he laid out the roof, the braces and collar ties. The whole barn evolved from his first length: 30’-1”.
I look at this: so simple, so sophisticated. I am amazed! The geometry is there, but we have forgotten it. It is so beautiful!.
I will follow Green Mountain Timber Frames as they dismantle other pre-1800 barns and house frames for more confirmation of how early timber framers used geometry in structural design.”
Green Mountain Timber Frames is now of video!
But before I show you the video, let’s take a look at this before and after shot.
 You may remember back in 2013 when I wrote a few times about the timber frame we had restored and erected up at Sissy’s Kitchen in Middletown Springs. A gunstock timber frame, it was built over 250 years ago.
For this project, we erected the restored frame with help of the one and only Vermont Jeepgirl (otherwise known as Crane Operator extraordinaire, Sue Miller.) Luckily for us, she made a video recording of the raising day!
Hats off to Sue for capturing our madness!

Vermont Jeepgirl Sue Miller
It was a great crew that worked on this frame. Here we are, standing proud in front of the restored timbers.

Construction crew from Green Mountain Timber Frames
This frame – even before it became a new storage barn – saw a lot of good times! For a couple months, the erected frame stood on the beautiful lawn behind Sissy’s Kitchen in Middletown Springs, Vermont.

Test Barn Raising of Timber Frame Barn Home at Sissy’s Kitchen
While we waited for the right buyer, the frame housed many a dinner party and afternoon tea, just around the corner from the workshop of Green Mountain Timber Frames.

Summer evening party at Sissy’s under post and beam frame
I want to send out a huge thank you again to Sissy for letting us have all this fun, right in her yard!

Have more timber frame projects worth capturing on video? Let us know! We would like to hear from you!
Here in New England, I have been restoring timber frame barns and building barn homes for many decades. Recently, our little company was able to venture further afield. Like Lewis and Clark did two centuries ago, we too have at last reached the west coast.
We restored a colonial era barn – seen below at its original location in Hartford, New York – and sent it off for a new future in Snohomish, Washington.

Original barn in Hartford, NY (pre-restoration)
Just over two years ago, we hired a web design company to redo our website. In addition to creating our new site, they have helped us spread the word about what we do. Suddenly, instead of relying on word of mouth here in Vermont, Green Mountain Timber Frames has found itself with an international audience of timber enthusiasts, history buffs and potential clients. Our little local mom and pop shop has gone global.
Thanks to the success of our site, we can now restore old barns here in New England and then ship them all over the country for reassembly. We are so grateful that our audience has grown and that we can find people across the country – and the world – to help us in our goal of preserving New England heritage and historical structures.

Side view of the 1791 barn (in original NY location)
The frame itself was built around 1800, just a dozen years after the U.S. Constitution was signed. It was originally a corn crib and an unusual one at that. It has four different levels which add up to a total of 1000 sq. ft.

Notice the multiple levels of the frame
While the old barn originally measured 16 x 18 feet, a 16 x 13 foot addition was put on a few decades later. (Hence the different floor heights.) The original timber framer was quite clever and talented. He artfully joined the floor systems together with various stairs.
It was common during this period for corn cribs to have living quarters where the hired help would sleep. I suspect that was the case for this frame.
For this most recent project, we found an owner in Washington State who shares our passion for history and our dedication to preserving historic structures. So while moving the frame to Washington did take the barn far from its New England roots, we are grateful that the timbers have been restored, re-erected and valued. Without the support of the new owner, the frame would likely have been demolished or burned.
Here is the restored frame loaded onto a tractor trailer – board by board – ready for the long journey west.
 Back in the fall of 1805 when Lewis and Clark (with the help of Sacajawea) were just finding their way to Washington, they could not have imagined that one day a humble New England barn would follow in their footsteps.

Vintage timbers in transit
And here is the frame, re-erected beautifully in Snohomish, Washington.
 What will the frame be used for?
The restored frame will be used as a storage barn in its new location. We shipped the frame together with the original barn siding, roof boards, slate roofing and flooring. In fact, much of the contents made their way west as well.
Below you can see the beautiful wooden floor boards:

Wide pine floors
Inside the barn, we found over 50 beautiful wooden dovetailed boxes. They had never been used and were very finely made, so we sent them along as well. We also salvaged horse tack, vintage bottles, hand tools, and other varied knick-knack paddy-wacks.

Various contents of the barn shipped with frame
We also found two early wooden barrels that were clearly built before 1800. We could tell the barrels were early because they were made with sapling bands as opposed to the usual metal bands.

Early wooden barrel with sapling bands
So while we are a bit regretful that the frame left New England, mostly we are thrilled that it has found a new home – with appreciative owners – and that this frame will stand tall for decades to come.
Now we just need for the famous Washington State rains to abate so that the talented builders out in Washington can finish rebuilding the barn.

Notice the slate roof. Tarps protect the frame while we wait for the rains to stop
It’s been an exciting project. Through it I have also learned the skills of shipping long distance and was fortunate to connect with an excellent commercial trucking company which I can depend on in future.
Want some more information about this frame, or others? Be sure to contact me to talk timbers!
We finished work on this beautiful barn in Manchester, VT back in 2013. Since then the owners sourced particular stone for the finish landscaping and the final results are evident in the following pictures.
 The barn is from Middle Granville, NY and was originally built around 1800. The current family wanted a timber frame barn to match their Green Mountain Timber Frames barn style home. In the pictures below, you can see the process and transformation that this barn went through.

Another aspect of this frame was working with and restoring the truss girt system. Not typical of a frame from this time period, this type of truss girt system means that two large timbers are joined together in the middle with a small connecting post and braces. This allows there to be no post in the middle of the frame thus having a clear 31 foot wide space to use with no posts to bump into. Below, you can see the process we used to restore this truss girt system.
 Part of this restoration project entailed finding “new” siding for the barn. I love doing this kind of work! It’s so much fun to put together the siding – a sort of puzzle.
This first picture shows the source of siding, another barn in NY state. The siding was for sale and we seized the opportunity.
 The next step was to sort through the siding and try to find the best – most attractive – way to apply it in its new location, factoring in the existing lengths of boards.
 When applying the siding on the restored barn, we blended the colors together. We varied the use of different boards and different colors to give the best final look.
 The siding had this light to dark shading effect that we were able to capture again. The cutout with the hole is sized to invite in a kestrel hawk. The remainder are decorative.
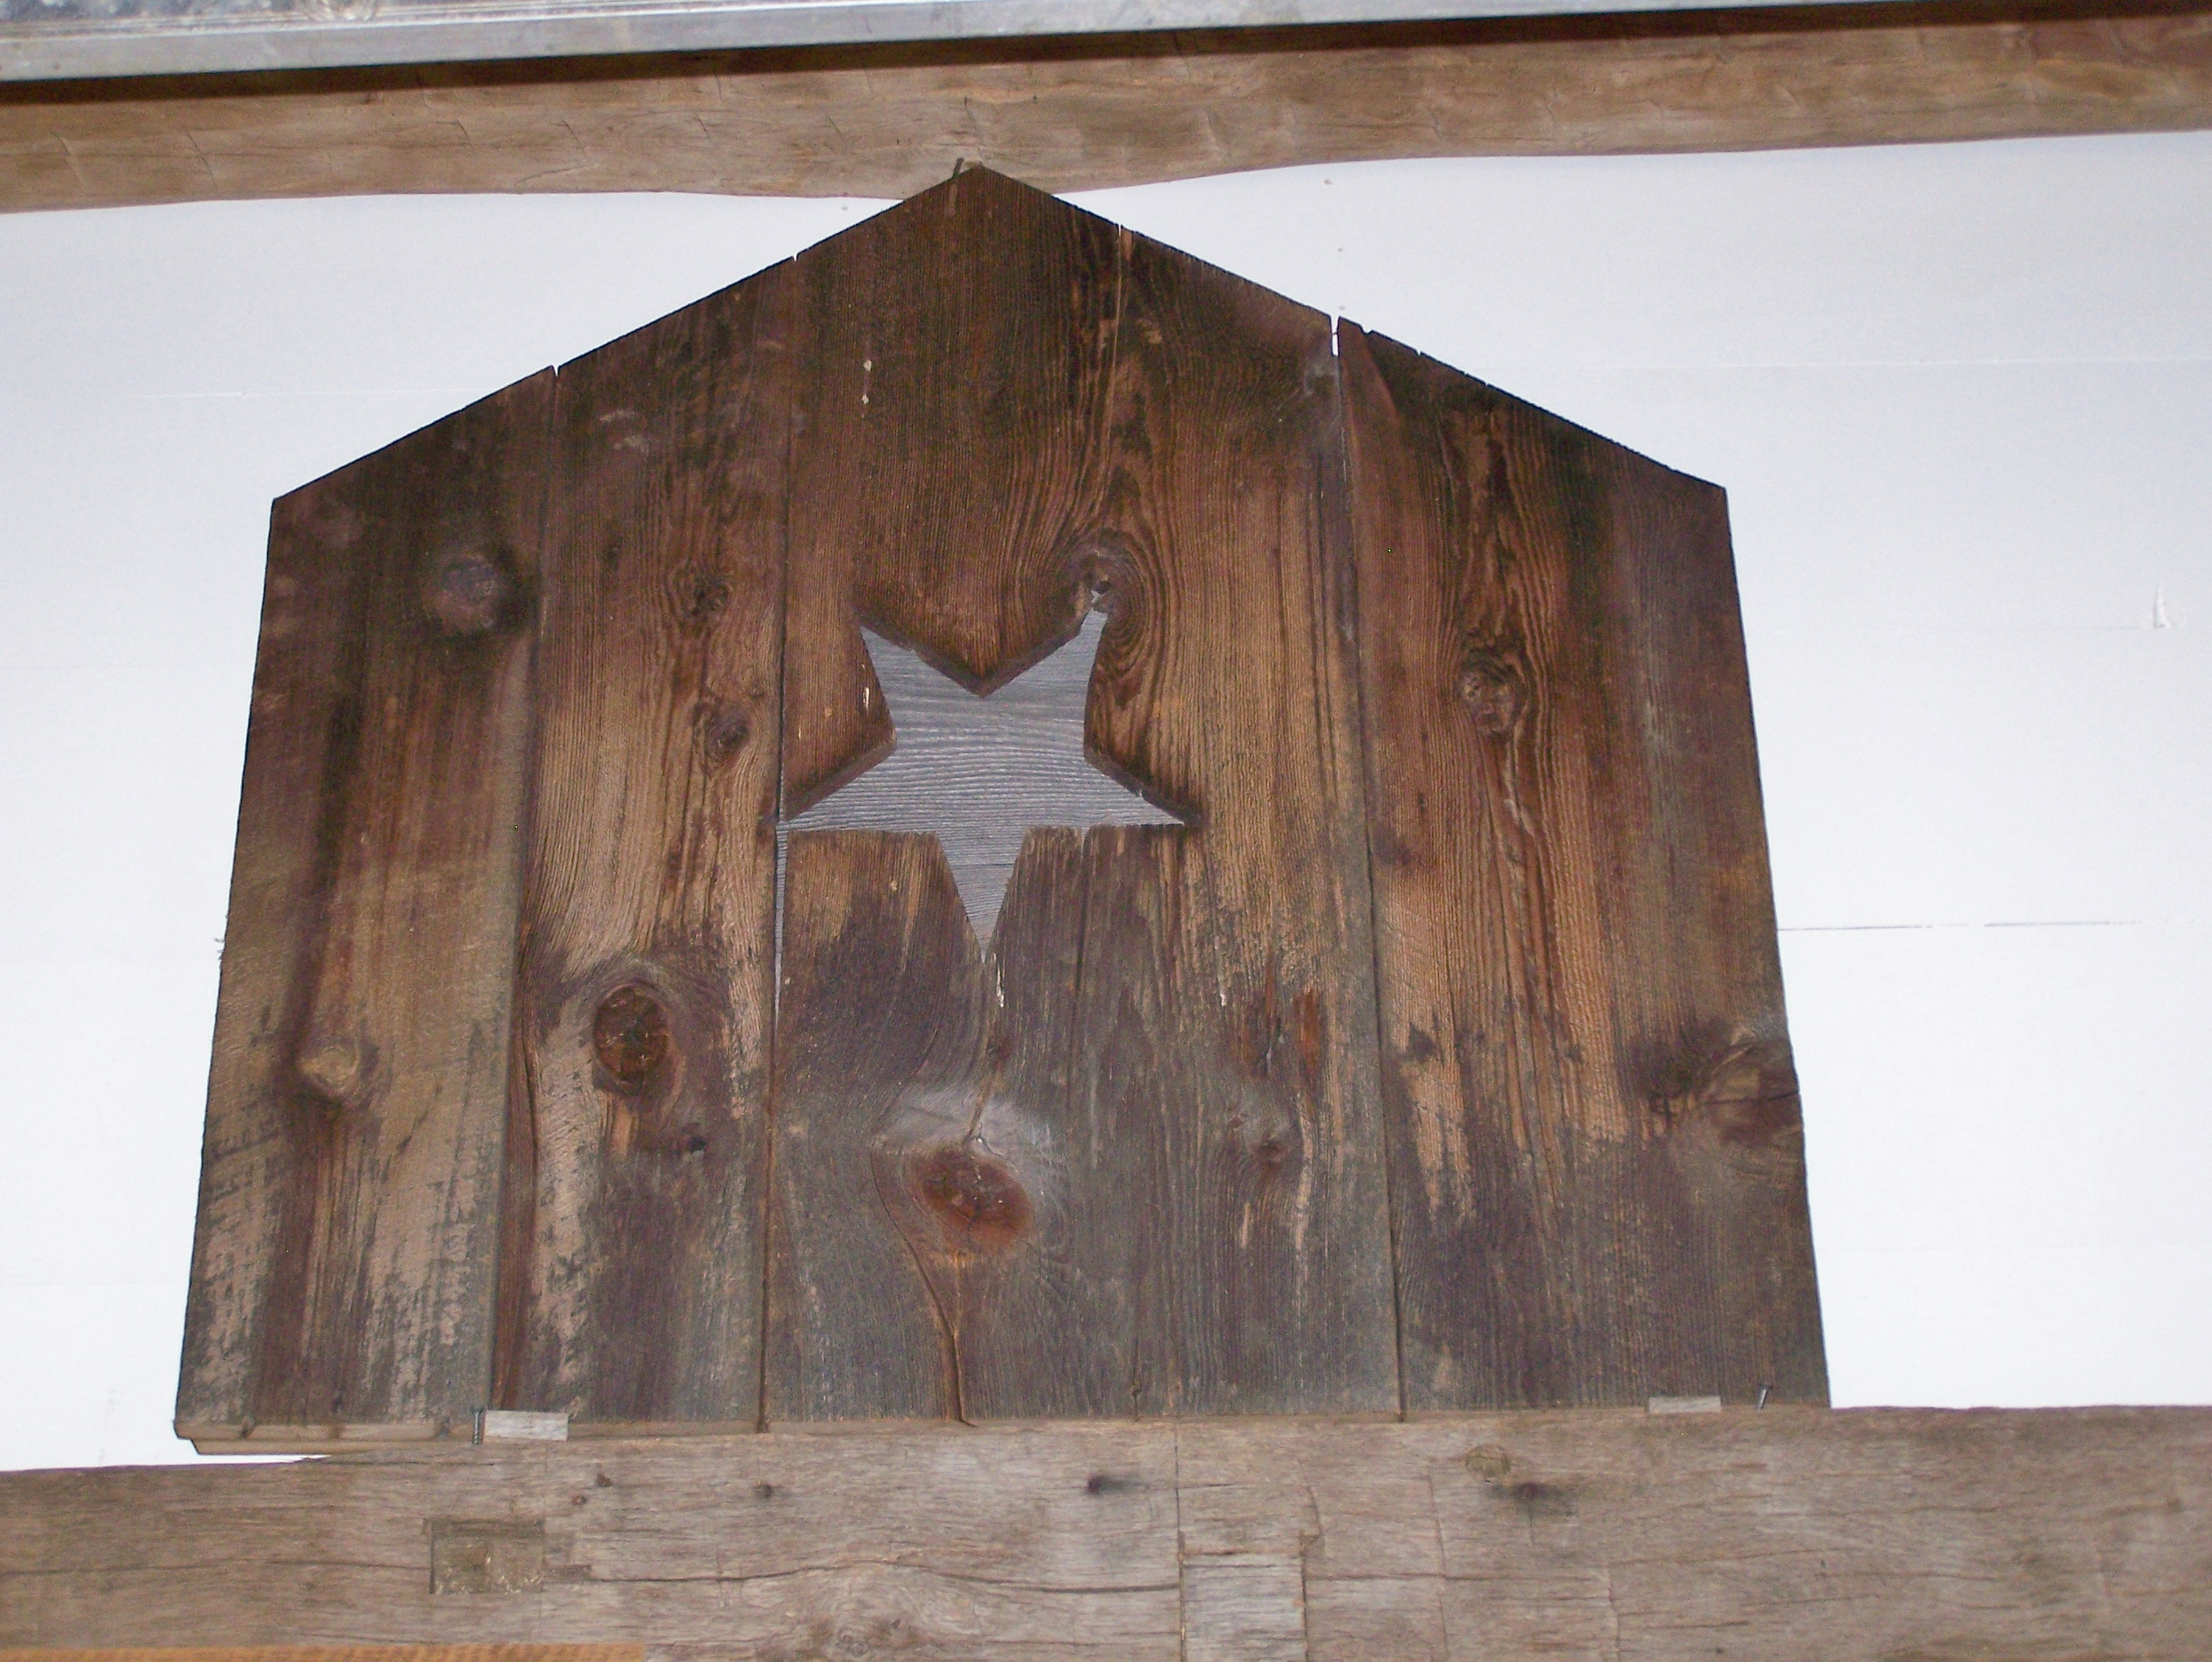
 In the sorting process, we discovered this star emblem. We saved it for interior use as a piece of folk art. Anyone know the significance of a star?
 Below – the finished project! The look of an 1800s barn, but now the barn is restored and in beautiful condition for another 200+ years.
 This is a rare frame to have no mid-span support posts on the 31 foot width. I was told it was a German style. Anyone know more about that?
I am always looking for new projects! Do you have a barn you want restored? Do you want to live in a historic timber frame?
Contact Us and let us know!
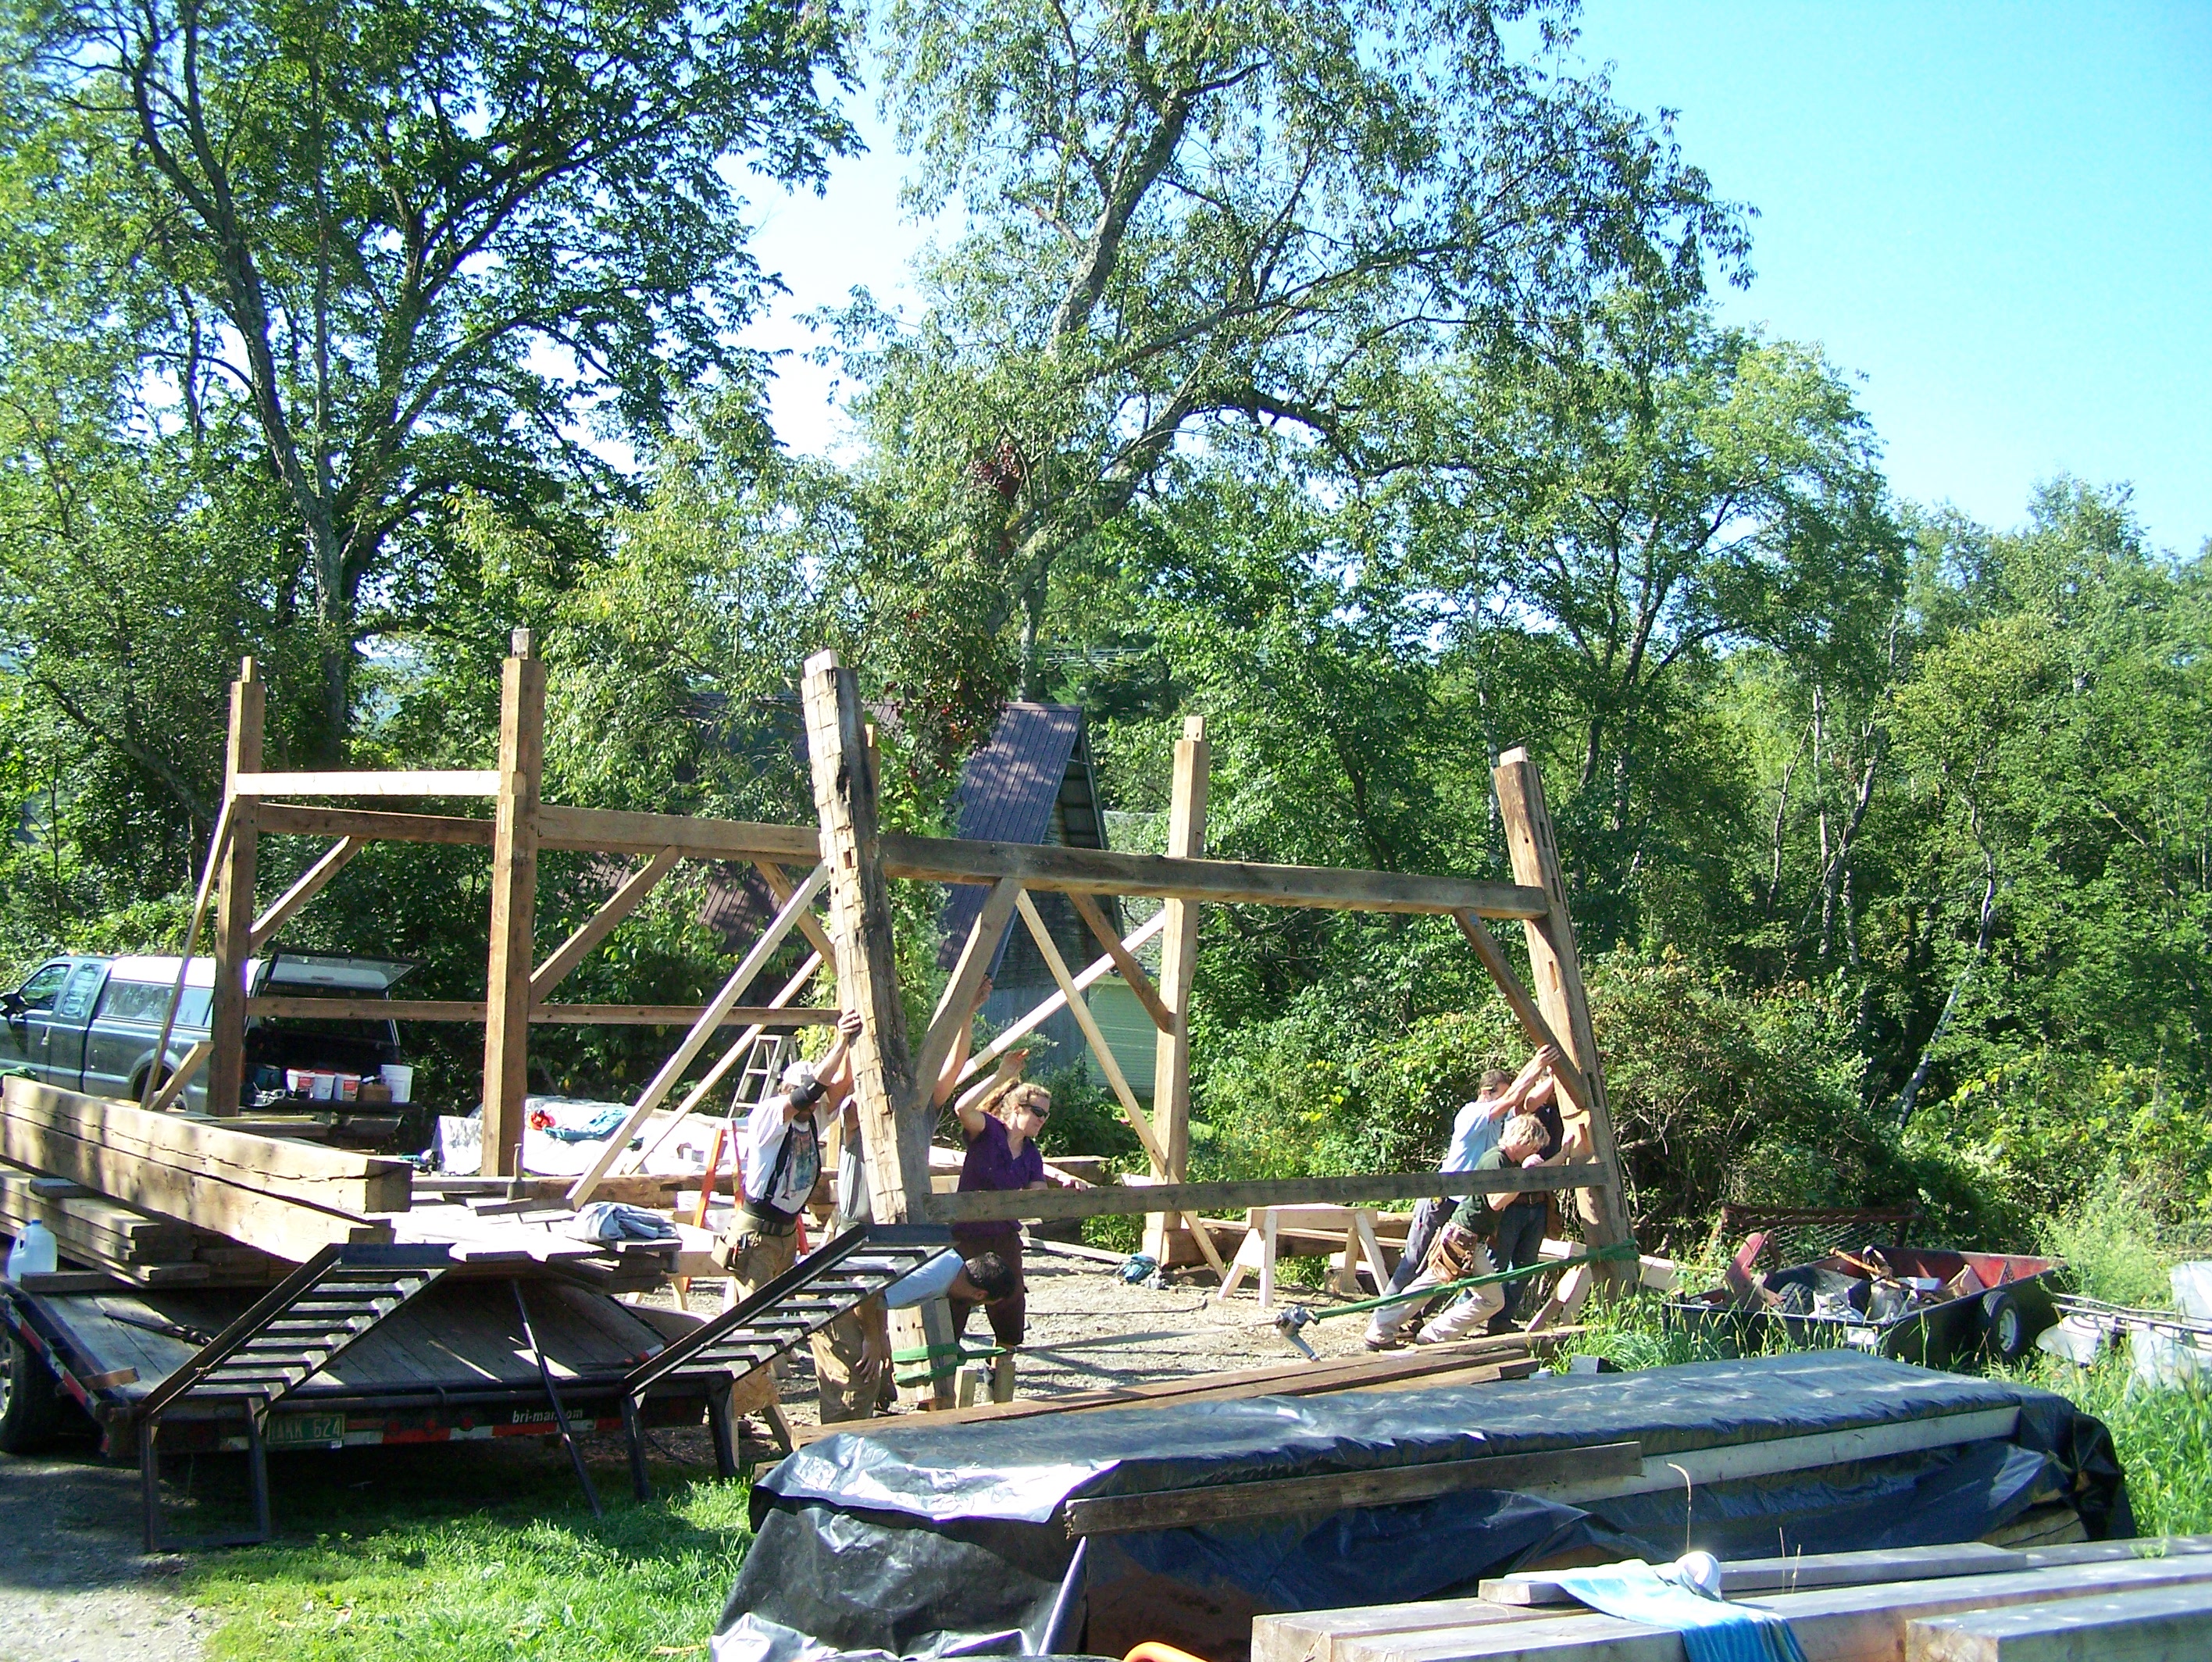
We spent a few days at the end of this summer putting up a reclaimed barn at the back of my property for my daughter and her husband. We enjoyed beautiful late summer days and with a small crew of 7 people, we were able to re-erect the restored barn in a day.
 Many hands make light work!
 It’s nice to be able to use my skill to help my family out – and of course there is nothing like having my grown kids nearby! On this project, I was also able to use some of the leftover timber and reclaimed wood from other projects. A great recycling project all and all, and one that makes for an eclectic, one-of-a-kind, beauty of a barn.
This barn comes from a two part structure from a farm in New York state. The oldest section was from the 1840s and has been sold to a customer. The barn in this blog was probably added on to the 1840 barn in the 1900s and was not finished with traditional joinery. As a historic piece it has little value, but the timbers are strong and sturdy and I knew it would make a fine shelter for the kids’ farm equipment and hay.

The original barn under black plastic, circa 1840s. Addition probably 1900, being dismantled.
We dismantled the newer barn first and restored it with traditional joinery. (That means that we let in the bracing and tie timbers with mortise and tenon joinery, instead of just nailing things together.) While this takes a bit more time than using a hammer and nails, it gives the barn a much more authentic, historical and structural look.
Here we are putting up a bent (or side wall).
 Here the 2×4 roof purlins are being applied.
The recycled metal roof was screwed to the 2x4s.

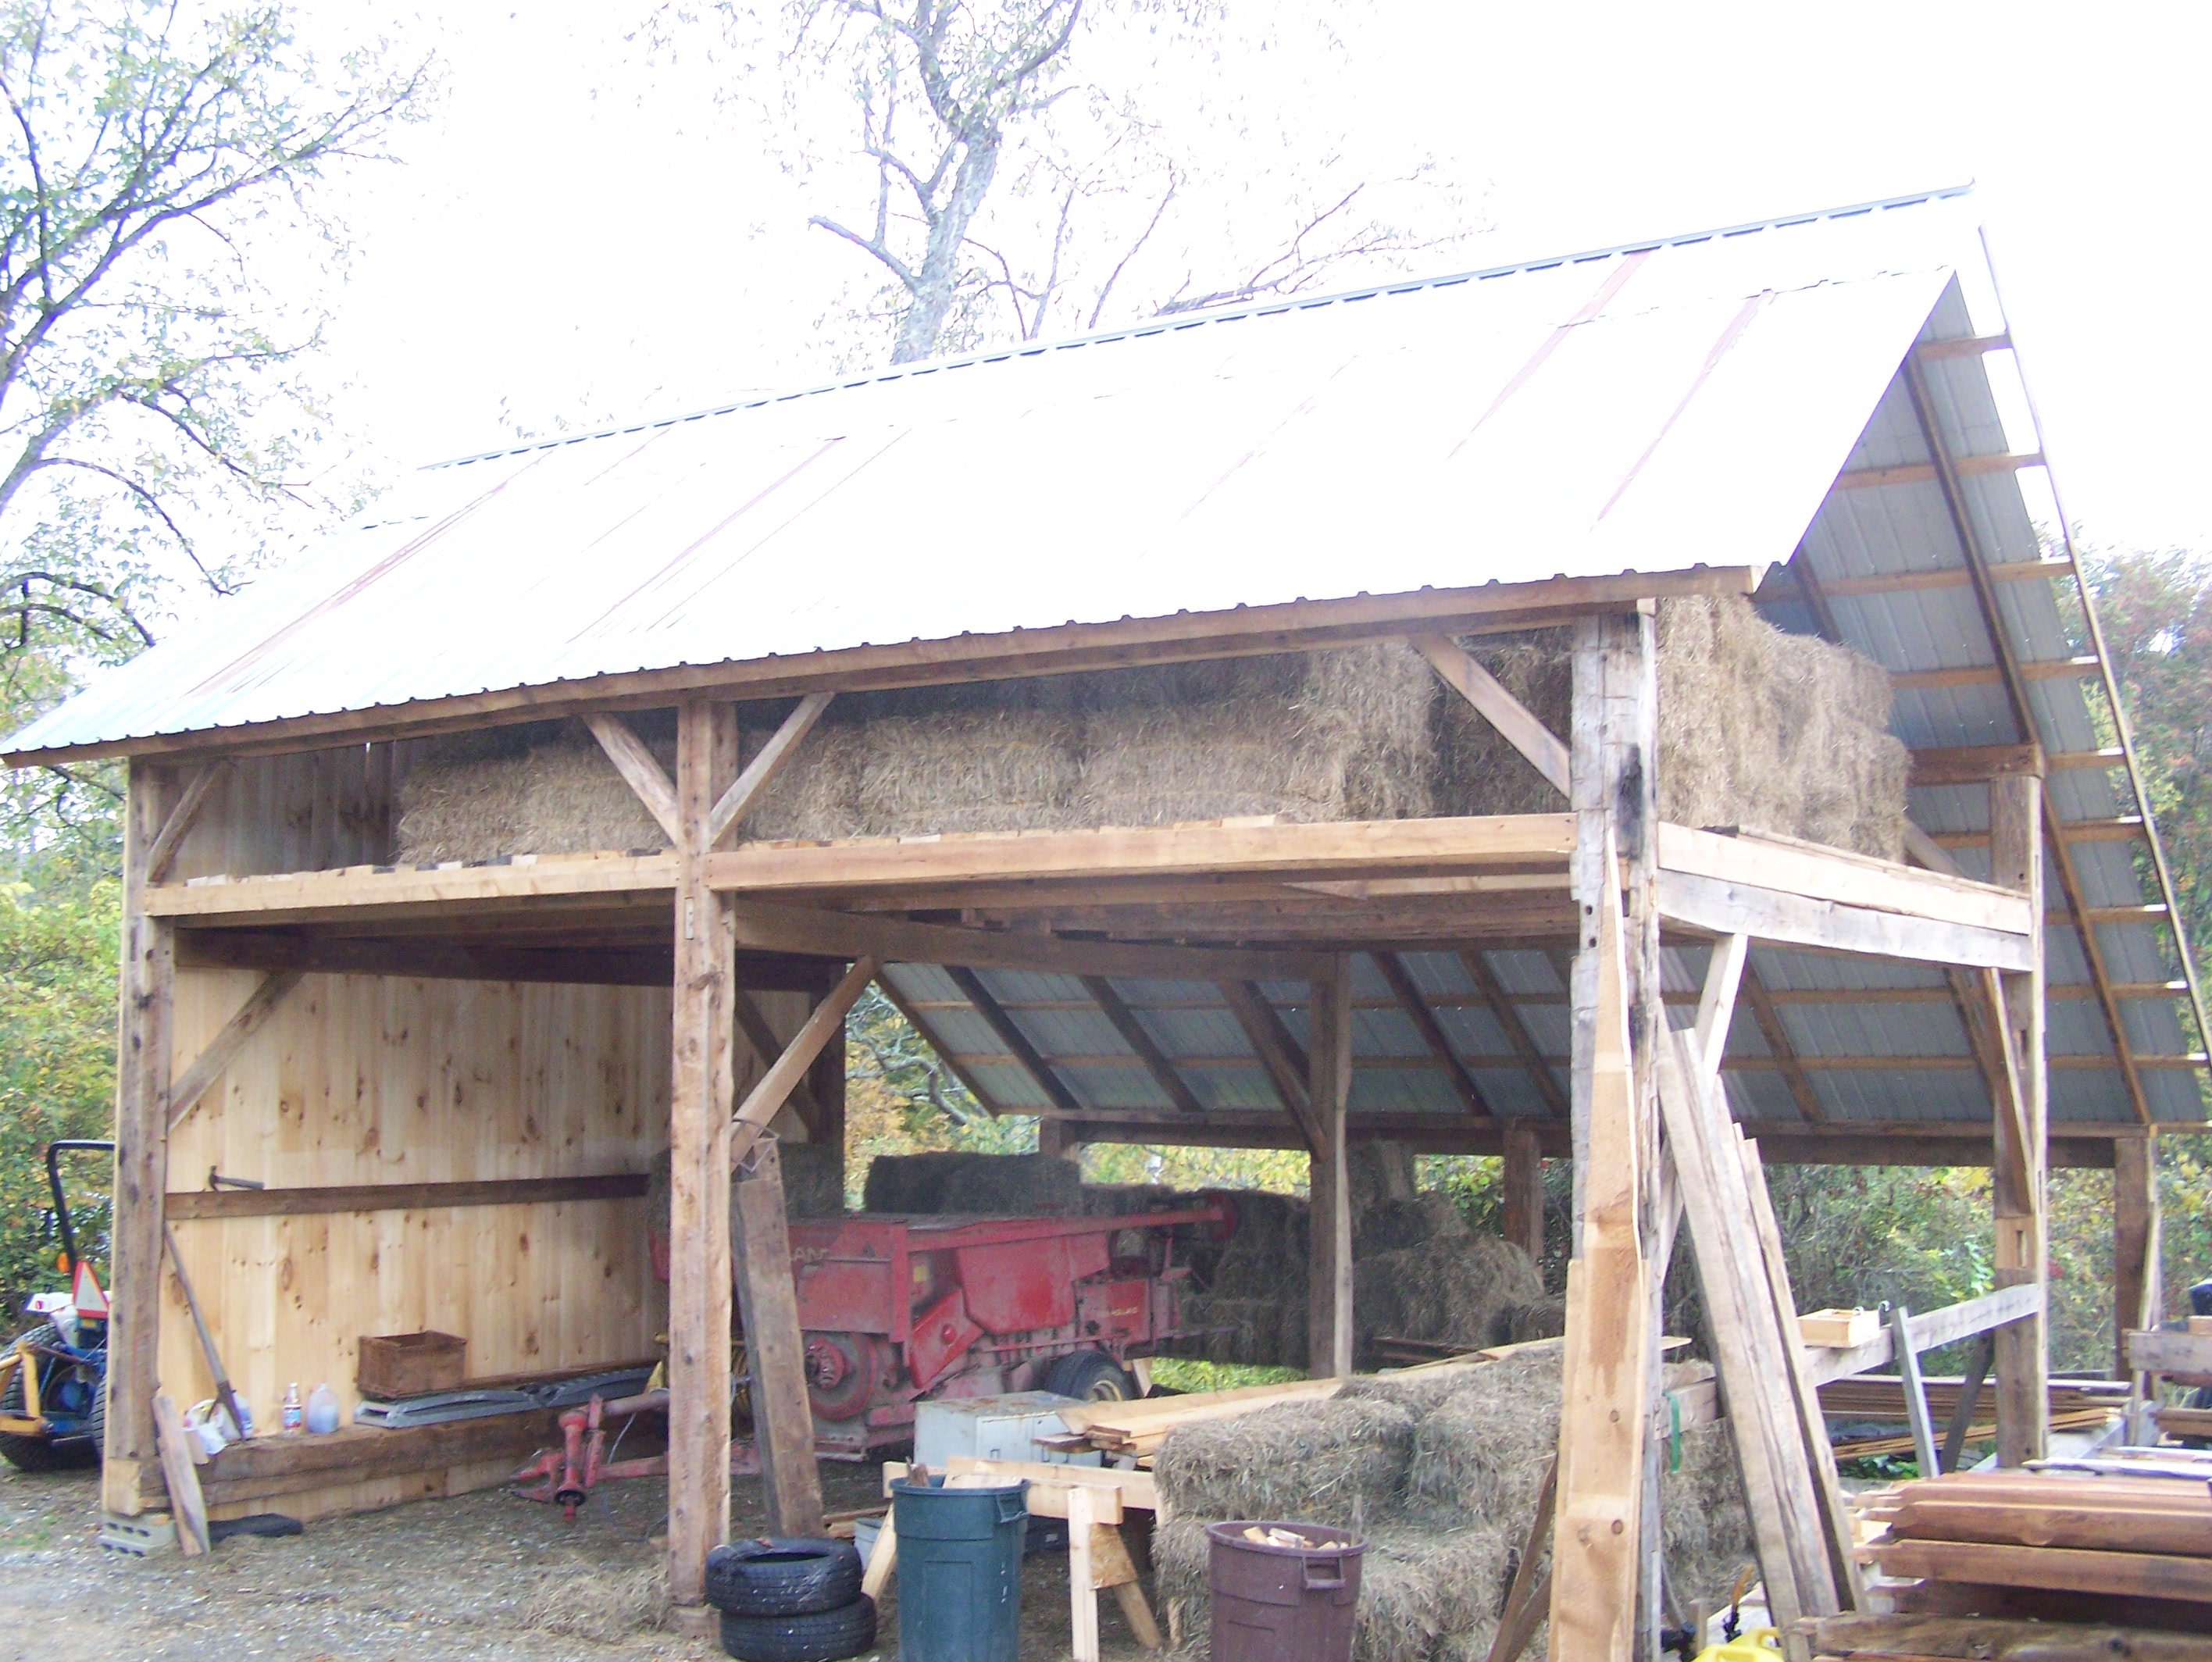
The next step was to build a second floor which you can see (from below) in the next picture.
 We used a mixture of common 2x6s doubled up and half round timbers to create the floor joist system. The flooring is 2 inch planking.
We’ve started the siding by using some newer recycled boards. We will have to cut three feet off the top to find the second floor, but it is doing the job for now. The remainder will be finished with older boards.
 We will also be attaching a shed roof to this wall in time. In the picture above, notice the future shed wall sill and top plate timbers in front of the tractor.
The ground level of the barn is for storing mowing equipment while the second floor is for storing hay. As you can see below – it’s already in use!
 While the barn is highly functional and my son-in-law is pleased, this barn is still a work in progress. As we gather more siding from other jobs, we plan to wrap the frame entirely with siding that doesn’t make the grade for our paying customers.
Here’s how the frame looks today. We should have all the siding on by Thanksgiving.
Interested in having your own barn home or backyard barn? Let us know!
I am helping the owner of this finely crafted timber frame find a new owner. The frame, originally built in the 1870s stands a majestic 32 feet wide and 48 feet long.

The large barn is in good condition and could make a stunning barn home, restored barn, studio or gallery. With so much space, there are a lot of options. There is 1500 square feet of space with an additional 750 square feet of potential if we add in a loft.
Notice the partial loft floor joists – great loft potential!
One added feature is the slate roof. Since Benson is in Vermont’s “slate belt,” this frame boasts an unusual purple slate roof that is of the best quality that you can find in the region.
In the picture below, you can see the wide gable wall which stretches 32 feet. The roof pitch is 12-12. This is one reason it feels so big inside.
Both the roof boards and wall boards are in excellent condition and the frame features long timbers that are hand hewn. The posts themselves are sawn.
Some more interior pictures below. Notice the beautiful honey color and the well preserved vertical wall boards.


Interested in living in a historic property? Have questions?
Please give me a call at 802.774.8972. This post and beam frame could really make a one-of-a-kind barn home and we are looking for just the right owner to preserve this beautiful frame.

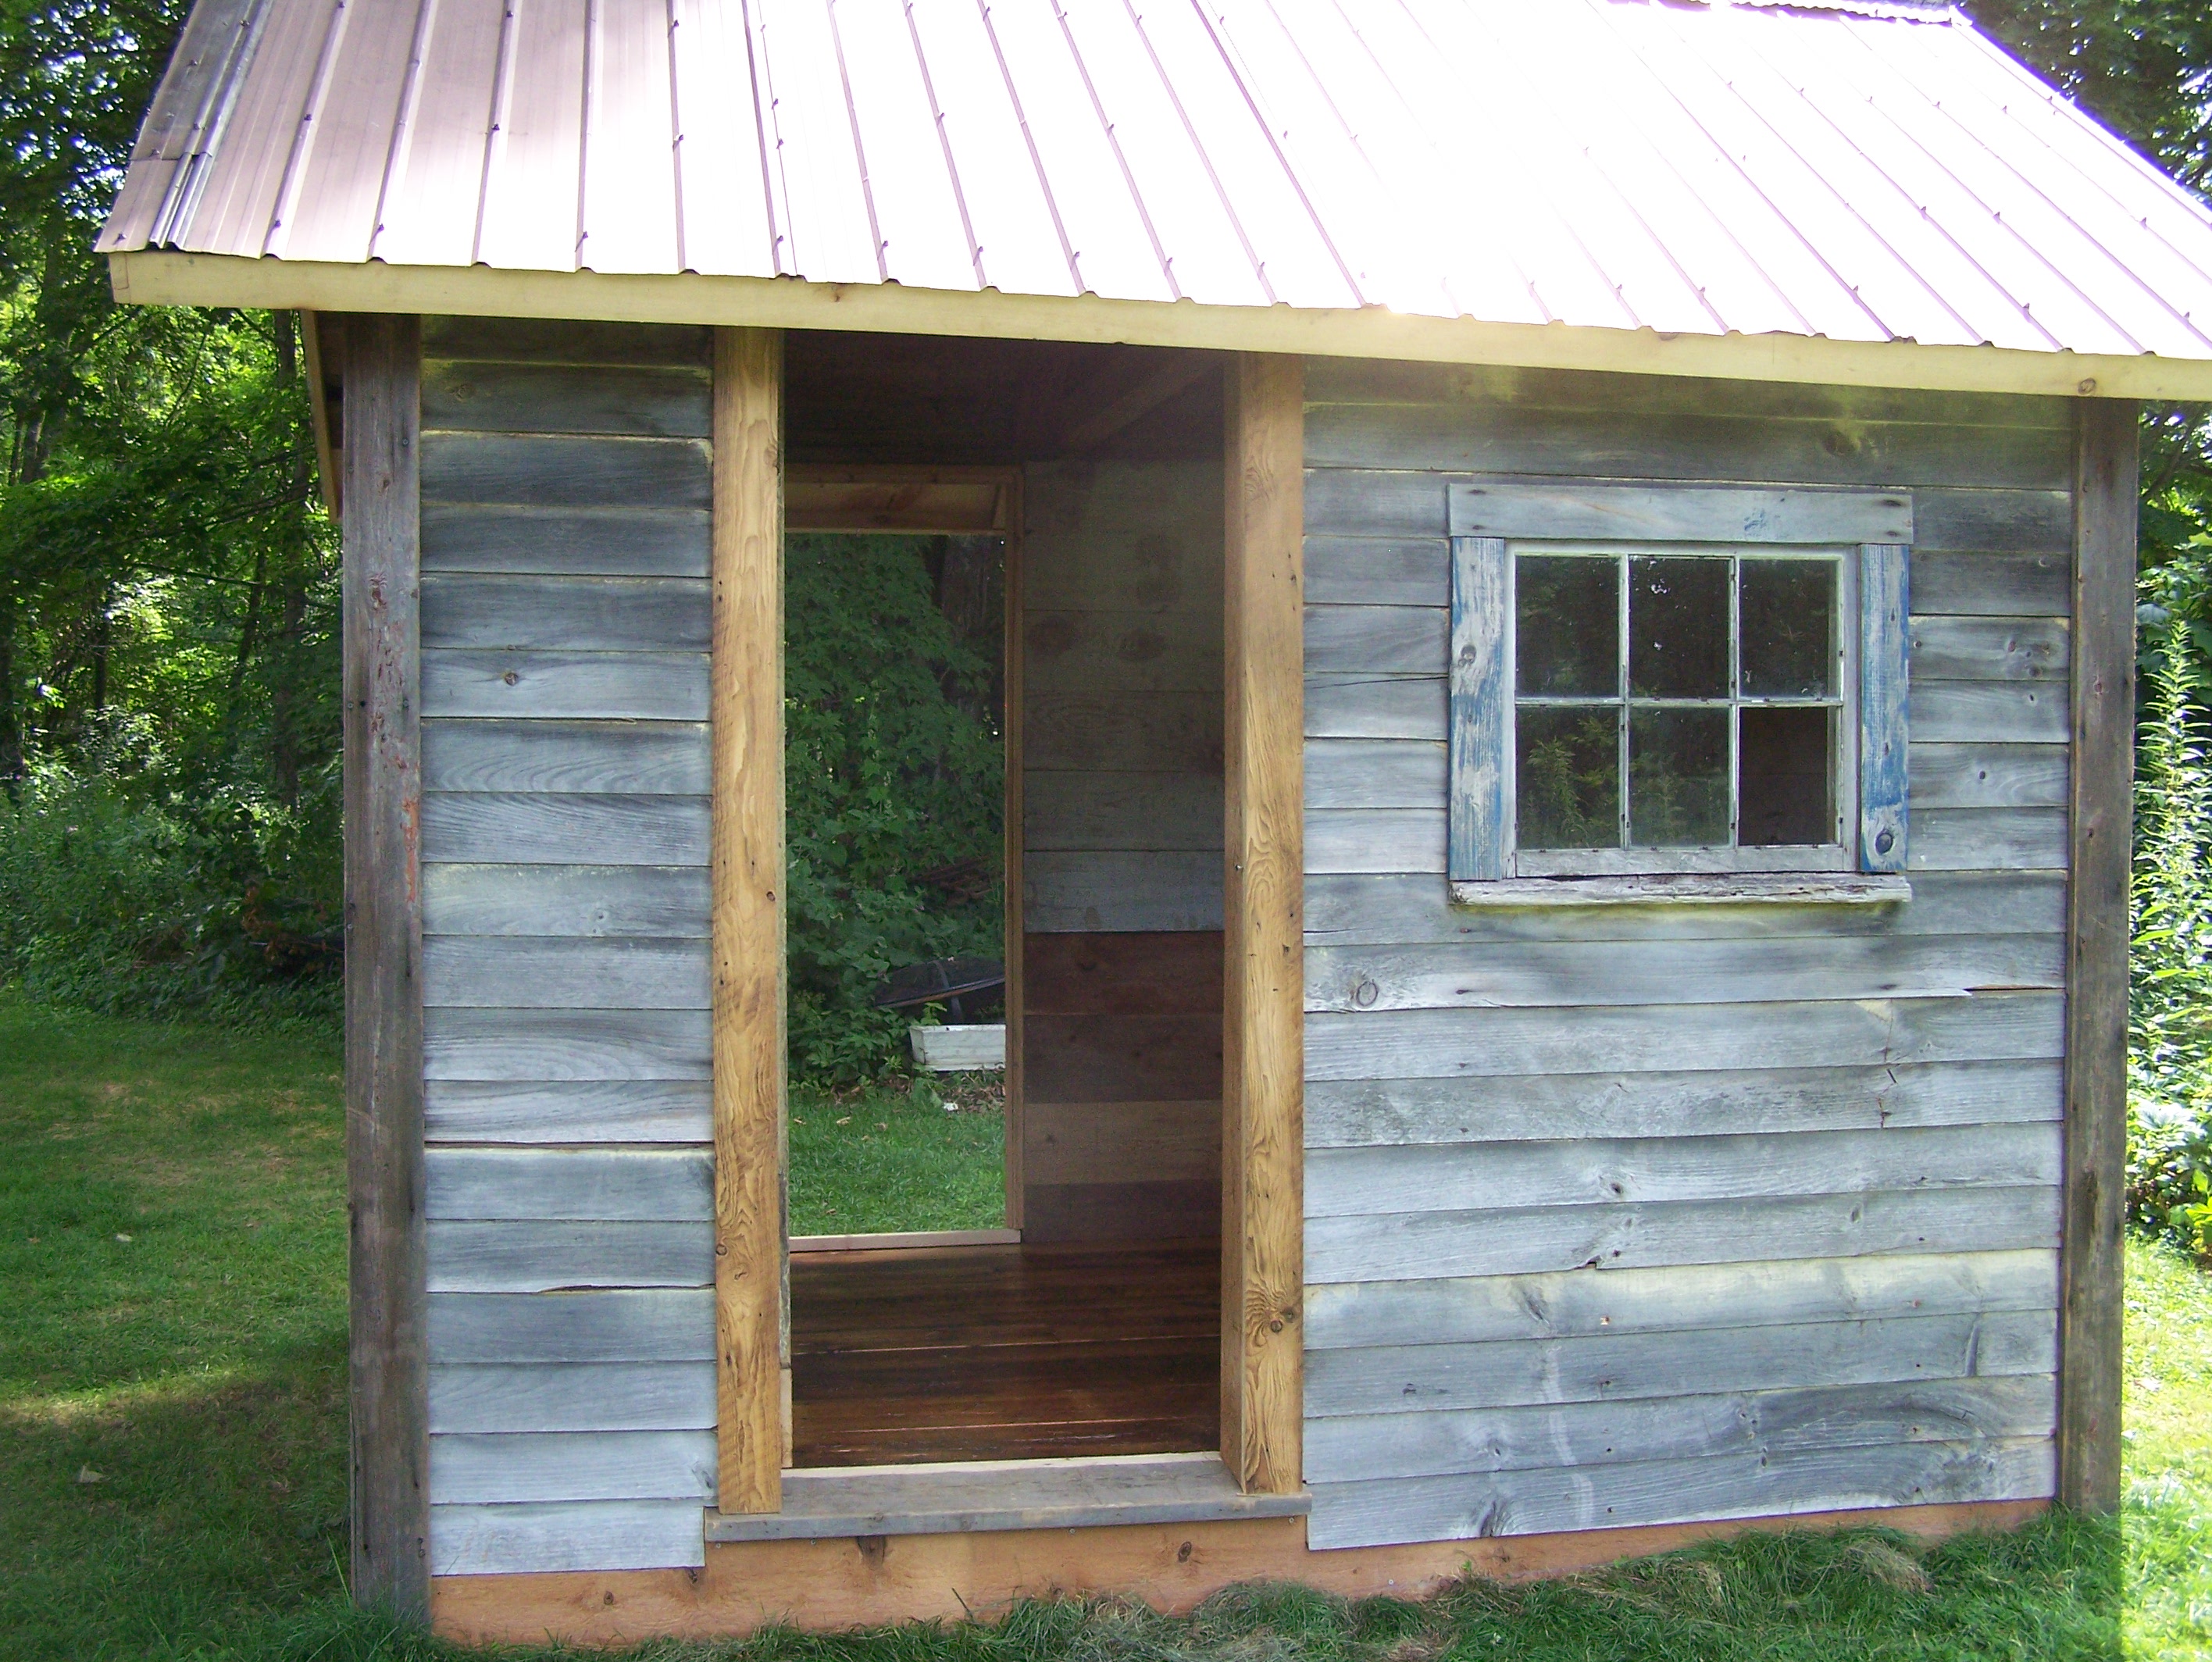
I traded this nearly un-restorable milkhouse in exchange for a playhouse for my grandchildren. The milkhouse needed some TLC, and was one of the smaller projects of our summers work. I am very pleased with how this little button of a building came out.
The frame measures 8’x10′ and was originally built in 1930.
My friend asked me to turn the little milkhouse into a backyard getaway spot where he can read, play music and find his muse beneath the rustic decor. Eventually, we plan to add a porch and another window, but for now it is ready to use.
We spent a good deal of time working on the roof. This next set of pictures shows our process.
Below you can see it in the new location, but not yet restored. That’s the old playhouse in the background.

One benefit of working on this little building was that it allowed me to use up some of the vintage wood and other salvaged materials that I have been saving from previous projects.
The “novelty” siding in this picture, for example, was salvaged from another barn. This kind of siding started to become popular around 1900.

Novelty siding
The vintage flooring was also left over material from another project. Here it helps warm up the white wash walls.
Vintage flooring
The roofing was recycled as well – from the restored barn I worked on in Pawlet in 2012.
Recycled, restored roof
Since I got to use up all these odds and ends, my workshop and yard are starting to look rather tidy and spacious, ready to fill with new vintage material for future barn restoration projects. So do let me know if you hear about available barns! I am always interested in at least looking at them.
Coming soon:
Here’s a closeup of the playhouse for which I traded the milkhouse. I built the playhouse over 30 years ago for my children, sold it to friends for their daughter, and it’s now coming back home to be restored for our family’s next generation. Stay tuned!

Kids’ Playhouse
Interested in living in a restored barn home? Have a timber frame available for sale? Please let me know!

This gallery contains 11 photos.
Remember this 1770s gunstock frame from Ira, Vermont? I have written about this historic timber frame a few times – from this blog, when I first started working with the farmer to help him find a client over 2 years … Continue reading


