Spring Cleaning!

Reading this in your email? For easier reading – Click here.

As one of the fist steps in the timber frame barn home restoration process, we power wash all the individual elements of a frame. This includes all the beams, every brace and each board that we are able to save and re-use.

Since winter in Vermont usually means sub-freezing temperatures, the piles of “dirty laundry” tend to pile up, waiting their turn with the washing team. Well, spring is here, and the washers are running!

Power washing old barn board_Green mountain timber frames.jpg

Our newest team member, John, washing a thick vintage siding  board.

Think about cleaning your house and the way grime builds up. Now imagine the dirt that collects in the hidden places of a 200 plus year old house or barn! It can be… pretty amazing!

American chestnut hand hewn barn timber_Green Mountain Timber Frames.jpg

This 26 foot long top plate has not seen the light of day, or a cleaning, since it was hoisted into place 210 years ago!

Washing beams and boards can be a tedious, wet, and cold task. Yet we also find it very satisfying and even exciting to watch the real patina and natural beauty come forth from underneath the dirt.

Timber frame beam barn home beam_Green Mountain Timber Frames.jpg

Look at the difference! This American Chestnut timber has received one pass from the power washer on the lower section.

Washing timber frame knee brace_Green Mountain Timber Frames.jpg

What a contrast between the washed surface and the dirty one!

Hardwood knee brace from Vermont Timber frame.jpg

The final product of the cleansing is an amazing color that can not be replicated in new materials.

We do not use any soap in the washing. The water alone is enough to bring out the color. Wood ages as a result of exposure to air and light. While boards exposed to excessive sunlight turn silver, protected wood surfaces take on a beautiful glow.

Vermont barn beams for sale_Green Mountain Timber Frame.jpg

It took more than 200 years for this Beech timber to take on its patina.

The Art of Power Washing Old Timber Frames

Washing barn timbers and boards is not just a matter of pointing and shooting the stream of water at the materials. If we let the powerful water get too close to the wood, or if it strikes the surface at the wrong angle, the result is “raised hair” on the surface. Too much power in the spray slightly shreds the grain of the wood, causing the wood fiber to separate slightly on the surface, which can damage the patina and lead to a rough surface. Power washing takes patience. We can’t do too much, yet we must get the surface clean. The distance and angle from sprayer to old board has to be “just right!”

When the timbers and boards are washed, there are still steps to be accomplished. The boards must be dried before they can be stacked or else they will mold. We have to get creative in spreading the boards out to dry! We flip the boards halfway through the drying process. Eventually, we are ready to collect them carefully into piles for storage under cover.

Barn style home_wide timber boards.jpg

Vintage boards drying after washing.

The timbers and boards shown in these photos are from the 24 x 26 cape style house that we disassembled this past winter.

Stay tuned as we move towards a full restoration of this wonderful little timber frame! We better get back to work- the pressure washers are calling!


Dutch Cape House from c. 1800

Reading this in your email? For easier reading – Click here.

One early morning, before dawn in November, two brothers were readying for an early morning deer hunt. Hunting culture in rural Vermont dates back to the original residents, and continues still. On this particular morning, breakfast was cooked, weapons readied, and excitement no doubt was rising!

I can imagine that the black of night began dissipating, and the hunters hurriedly finished their planning and headed out into the breaking daylight. A chair had been left too close the roaring wood stove and a couple hours later, a passerby saw smoke billowing from the house. Fortunately for those young men, for Green Mountain Timber Frames, and for the future owner of this beautiful timber frame, the fire was put out and the house survived!

IMG_3277

Since that early morning fire, this little house has served the farming community well. When the local grange had to move out of a nearby building, the family that owned this cape generously offered the space. After many community work days, the grange moved in for weekly meetings and community events. The National Grange of the Order of Patrons and Husbandry is a national organization that began shortly after the Civil War. The group works to promote community bonding and education around agriculture.

IMG_3091

This frame dates from around 1800, when Vermont was still a young state. It was placed in a little hollow between knolls with a stream nearby and land was cleared around it for farming. The house was built using oak, chestnut, and beach trees- no doubt the very trees that were cut down to begin opening up fields for livestock.

IMG_3252

This frame has four bents and stands true even after 200+ years and a close call with fire!

It is fascinating to get to study so many local timber frames and ultimately to get a sense of who built these structures many generations ago! This particular house is a Dutch style of timber framing. The bents are close together and the floor joists are built strong enough to span the whole 24 feet of width.

IMG_3238

A clear span of 24 feet makes this an open canvas for future room design.

This little building measures 24 feet by 26 feet. It is perfect for a small cabin or house, for an addition onto another building, or as a small storage or animal barn.

IMG_3237

The posts and top plate are 10 x 10 inches – a solid little house!

A Spacious Second Floor

One of the reasons we fell in love with this structure, and just had to save it, was the spacious second floor. The posts extend quite far above the second floor, creating a tall “knee wall.” There is plenty of head room upstairs.

The rafter system has a five sided ridge beam with braces to the rafters. Unfortunately, the rafters and ridge beam were damaged by the close call with fire and by subsequent roof leaks over the years. We will be replicating the original roof system however and it will once again be strong and beautiful.

IMG_3235

The posts extend up beyond the 2nd floor, creations a spacious second floor living area.

IMG_3231

Here you can see braces strengthening the structure.

The Ingenious Basement

The ingenuity and creativity of the builders of this home are demonstrated in the basement of the house. Underneath the floor system, we discovered a very rugged food storage room or “root cellar” built with rough hewn logs, stone, and brick.

I have no doubt that it was filled with ice from the nearby river before the spring thaw, and that it was filled with squash, potatoes and other vegetables in the fall! Surely, it also was an excellent place to make and keep that hard cider that Vermonters loved (and still do)! It also doubled as a very strong foundation for a wood stove on the second floor. Imagine the original residents filling this little room with the fruits of their labors, and then relishing the food during the bitter winters.

IMG_3274

Let’s keep those garden vegetables and root crops good all winter!

Once again, we consider it such a privilege to cross paths across the span of generations with the pioneers, carpenters, farmers, and families who have built and dwelt in this structure. We are also grateful to the family that saw the historical value of the house and allowed us to disassemble it once it could not be kept up in its original location. The restoration of this timber frame will take place over the future months and it will once again be ready to house future generations.

Interested in this timber frame or another historic property?

Contact Green Mountain Timber Frames at
luke@GreenMountainTimberFrames.com, or
802.774.8972


A Comparison of Timber Frame v. Stick Built Construction

Reading this in your email? For easier reading – Click here.

This week’s guest blog is from builder and timber framer, Glenn Tarbell. Glenn has collaborated on many projects with Green Mountain Timber Frames over the last two decades.  Recently, he built this beautiful timber frame garage for a client. 

Final Timber Frame Garage.jpg

Why Use Timber Frame Construction?

Recently I had a customer who wanted a new garage. They live in a beautiful wooded area with large oak trees near a wetland. Their house is not large and has a low sloping roofline. The siding is rustic, rough sided pine that is stained. They asked me to build a two bay garage.

Timber Frame v. Stick Built

I inquired if they would be interested in a timber frame garage rather then a traditional stick built garage if the pricing was not considerably higher. They loved the idea of a timber frame and we began the design process. The pricing for a timber frame style building was only slightly higher, so we decided to go with it!

Designing the New Garage 

In the design phase, we talked a lot about the height of the new building. The customer did not want a garage looming over everything. We talked about enclosed and not enclosed bays, power needs, and building materials for the roofing, siding and the timbers. They also needed storage for kayaks and canoes and windows on the south face for garden starts.

We decided that the final building would be a barn-garage. We would create a structure that looked like a barn with an extension for the traditional hay hook or, as we discussed, a canoe hook. The customer had a rope system with a vintage pulley that has already pulled the boats into the upper half story for the winter.

The structure we finally designed has one fully enclosed bay with an overhead door and a shed roof off one side for the second bay. We ultimately choose this look for two reasons: height and looks.

6_plate section for the shed roof

Building the Barn – The Construction Process

When it came time to start building the garage, we chose hemlock wood for the frame. This is a ridged softwood that works well for timber frames. We cut the joinery traditionally using chisel, saw and chain mortiser. Then, we dry fitted all the parts of the frame at my shop. Seeing the mortise and tenons fit together and then seeing the bent sections laid on the sawhorses was wonderful. Dry fitting the frame gives a sense of what the building will become, while also allowing for us to check for accuracy in layout.

2_All the bents are up

Here we are drilling 1-inch holes for the wooden pegs.

The barn posts are six by six, the girts are eight by eight, the rafters are four by four and the braces are three by six. As a big pile of wood it does not look like much, even with the joinery cut. But on raising day, wow, it takes on a look of its own.

4_4x4 rafters in place

Here you can see all the bents assembled and the frame with shed walls erected.

And here’s a look at the new garage once the roof sheathing and trim were on:

7_Roof sheathing and trim

Pricing Timber Frame v. Stick Built Construction

When pricing this kind of project and determining the cost difference between timber frame and stick built construction, I have to look at the two styles of building with the thought, “What steps will be different?” Siding will be applied in the same manner in both building styles, as will trim, roofing and sheathing. The only real difference then, is the framing.

It took nine days to cut out the timber frame and tip it up, including roof sheathing.

3_Drilling holes for pegs

The frame with all the 4×4 rafters in place.

To build a traditional stick built garage with roof sheathing, it may take seven to eight days to get to the same point. Therefore, the difference in this project was two days of labor.

Timber Framing – A Worthwhile Investment

In the end I think timber frame construction makes more sense both financially and aesthetically. Even if it takes a bit longer and requires a slightly larger initial investment, (usually 15-20% more) a new timber frame is strong. Barns built this way have lasted hundreds of years.

Standing in a timber frame feels good. You can see the craftsmanship of the builder and know that the history of barns and houses built this way dates back hundreds of years. So whether you build a new timber garage or use a vintage timber frame barn as the frame for a garage, from my experience timber framing is usually the way to go. It’s cost effective and the building can last for centuries if the roof is maintained.

Interested in your own timber frame barn or home? Let us know!

We’d be glad to hear from you! 

Luke – Green Mountain Timber Frames
luke@GreenMountainTimberFrames.com
802.774.8972

North Hero Barn Restoration: Before and After

Reading this in your email? For easier reading – Click here.

Remember that North Hero, Vermont historic barn we wrote about back in April of last year?

Luke Larson, of Green Mountain Timber Frames rescued this special barn from North Hero Island, which is smack in the middle of Lake Champlain and only a few miles south of the Canadian border.

Removing Roof of timber frame barn home

Dating back to the 1780s, the barn is a hardwood frame with hewn oak braces. While it was truly in very rough shape, Luke was determined to save it because it is such an old, rare specimen. Measuring 26 X 36 feet, it offers nearly 1000 square feet of space and is a gunstock post frame, a good indication it was built before 1800.

A New Beginning – Near The Frame’s Origins

The exciting news is that this beautiful restored timber frame will become a handsome “great room,” complete with a fireplace, for a new home that is being built on the New York side of Lake Champlain.

Understanding the Restoration Process

In the following Before and After photos, you can see the restoration process taking place at one of our shop sites.

2
Above: Many of the beams needed repairs or replacement. One of the top plates was replaced completely during the restoration process. In the restored photo, all of the beams are once again sound.
3
The ridge beam and rafter braces were one of the lovely features that caused us to love this barn!
4
During the dismantling of the barn, we labeled all of the roof boards so that they would go back to the original location. In this “after” photo, we have put all boards back on the roof and used some replacement vintage material to fill in the gaps.
5
The beautiful December sunset here in Vermont showcases the lovely detail where the rafters intersect with the ridge beam. In the restored version, we have made all the edges of the boards straight once again, so that the gaps between the boards are minimized.

Ever Dreamed of Living IN History?

At Green Mountain Timber Frames, we turn old barns into beautiful new homes, studios, offices, barns and more.


For details, please contact Dan or Luke:
802.774.8972
luke@GreenMountainTimberFrames.com

Green Mountain Timber Frames - Contact Us

Spacious, Hardwood 1840s Timber Frame – For Sale

Reading this in your email? For easier reading – Click here.

We’ve named it the Meadow Barn. 

1_”34’x46’ hand hewn, hardwood timbered barn frame”

This beautifully kept timber frame barn, hailing all the way from Northern Indiana, was built amidst the prairies and the corn fields.

Former “meadow barn” surrounded by soybeans

Throughout the winter, the barn was used to store hay. The 34 X 46 foot structure stood far from the farmhouse itself, but strategically within the fields so that the balers wouldn’t have to transport the hay too far. Come springtime, the farmers could come back for the hay.

Who Built This Beautiful Barn?

The timber frame was likely built by New England timber hewers. Around the same period, in the 1840s, New England was adapting to water-powered saw mills. This meant the demand for craftsmen, who were skilled in creating square timbers using only axes and adzes, was on the way out. So the hewers headed west for new opportunities. 

What Makes This Barn So Remarkable?

While New Englanders had cut down most of the eastern hardwood trees and started building  with soft woods like pine, hemlock and spruce, Northern Indiana offered forests rich with hard wood timber. This frame was built from beautiful, first-cut red and white oak, beech, black walnut and ash.

Pic 2_Gable end wall, loft space possible in roof rafters

Wonderful White Oak Roof Boards

Because hard woods were still prevalent in Indiana, even the roof boards on this barn are hard wood. In fact, the white oak boards are so beautiful, the new owner could use them to make stunning flooring.

White Oak Roof boards restored by Green Mountain Timber Frames.JPG

In the picture below, you can see the full length, hand hewn timbers.

Pic 4,_Loft space evident

The following picture showcases the soft, warm colors of the hardwood.

Lovely color of hardwood hewn timbers

Standing the Test of Time – An Old Barn in Excellent Condition

The frame itself is in excellent condition, with straight lines that have stood up to over 165 years of grueling winters and winds in the mid-western plains.

Picture 6_Simple geometry survives  165+ years of prairie winds

Endless Possibilities

Spacious and sturdy, this frame offers an expansive 1560 square feet of space, with the option for a second floor. We could easily add in a loft system in the rafters.

This barn frame could become a great room or a complete home. It could also become a restored barn, restaurant, studio or vintage vehicle storage.

Want to Call This Beautiful Frame Your Own?

Give us a call at (802) 774.8972 or email Luke@GreenMountainTimberFrames.com

Timber Frame Labeling – The Pragmatics and Beauty

Reading this in your email? For easier reading – Click here.

What is in a label?

When it comes to timber framing – a great deal!

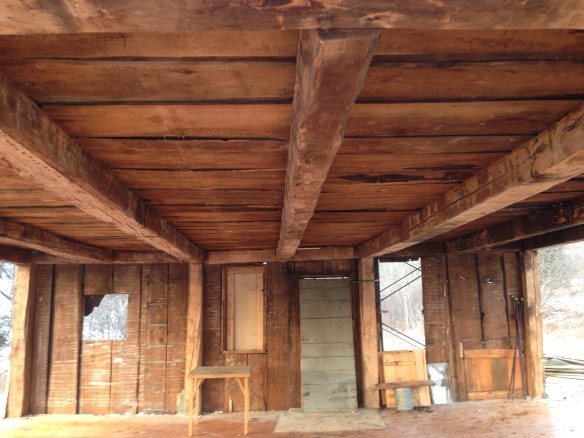
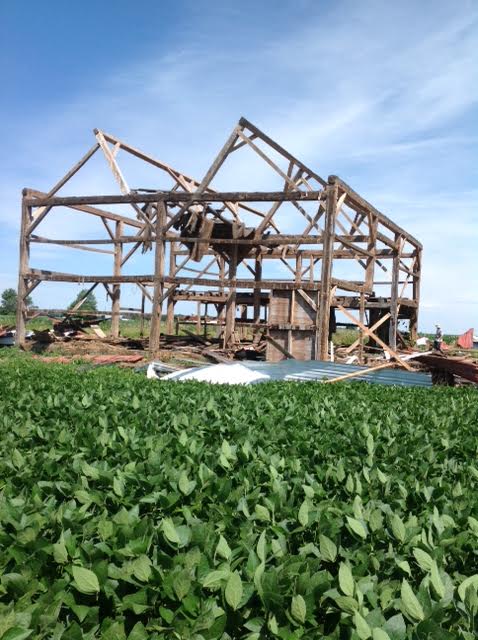
The homes and historic barns that we disassemble have many individual pieces. A timber frame can easily have over two hundred different pieces of hand crafted wood and each piece has been carefully fit and adjusted to create a specific joint. Individual timbers and braces were scribed to each other. Braces in a building may look interchangeable, but they are not!

Roman Numeral Labeling in Timber Framing_Vermont_Green Mountain Timber Frames_4

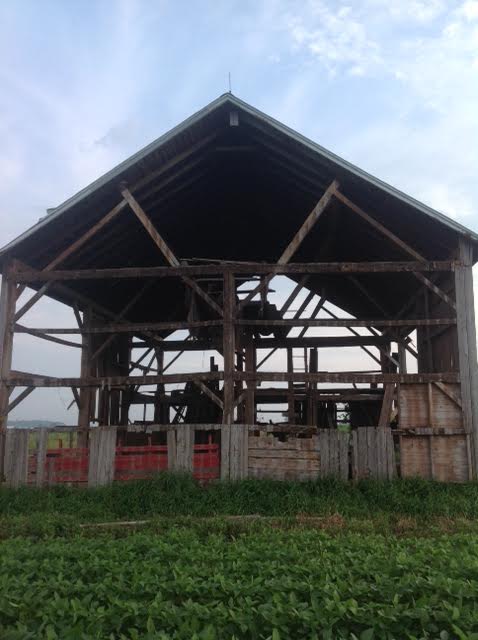
We use the terms “bent” and “plate wall” to describe the two types of cross sections in a barn. There are two plate walls in every timber frame, which are the exterior walls where the roof comes down.

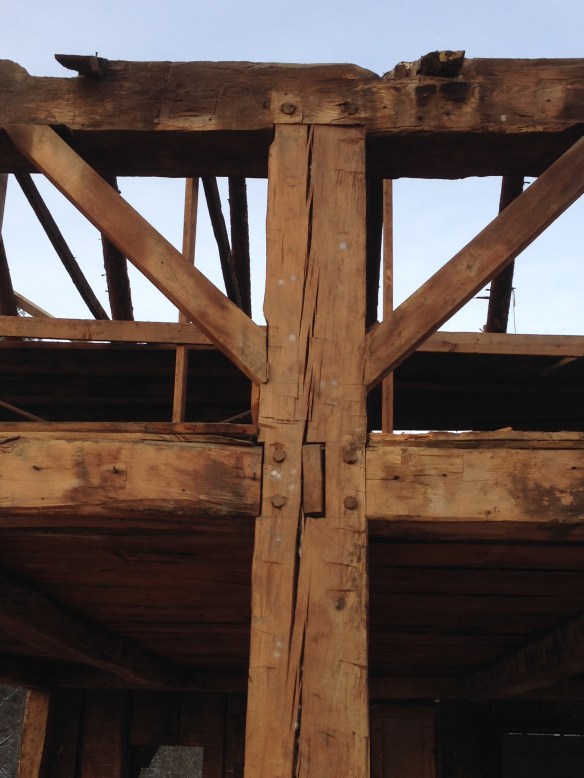
“Bents” are a cross section going in the other direction, creating the gable ends and supporting systems for the interior of the building.  A frame can have anywhere from two bents to six or even more, depending on the barn size. Here is a scaled drawing of one bent cross section of an 1840s timber frame. This barn has four bents. Multiply this cross section by four and you can imagine the four bents, usually similar but not identical. Labeling System_scaled drawing of one cross section_1840s timber frame_Green Mountain Timber Frames
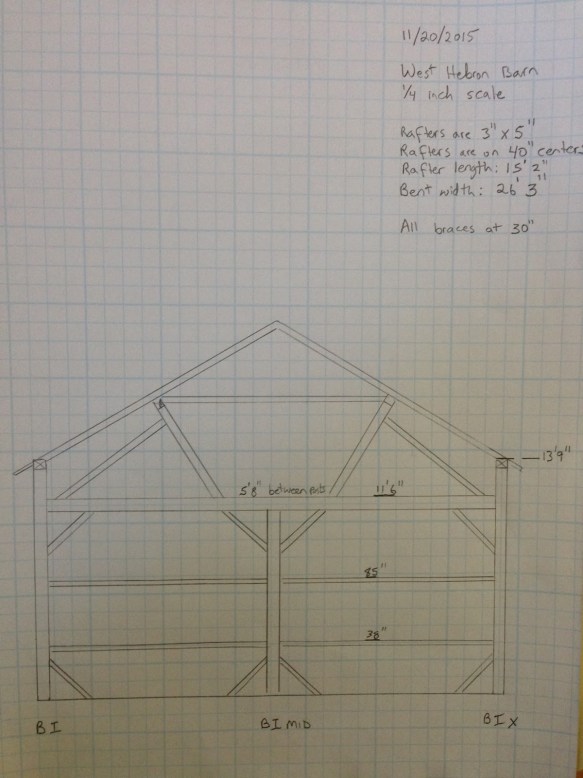
There are also the two eve walls with multiple braces, which can’t get mixed in with the “bent” braces! Timber Frame Label System_Green Mountain Timber Frames_2So how does one know where to put each piece of wood?
The labeling system!

History of Labeling Timber Frames
In many of the older barns and homes, even the roof boards and floorboards were labeled! Long before a crew of framers, farmers and family showed up for a house raising, someone had carefully organized the materials and designated a spot for each piece. 

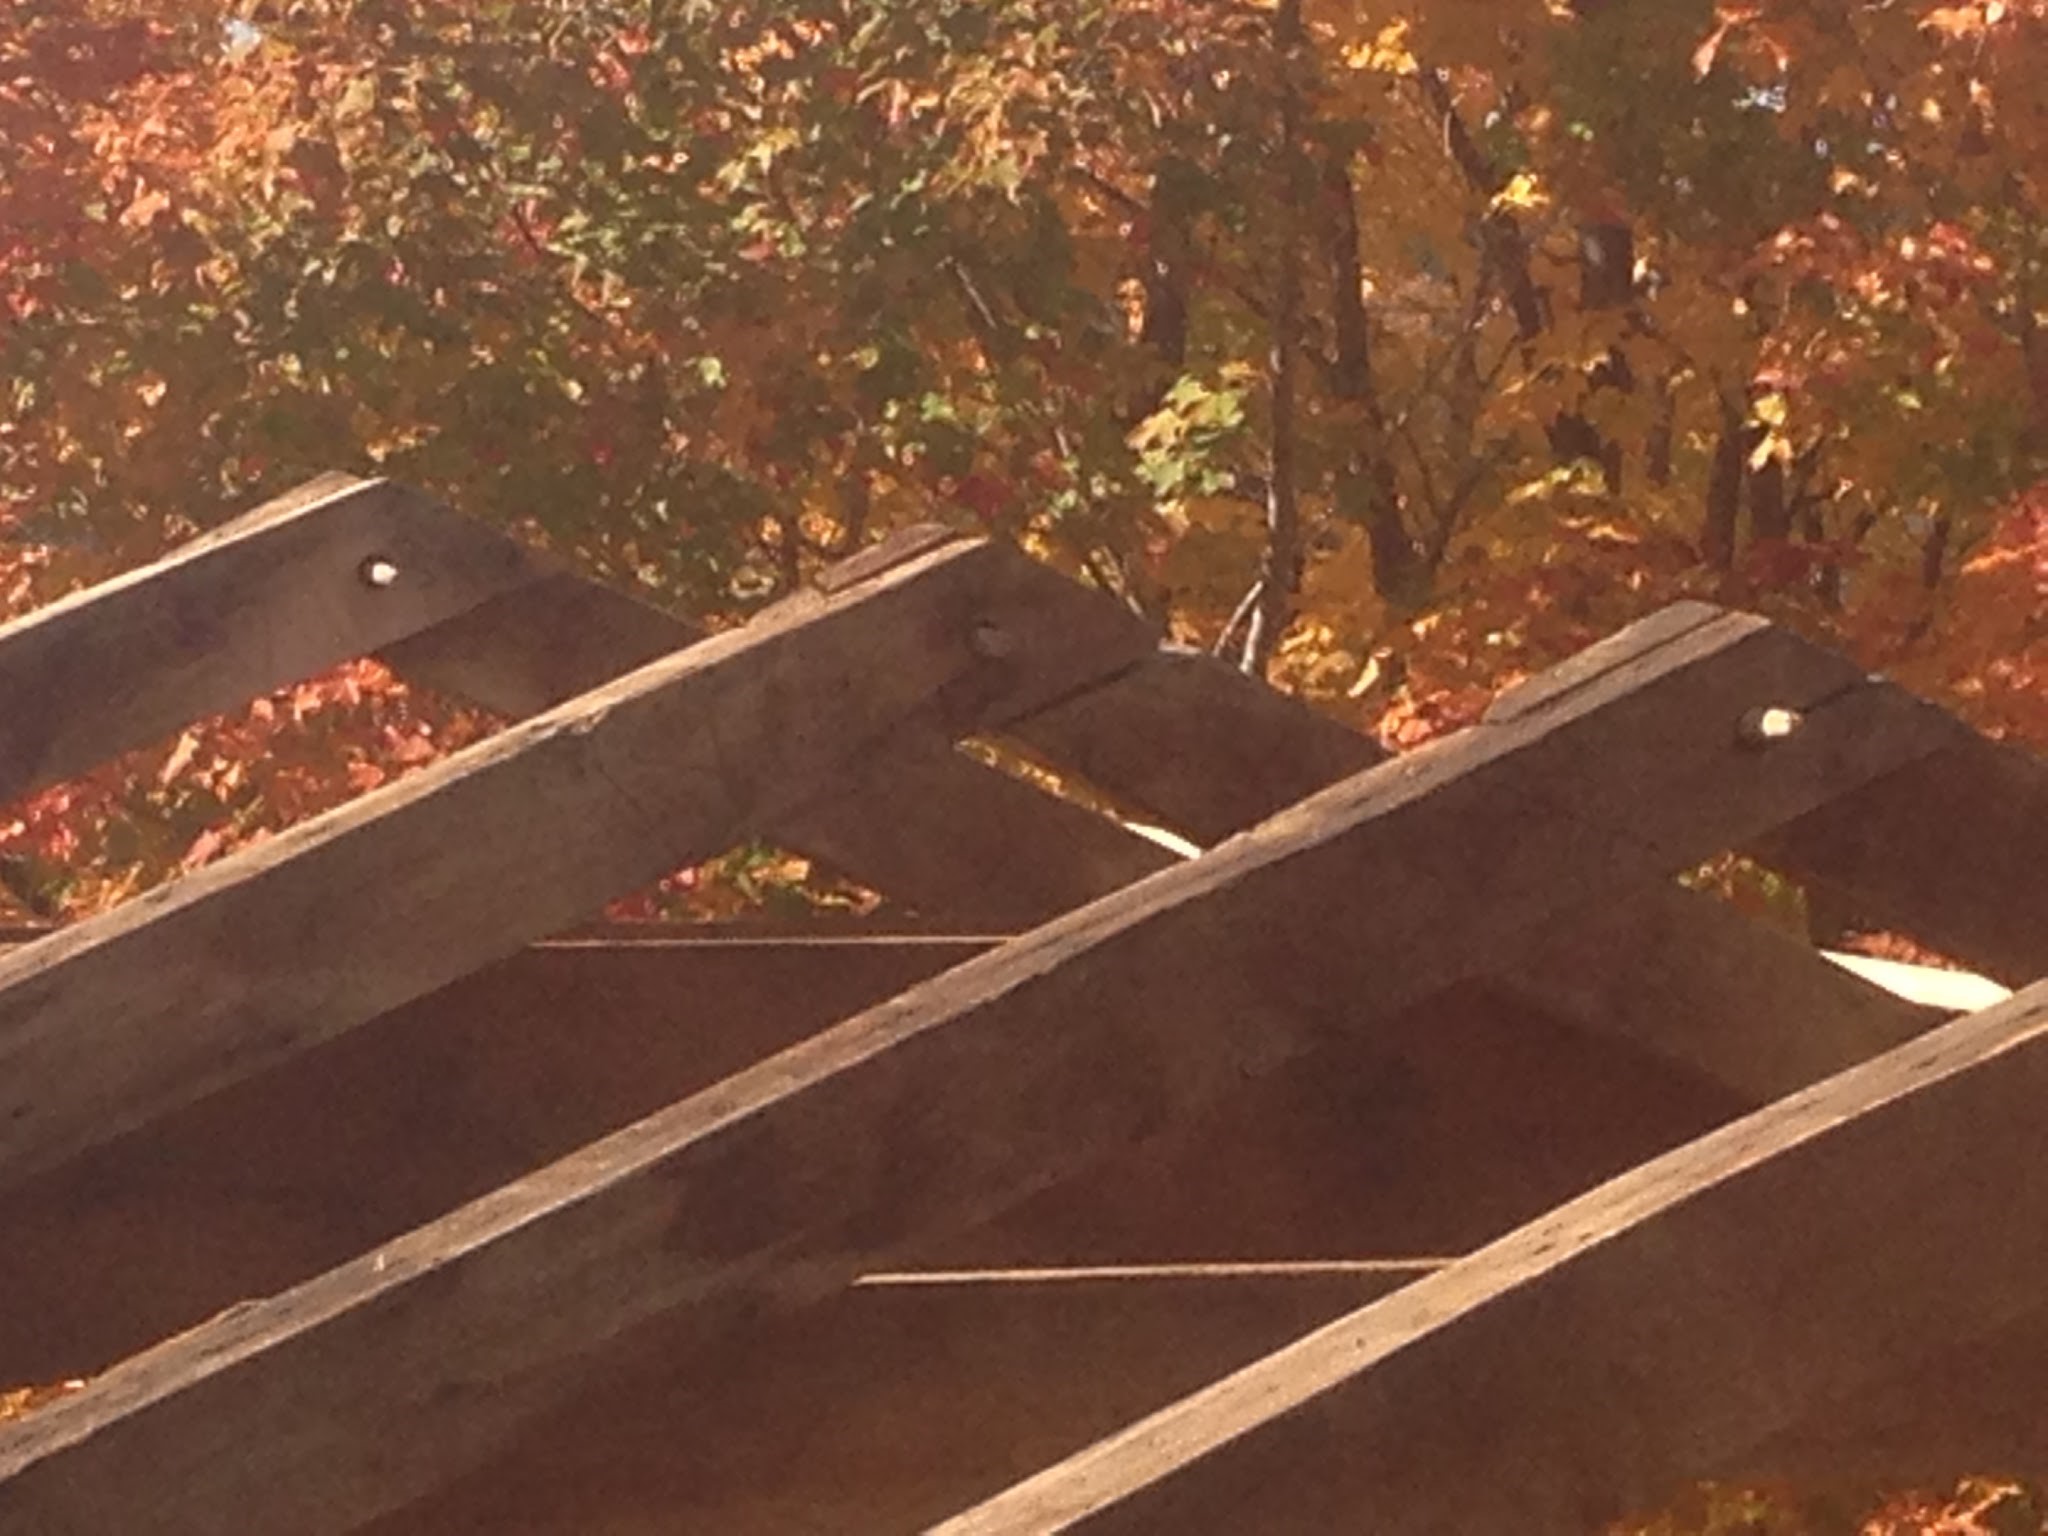
Why would it make sense to label even the roof boards?
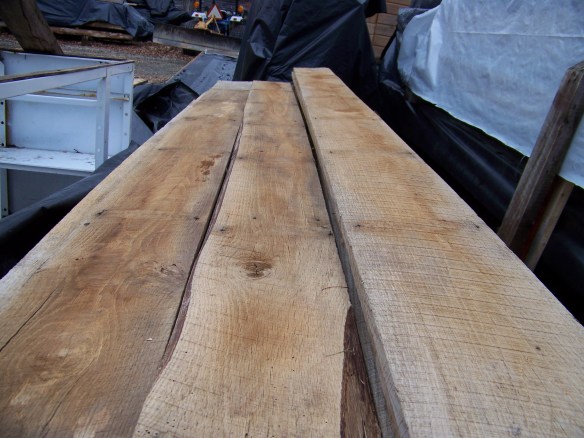
One reason is that the boards were often still in the tapered shape of a tree trunk. In other words, they are wider at one end – the base of the tree – and narrower at the other. By switching the direction of the taper – board to board – as you moved up the roof, the framers could get the most width possible out of each board without getting too uneven before reaching the peak of the building. 

Roman numerals were the most common method for inscribing labels on the beams and boards:

Roman Numeral Labeling in Timber Framing_Vermont_Green Mountain Timber Frames_4

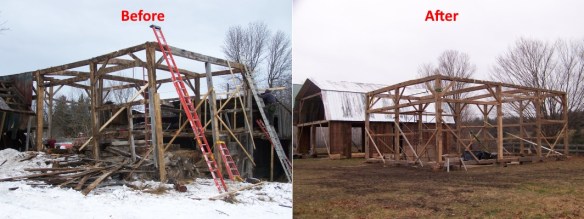
We recently completed the restoration of a 1790s gambrel home. (You can read about it in this blog.) This frame is a wonderful example of the way that craftsmen of the past insured that the timbers all ended up in the right place.

In the gambrel house we restored, there are four bents for a total of 12 posts on the first floor. There are 8 more on the second floor.Gambrel Barn Home_Green Mountain Timber Frames_3

But how do you designate which side of the building each piece will live on?
Each exterior post is a component of both an eve wall, and a member of a bent. Therefore, each of the joint sections must be labeled. When we cut a new frame or relabel an old frame, we use “B” for bent, and “P” for plate, or eve wall. On top of this distinction, we distinguish which of the two eave walls any given post or brace belongs to.

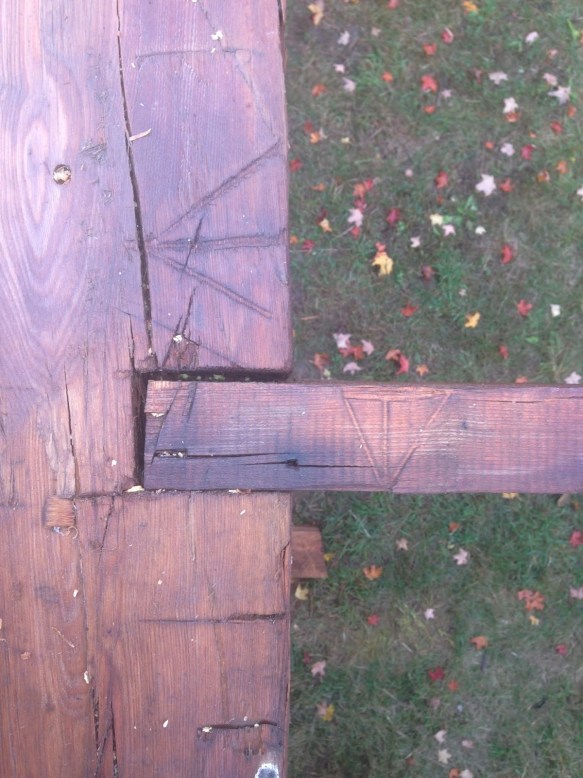
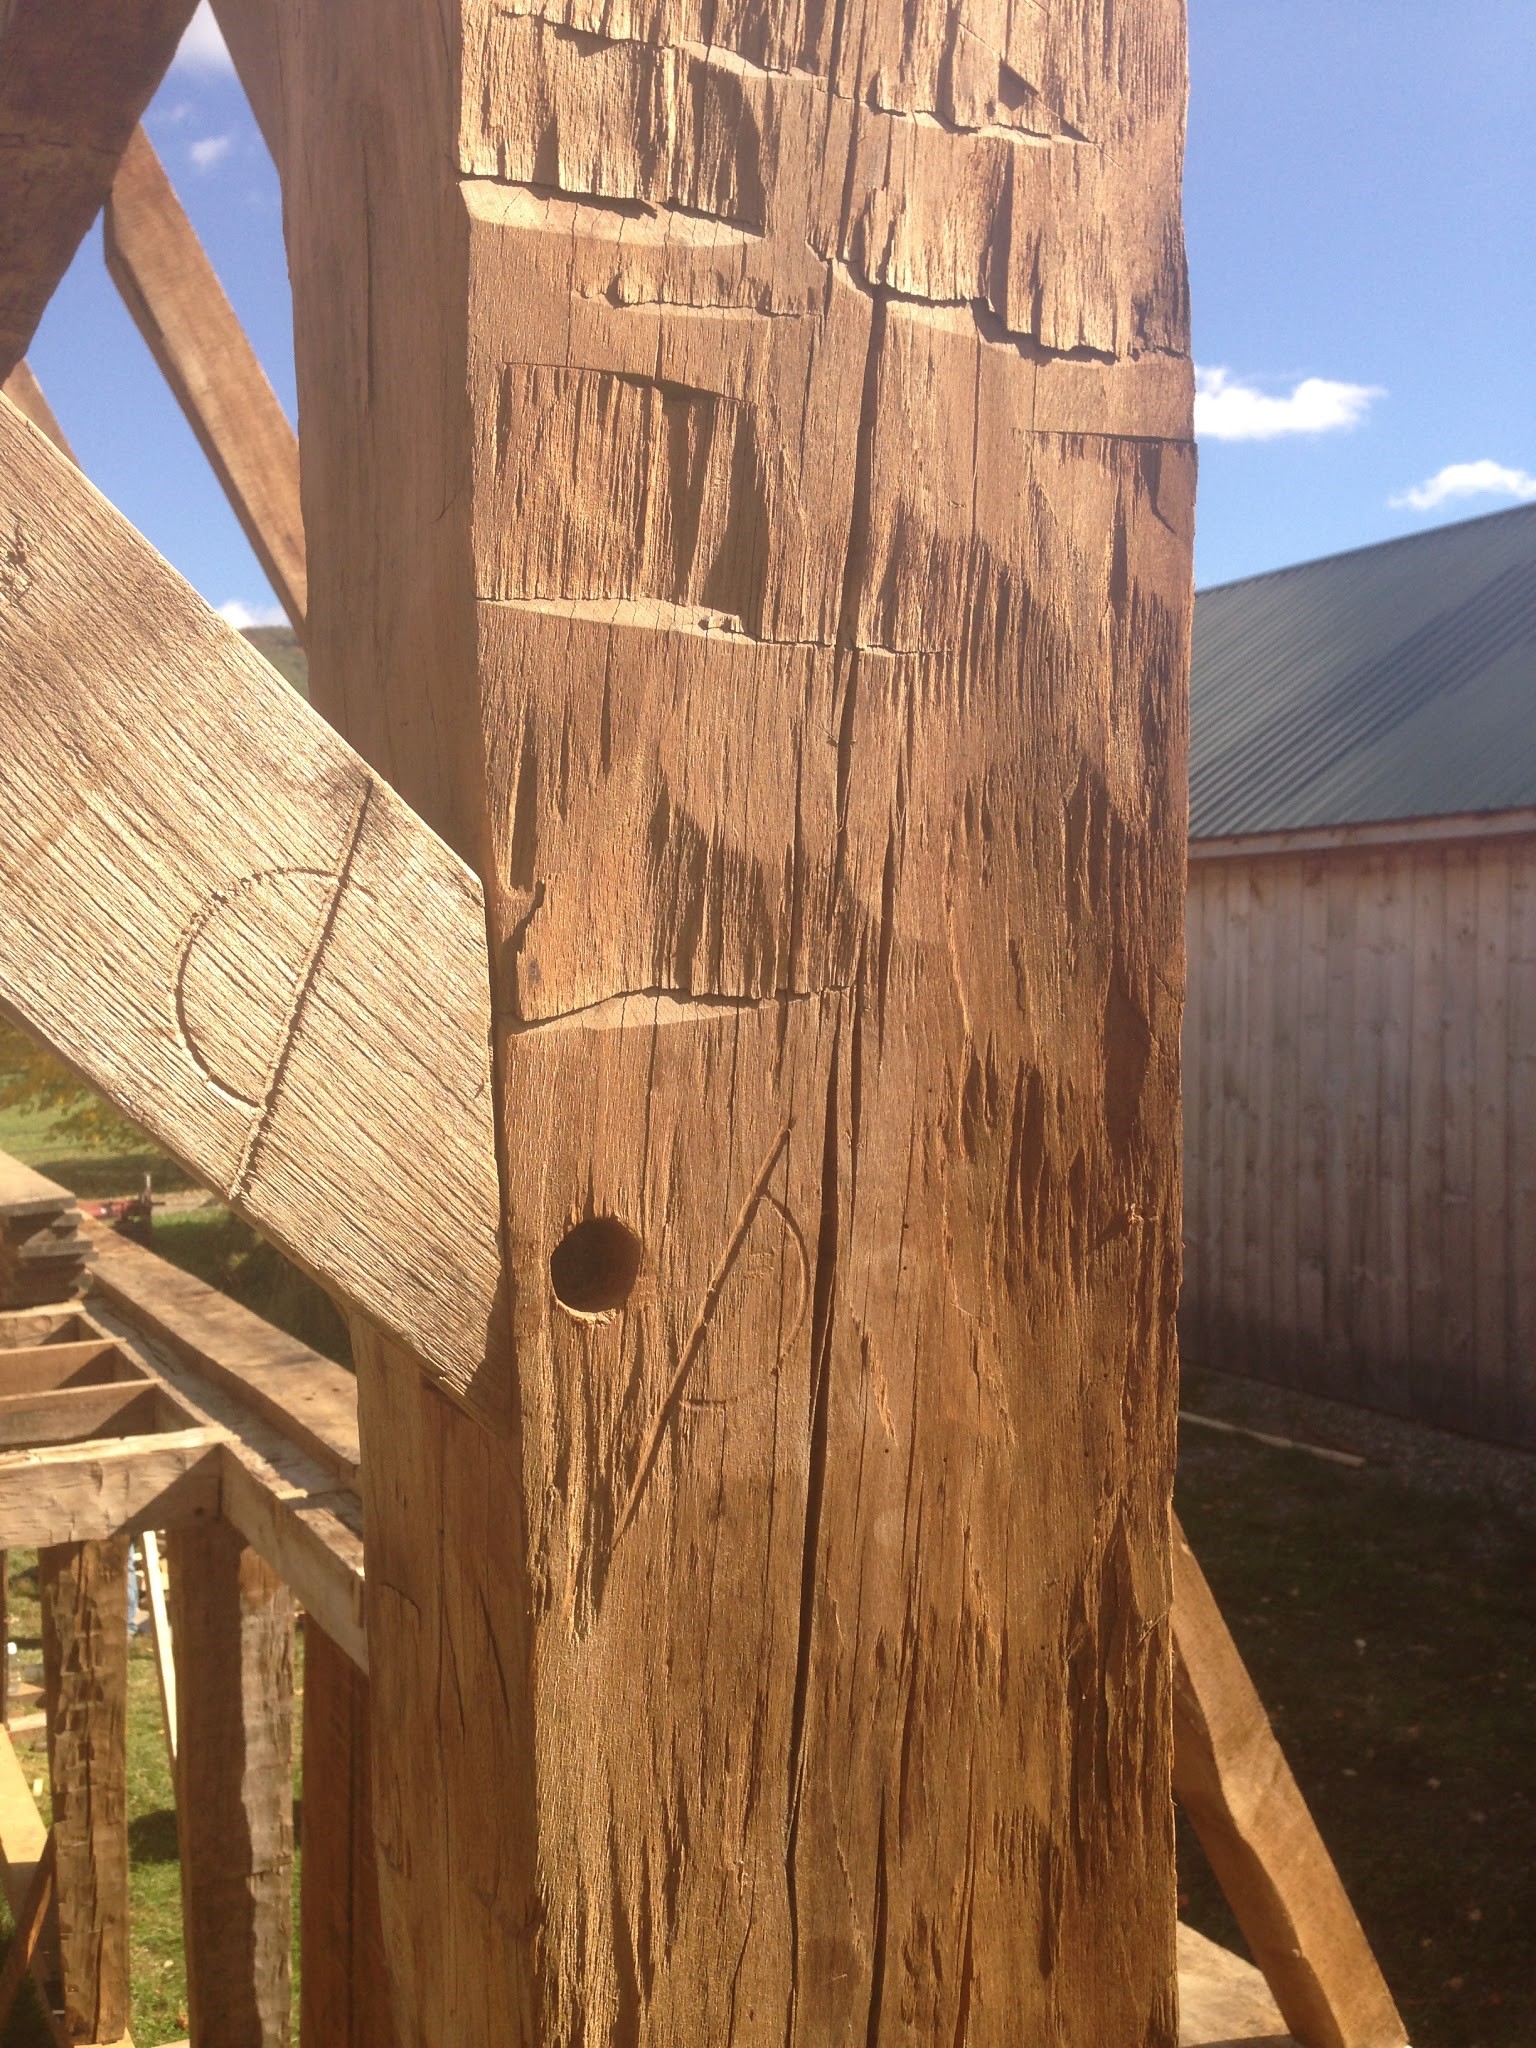
In the gambrel, the original builders added a diagonal line to the numbers in order to make this distinction. This line makes post #4 look like this:Labeling System_1840s timber frame_Green Mountain Timber Frames_5
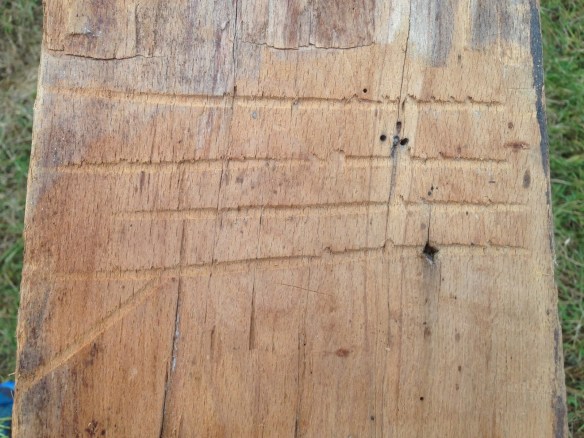
Note the four slashes, and the one slash with an additional diagonal cut. The opposite wall does not have the diagonal marking. 

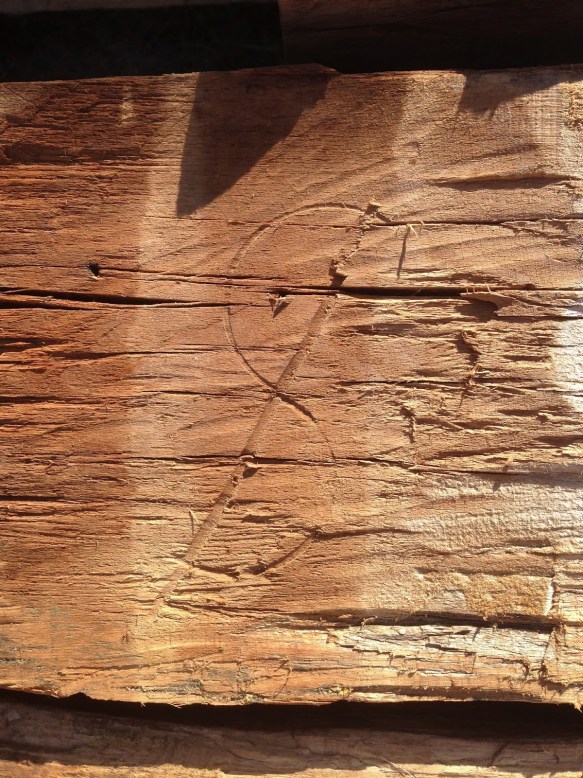
Below is a label on a floor joist that had us stumped for a while. Then we realized – the framers were distinguishing the roman numeral 9- IX, from the roman numeral 11- XI. What if on raising day someone was looking at the floor joist upside down?

Joist Number Nine Drops Down_Green Mountain Timber Frames_6

Joist #9 drops into the “summer beam”, the central heavy timber that supports the floor system.

Timber Frame Label System_Green Mountain Timber Frames_7

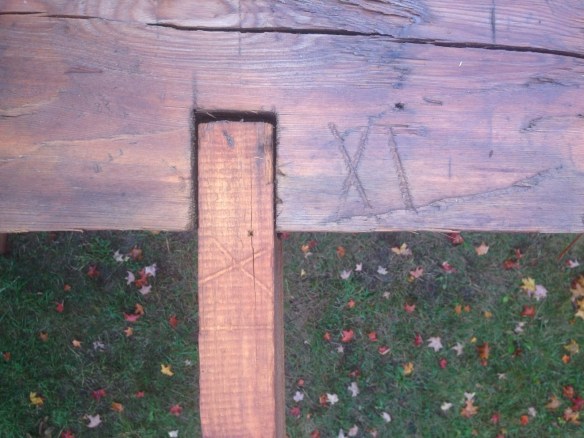
Here is #11, not to be confused with #9!

We have not seen this marking before, but surmise that it meant 11. If anyone has seen this designation for 11 before, please tell us about it!

How do you designate that a post is a center post rather than located on an exterior wall?
Here is how they labeled an exterior mid post on the gambrel:

Exterior mid post on Gambrel Barn Frame_Green Mountain Timber Frames

Someone took artistic care with this inscription!

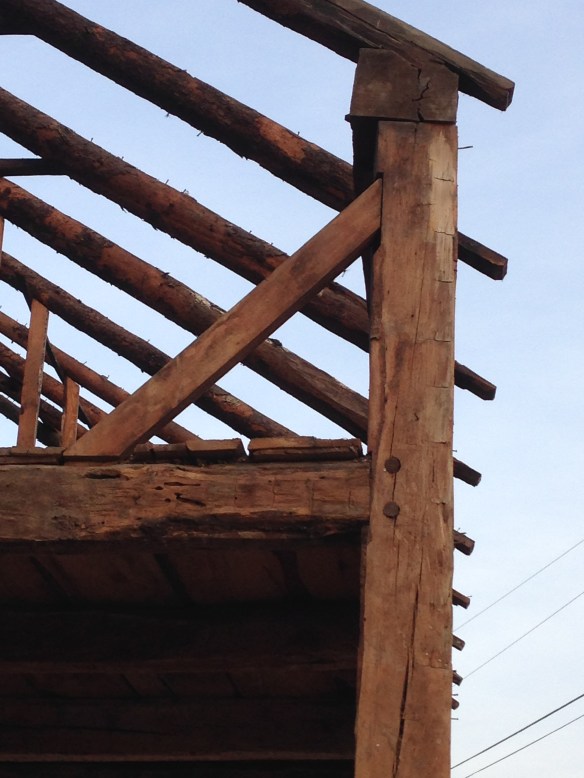
And here is the label on an upper post that supports the rafter system. Notice our modern (and much less attractive) label on the tenon where it will be hidden:Modern Label on Tenon_Green Mountain Timber Frames_9
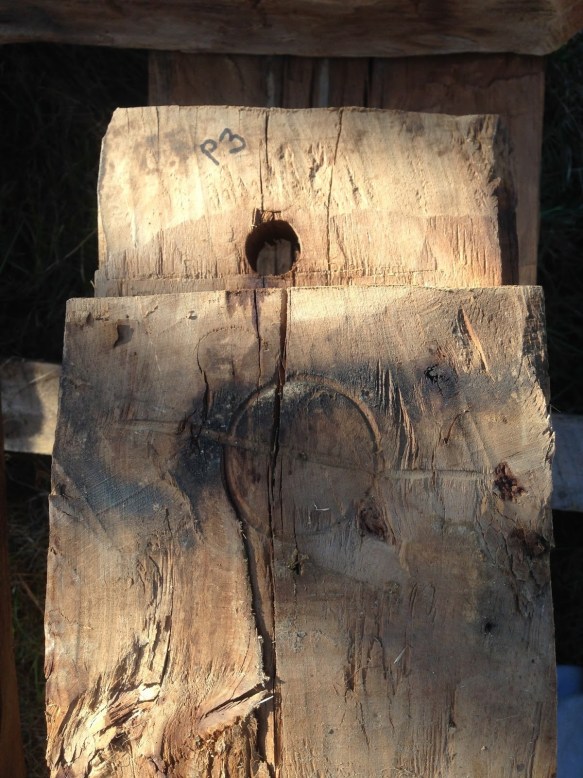
The gambrel has a unique system where the floor girts and joists went out beyond the eve to create an overhang. Heavy planks rested on the joist tails. Here is a photo of the labeling of those planks:Labeling System for heavy planks on joist tails_green mountain timber frames_10Another beautiful inscription was often placed on a central board in the ceiling. This photo is one of these daisy wheels:Daisy Wheels_Timber Frame Labeling System_11We re-label each joint as we take it down. Occasionally, in the excitement of disassembly, we miss a piece or even mis-label. When we are stumped, we often look for the original labels and figure out where it will be “at home.”

Pragmatic & Beautiful
These old labels are both useful and artistic. They were created using very sharp chisels, often of a “gouge” or cupped variety, as well as compasses. The labels add beauty to the finished space when visible. As with all aspects of vintage frames, much can be learned about the people who crafted the barns or homes by looking at their “handwriting.”

Some label inscriptions are flowery and large; others are more subtle and small, meant to disappear visually once the frame is up.

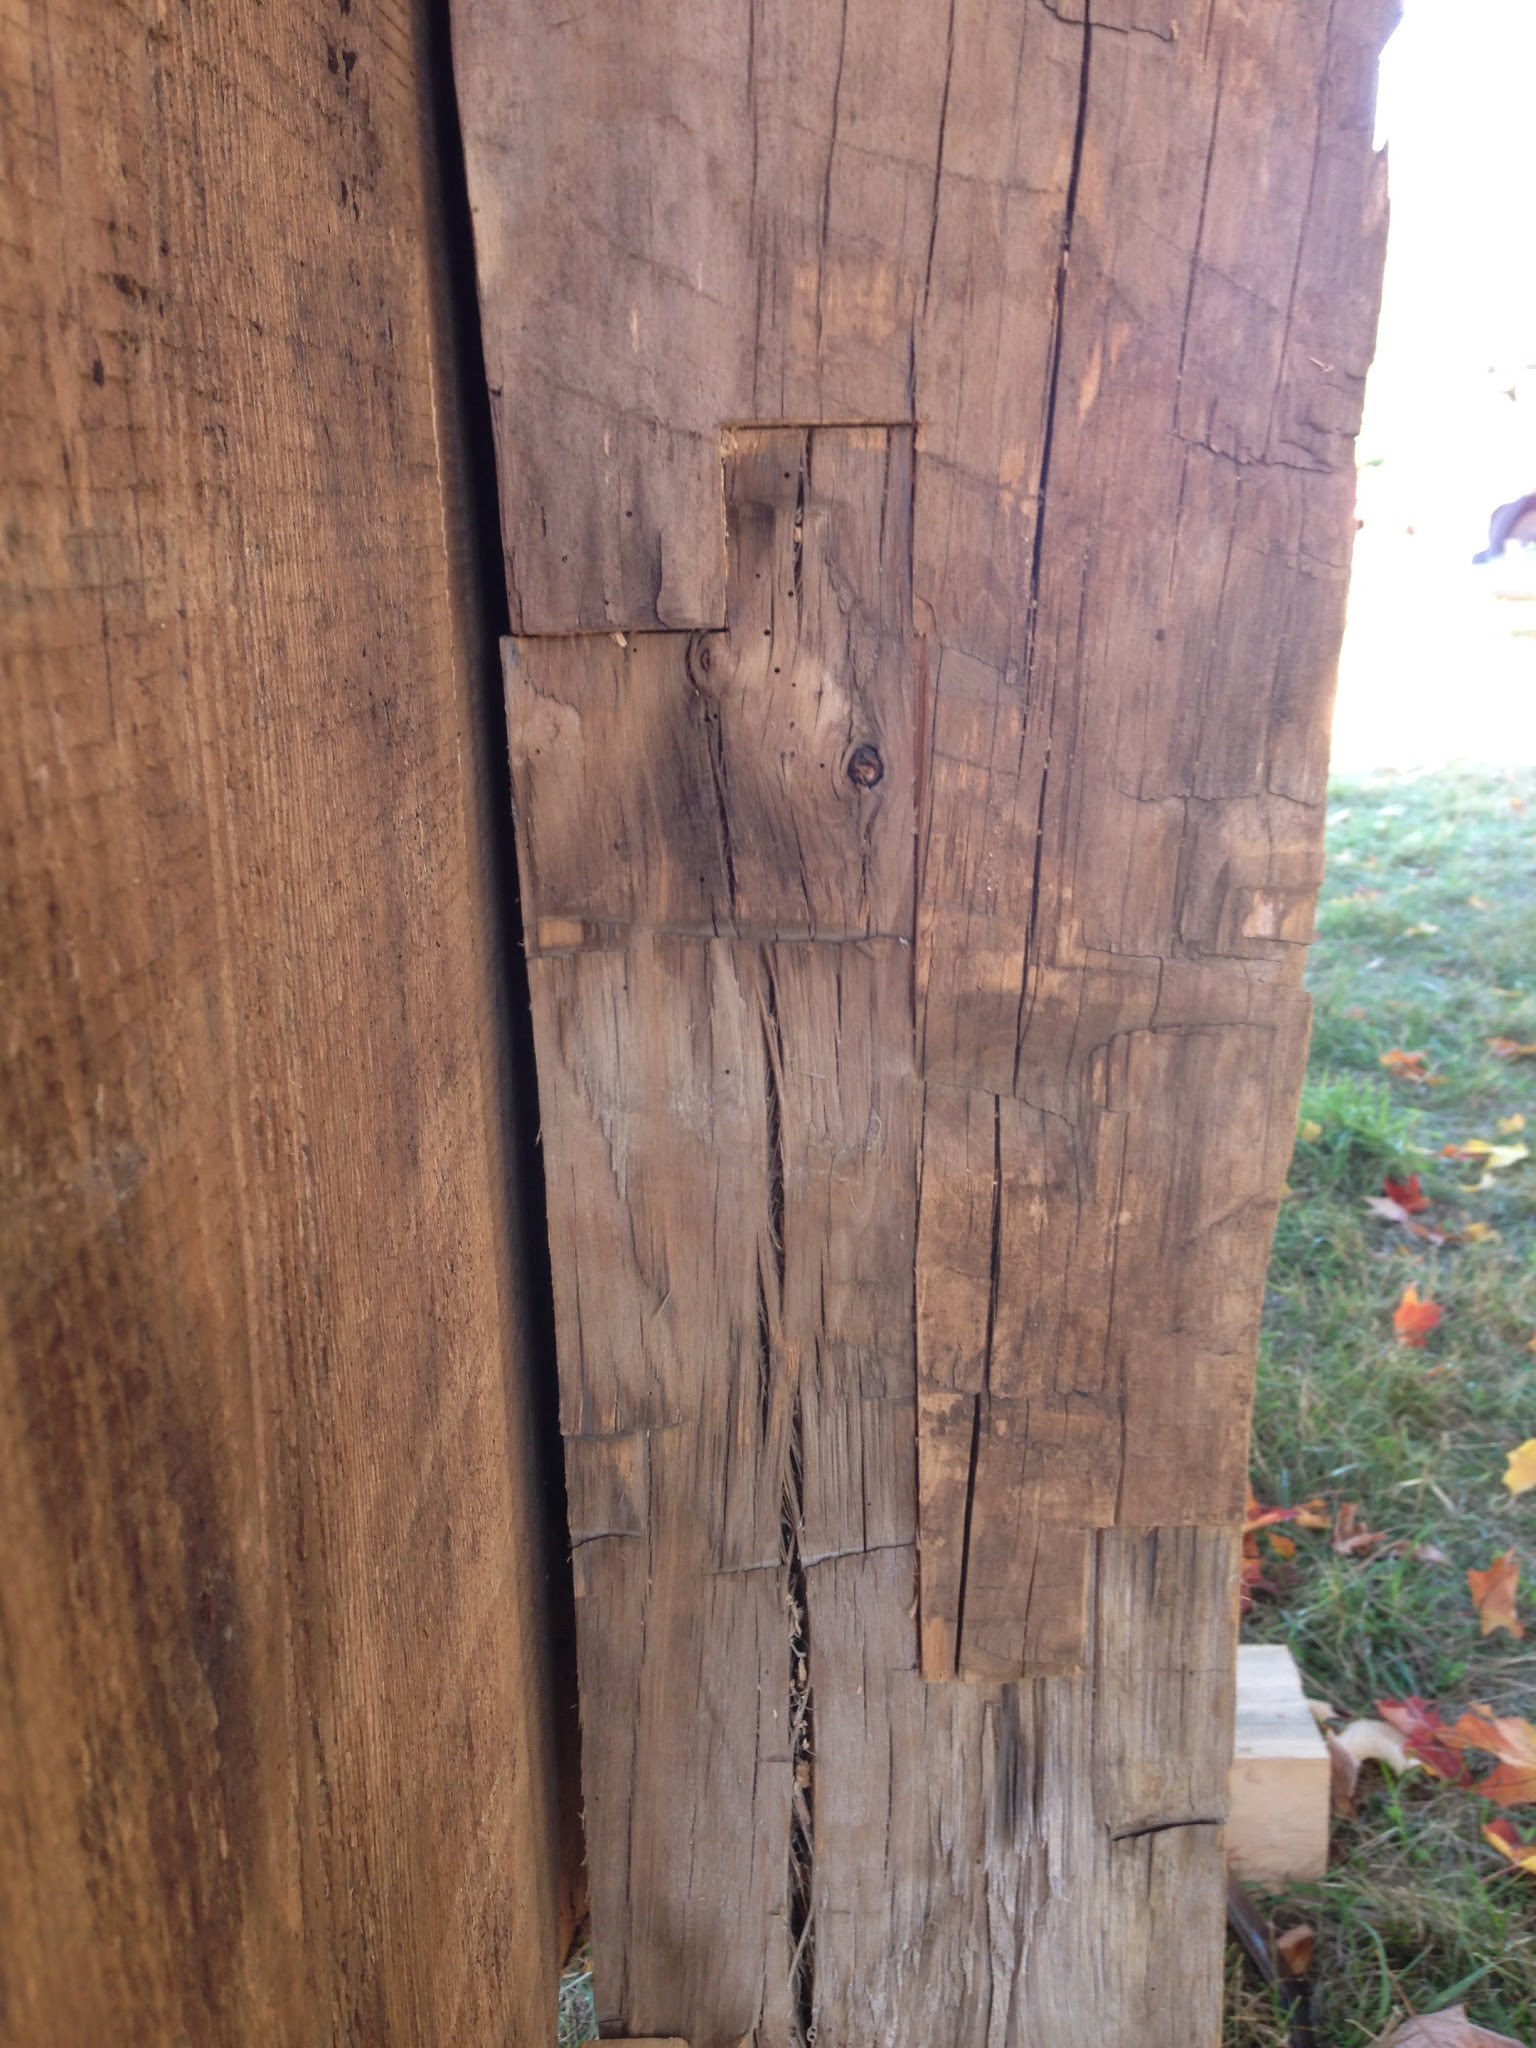
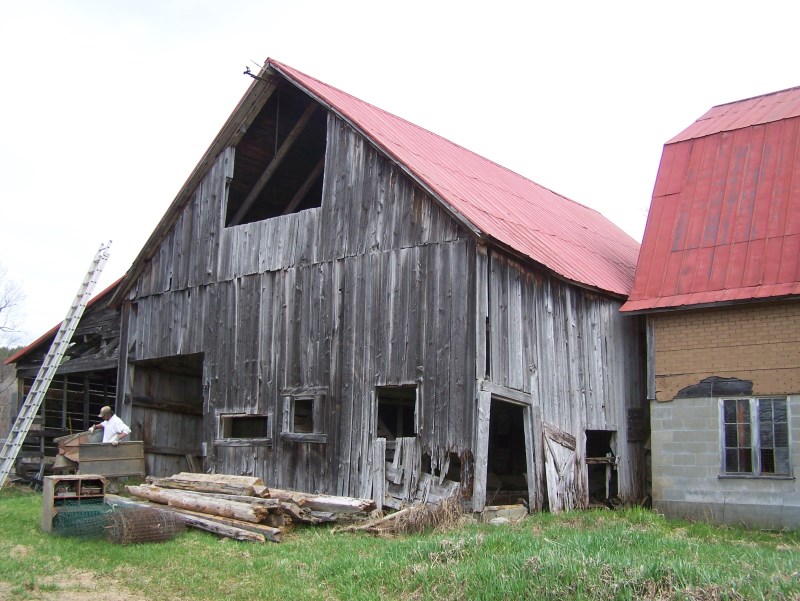
Below is a brace and post from the North Hero barn:

Labeling system for post and beam historic barns_green mountain timber frames

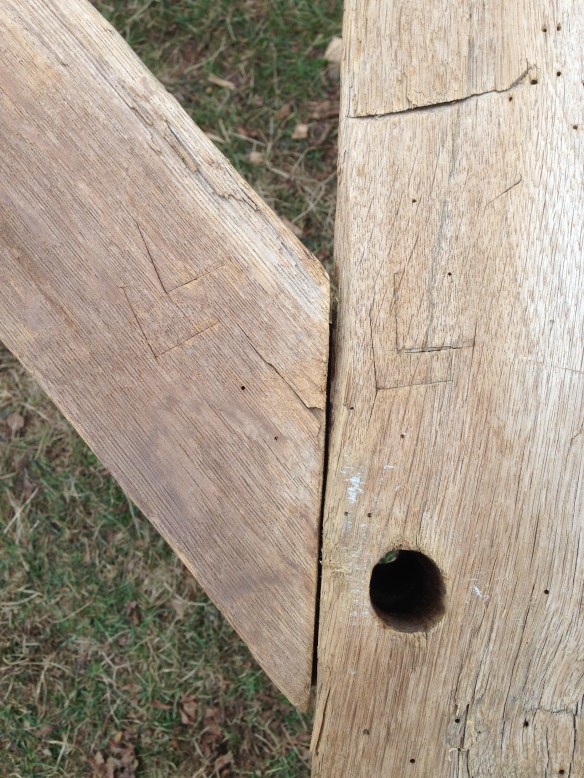
This builder used much smaller labels and a different marking

How did the framers come up with these markings, and are they universal? 

We do not know how the craftsmen from the past decided on the specifics of their labeling systems. The pragmatic aspect of the labels means that each frame contains its own logic. That is to say, it is a self-contained system that can differ frame to frame. We are just grateful when we see the labels match each other on each joint and we know we’ve put the pieces back together correctly! We like to imagine the framers carefully making the inscriptions generations ago, and we are grateful for the artistic care represented in these labels!

Here is one of my favorites – a label designating a second floor post and brace on the gambrel:Second floor post label_Green Mountain Timber Frames_11

Have you seen labels on pieces of your house? 

Please let us know what you might know about old labeling systems! In particular, we are curious if anyone has seen the representation of 11 that we’ve shown on the gambrel floor joist. We’d love to hear from you.


Green Mountain Timber Frames specializes in restoring historic timber frames and old barn homes. Interested in more information?
We’d love to hear from you!
(802) 774.8972
Luke@GreenMountainTimberFrames.com


All in a Day’s Work

Reading this in your email? For easier reading – Click here.

It’s amazing what you can accomplish in one day’s work! With a good team, beautiful cloudy Vermont skies and some hard work, we managed to install a new metal roof on this timber frame barn addition in ten hours with finish trim.

Timber frame_post and beams in Vermont_Green Mountain Timber Frames_8am

This particular timbered bridge addition was built by another crew, but since they weren’t available to complete the roof, we were asked to do the job. As a lover of all things timber, we couldn’t bear to see this new frame open to the Vermont elements any longer.

Our crew of seven left home at 6 am for the two hour drive to eastern VT. Starting with the raw frame at 8 am, we installed 2×4 nailers.

Working on roof of historic timber frame_green mountain timber frames_vermont

Then, we did the necessary finish on the roof trim and added flashing to the existing barn. Next, we screwed metal roofing to the 2×4 nailers.

applying roof boards_green mountain timber frames_custom barn homes

This particular barn has a beautiful gable window that adds an elegance to the building. The original builders did fine work. We believe the barn was built in the 1870s.
Gable Barn Window on Restored Timber Frame_Green Mountain Timber Frames

Closeup of Gable Barn window_Barn Restoration_green mountain timber frames

With the new roof safely and securely in place, the owner is relieved the structure is finally covered. We, too, are pleased that this rugged new timber frame isn’t taking on water anymore. Best of all, it’s a 40-year roof, so none of us will have to come back. I don’t think I’ll be doing roofs into my 11th decade!

If you drive by Maple Avenue Farm in the back hills of Vermont, you can see the new roof for yourself. There are not many four-story bank barns left in Vermont. Especially with a timber frame bridge to access the upper levels of this 1870s former dairy barn.

new roof on restored timber frame_post and beam architecture_green mountain timber framesMeanwhile, we’re always happy to take on another project! Looking for a timber framer in Vermont? Give us a call at 802.774.8972!

1790s Gambrel House Restored and Available for Sale!

Reading this in your email? For easier reading – Click here.

Two years ago, we began taking down a gambrel house from the 1790s. (We blogged about it here and here.) I am delighted to report that we have now completed the restoration of this rugged old timber frame! After the passage of that much time, it is all the more satisfying to be putting the timber joints, so masterfully crafted over two hundred years ago, back together as they are meant to be!

Here is what the house looked like when we first heard about it:

1790 Gambrel House_Historic_Green Mountain Timber FramesWhy did we take on this project?

The house was on the docket to be burned down by the local fire department. We are so grateful to the fire fighter who realized how old the house was and contacted Green Mountain Timber Frames! We just couldn’t stand to let it be destroyed.

A couple hundred hours into the process of gutting the house, which included filling two giant dumpsters with insulation, vinyl siding, sheet rock, plaster, and much other “sundry”, our hearts were sinking. But then we finally started to see the original frame. Here is the view after approximately 650 cold winter hours of gutting:

Original 1790 timber frameAfter a couple hundred hours more, we had the frame down and stored carefully under tarps. Now the frame is once again standing, this time in restored condition.

Restored historic timber_Vermont_Green Mountain Timber Frame_Larson FarmWhat does it mean that we have restored the frame?

The first step was to power wash each individual beam, brace, and board, as well as pull thousands of nails out of the timbers. Next, we went over each beam looking for fatigued areas that needed attention. Below is a “English scarf joint,” an incredibly strong joint that we used to replace the bottom of a post.

British Scarf Joint_Green Mountain Timber Frame_Larson FarmRestoration – with painstaking attention to details

The photo below shows a careful repair we did to one of the five beams that measure thirty-eight feet long. The beam had a very “tired” spot over this post due to a leak in the roof that must have persisted for years. We carefully removed soft areas, and replaced them with hand hewn material. Good for another 200 years! We were able to use materials from the original carrying sills of the house to make the repairs on the posts and beams.

Repaired Wooden Beam_Restored Timber Frame_Green Mountain Timber Frame_Larson FarmAs part of the restoration, we laid out each cross-section of the building, called “bents” and “plate walls,” and checked all the joints for tightness and the geometry for squareness. We built new rafters out of oak to replace some that had been too far gone for re-use.

In the following photo, we are laying out all the original wall boards on the ground to check our labeling system as we put the boards back in their original location.

Original Historic Wall Boards_Green Mountain Timber Frame_Larson FarmThe plaster lines from the eighteenth century construction even lined up on the interior! Many of the sheathing boards are over twenty inches wide!

20 inch wide Sheating BoardsWhy have we put this frame up on temporary sills?

Often, we are able to locate a vintage barn and keep it standing until a new owner has a chance to look at it and decide if it will meet the needs and dreams for a new house or addition. In some cases, we have to take the frame down immediately, as in the case of this gambrel in order to avoid its date with the fire department!

With gratitude to Larson Farm, where timber framer Luke Larson grew up, we are able to put the frame up both to check our work and to have it up so that anyone considering using it can walk through it and visualize what it can become.

Here are some highlights of this particular frame:

  • Pre-1800s and framed with American Chestnut, Beech, Oak, and Elm.
  • Gunstock frame on both floors! This means the posts grow in width towards the tops.
  • The gambrel profile creates a 22’x38′ wide open living space on the second floor. First floor is 28’x38′.
  • Original arched collar ties.
  • Original wide pine flooring boards are available.

The October brilliance of color in Vermont has made it a pleasure to work on this frame over the past weeks! This frame is currently available for purchase, and is now ready to stand strong and true again in a new location.

Historic Barn Frame for Sale_ Green Mountain Timber Frame_Larson Farm

11_Inside view of Gambrel Roof_Green Mountain Timber Frame_Larson FarmWe wish to thank the Larson Farm for their generous loan of space to put the frame up. Please visit the frame on its current location. You can learn more about the farm and its fantastic vision on the Larson Farm website or on Facebook.

This frame could be your home… 

If you are interested in turning this beautiful gambrel frame into your own historic property, learn more on our website or contact us at 802.774.8972 or Luke@GreenMountainTimberFrames.com.

Coming up next…

Stay tuned for a future blog on the amazing and artistic labeling system on this gambrel frame!

Labeling System_Restored historic gambrel home_Vermont_Green Mountain Timber Frame_Luke Larson Farm

Labeling System

GMTF Takes Timber Framing to the Water: The Boat House Project

.Reading this in your email? For easier reading – Click here.

In our latest timber frame project, Green Mountain Timber Frames took to the water! We put in no less than 1000 hours of work to build this gem of a boat house:Timber Frame Custom Boat House Green Mountain Timber Frames

We built the new timber frame structure on beautiful Lake Bomoseen – literally on and over the lake. 

Lake Bomoseen_Green Mountain Timber Frames

Lake Bomoseen

The goal was to build a post and beam structure over a boat mooring, allowing a boat to come inside, be lifted out of the water and stored for the winter. 

Inside the Boat House_Green Mountain Timber Frames_Luke Larson

The view from inside the Boat House

Hemlock and Oak Wood, from the Property

One particularly exciting aspect of this project is that the hemlock and oak were cut from the property using a portable saw mill. Only on a few rare occasions has Green Mountain Timber Frames been able to cut a new timber frame using materials from the land where the structure will be built­. Luckily for us, this was one of them!

Designed in Collaboration with the Owners

When it came to designing the boat house frame, our very own Luke Larson worked closely with the property owners. It was a great pleasure to work together to create a design that fit the goals and desires of the owners and also worked structurally.

One of those goals was to have an attractive shed roof across the gables. We decided to accomplish this with a secondary top plate, which we started calling an “outrigger,” that turns the corner and wraps across the gable ends.

Outrigger detail of boat house_luke larson_Green Mountain Timber Frames_Vermont

aerial view of timber frame boat house_Green Mountain Timber Frames_Luke Larson

View of “outriggers” from afar

The various dimensions of this frame were each built on saw horses in our yard, so that we could check all the math, angles and joinery as we went.

aerial view of timber frame boat house_Green Mountain Timber Frames_Luke Larson

Using saw horses to work on wall of the Boat House

We used king post trusses to frame the bents and curved oak braces throughout the frame.

Timber frames_Green Mountain Timber Frames_Luke LarsonMost of the purlins in the frame were hemlock from the property, but we needed two pick points in the ceiling that would be strong enough to lift a 4,000 pound boat. Heavy oak purlins were installed at two places which are rated for well over 2,000 pound point loads each.

Purlins in custom boat house timber frames of custom boat house_Green Mountain Timber Frames_Luke Larson

The location of the timber frame presented challenges in getting it erected. Since the lay of the land was such that a crane or lull was not feasible, we put it up the old fashioned way – by hand.

Dan went out in his kayak to take this picture of the flag being raised. 

Flag Raising on boat house_Green Mountain Timber Frames_Luke Larson

Here is a what the rafter trusses look like with the roof boards and wall sheathing applied. These were also harvested on the property. Soon there will be a walkway around the inside edges of the boathouse.

Interior view of custom boat house_Boat house completed with siding_Green Mountain Timber Frames_Luke Larson


Corner details of boat house completed with siding_Green Mountain Timber Frames_Luke Larson

We were especially happy with how the hip corners and eve purlins turned out visually.

Custom Boat House_Boat house completed with siding_Green Mountain Timber Frames_Luke Larson

Next, the structure will receive beautiful salvaged windows, carefully restored, and a layer of cedar shingles on the walls. There will also be triangular windows in the peak. Take a look!

Boat house completed with siding_Green Mountain Timber Frames_Luke LarsonInterested in your very own timber frame boat house? Have another timber frame project in mind? Green Mountain Timber Frames specializes in historic timber frames and restoration projects, but we also erect new timber frames.

Contact us with any questions! Email Luke@GreenMountainTimberFrames.com or call 802.774.8972.

From Fatigued Old Barn to Beautiful Great Room

Reading this in your email? For a better view of the blog, click here

Meet the “Fatigued Old Barn”

It was a frigid Vermont winter day when we first visited this old barn back in February of 2015.  It was too cold, even for us seasoned Vermonters. With more than two feet of snow on the ground, I wished I had brought my snow shoes.

Here’s a glimpse of how the barn looked – on the left – when we first met.

Original Restored Barn_Green Mountain Timber Frames_Before (800x601)The owner had called us to ask if we could dismantle this aging barn and restore it as a new Great Room, attached to their home. The barn, built originally in the 1850s, was indeed a perfect match for the house, a two story country home also built in the 1850s. 

Original Barn and 1840s Home_Green Mountain Timber Frames_Before (800x601)

Original barn beside 1940s barn with wooden silo.  House is in the back ground, on the right.

Dating the Barn

Judging from the 43 foot hand hewn beams, I concluded that the barn must have been built in the middle of the 19th century. Tall trees were still being hewn by hand into long square timbers. Shorter timbers, such as posts, were sawn at a local mill. During that time, sawmills could accurately saw up to 20 feet of timber, so the hand hewing guys were called in for the longer timbers. I often wonder if those guys – the “old school” timber framers – must have felt like horses when automobiles started to become more prevalent.

The Transformation Begins

Step 1: Dismantling

Once the snow melted, we traveled to Cavendish, Vermont to begin the careful process of dismantling the barn. The barn looked far more inviting during spring.

historic wooden barn with red roofIn three weeks, a team of six men dismantled the 30 x 43 foot barn and shipped it to the Green Mountain Timber Frames shop in Middletown Springs.

Cavendish Historic Barn before restoration _Green Mountain Timber Frames

Barn being dismantled, starting from the top.

Step 2: Restoration at the Shop

Once at the shop, we carefully washed all the timbers. We then laid them out in their new configuration of 21 x 35 feet and did a lot of joinery work. Next we assembled the roof structure, de-nailed the roof boards, gave them a solid washing, made them straight again, and finally re-applied them to the roof rafters. We made sure everything was well labeled, and then shipped the restored frame back to the Cavendish house site.

You can see much of the process in the pictures below:

Antique barn Restoration_Green Mountain Timber Frames_Vermont_3 (800x601)

Laying out the restored hand hewn beams into the new design.

Antique barn Restoration_Green Mountain Timber Frames_Vermont_4 (800x601)

Roof rafters re-adjusted and fitted, waiting for original roof boards

Antique barn Restoration_Green Mountain Timber Frames_Vermont

Rafters with restored roof boards applied and then labeled

The Great Room is Born – in Two Days

Because we had done the restoration work at our shop, re-erecting the frame for the new Great Room was a pretty straightforward task that took only two days.

In weather that was a far cry from the snowdrifts of February, we reassembled the frame under hot August sun with a team of four men and a mighty Lull (lift machine).

Erecting restored timber frame_Green Mountain Timber Frames_Vermont_Day1

Re-erecting the restored frame (the Lull is in orange)

Day One: Getting the Frame Up

During the first day, we spent about ten hours at the site. By day’s end we had most of the structure up, thanks to the help of the Lull and an experienced crew.

Erecting restored timber frame_Green Mountain Timber Frames_Vermont_Day1_2 (800x601)

Frame is up by the end of day one with a few roof rafters

Day Two: Raising the Rafters

Day two was even more fun as we placed all the roof rafters – always an exciting part of a barn restoration project – and experienced the structure taking its final shape. After hundreds of hours of our labor, the refurbished frame went together like a Lincoln Log set.  It’s gratifying each time to watch new life breathed into a formerly very distressed timbered, old barn.

Erecting restored timber frame_Green Mountain Timber Frames_Vermont_Day2

Finished frame. The roof is protected by tar paper, ready for the next stage.

Erecting restored timber frame_Green Mountain Timber Frames_Vermont_Day2_4 (800x601)

View from beneath the roof of the restored frame, with our friend the Lull behind.

The plans to complete this barn frame include a fireplace, large glass doors, a screened porch and a mudroom entryway. Truly it will become a GREAT room.

Coming Up Next:

This was a challenging and rewarding restoration project. Our next blog will feature a stunning new timber frame boat house, designed and built by Luke Larson and his crew. Stay tuned!